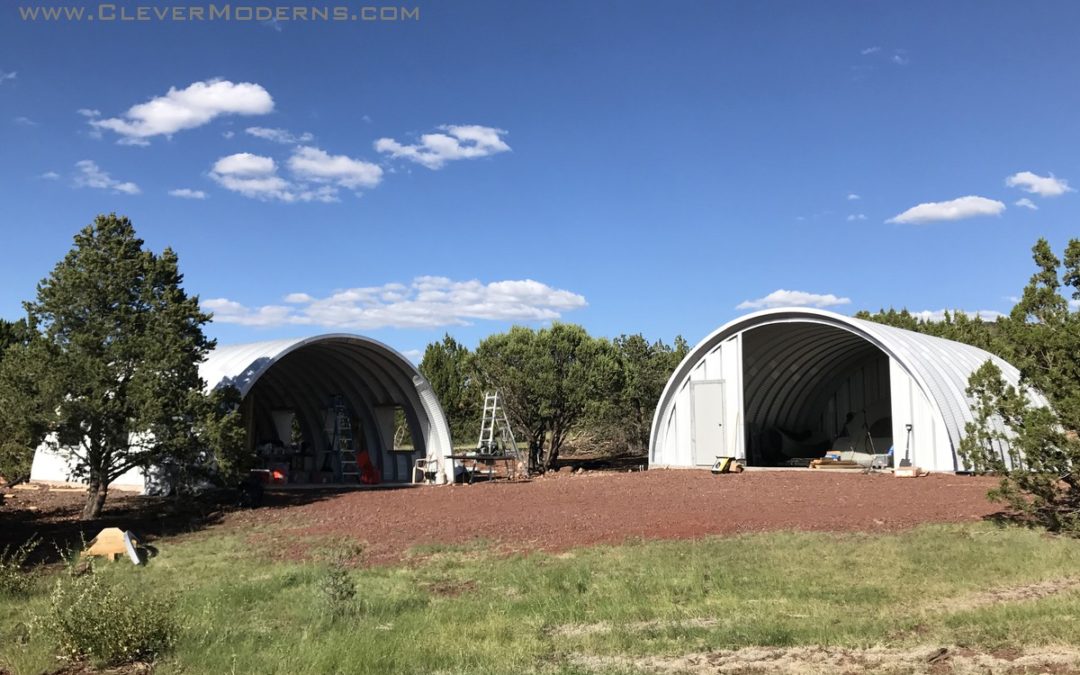
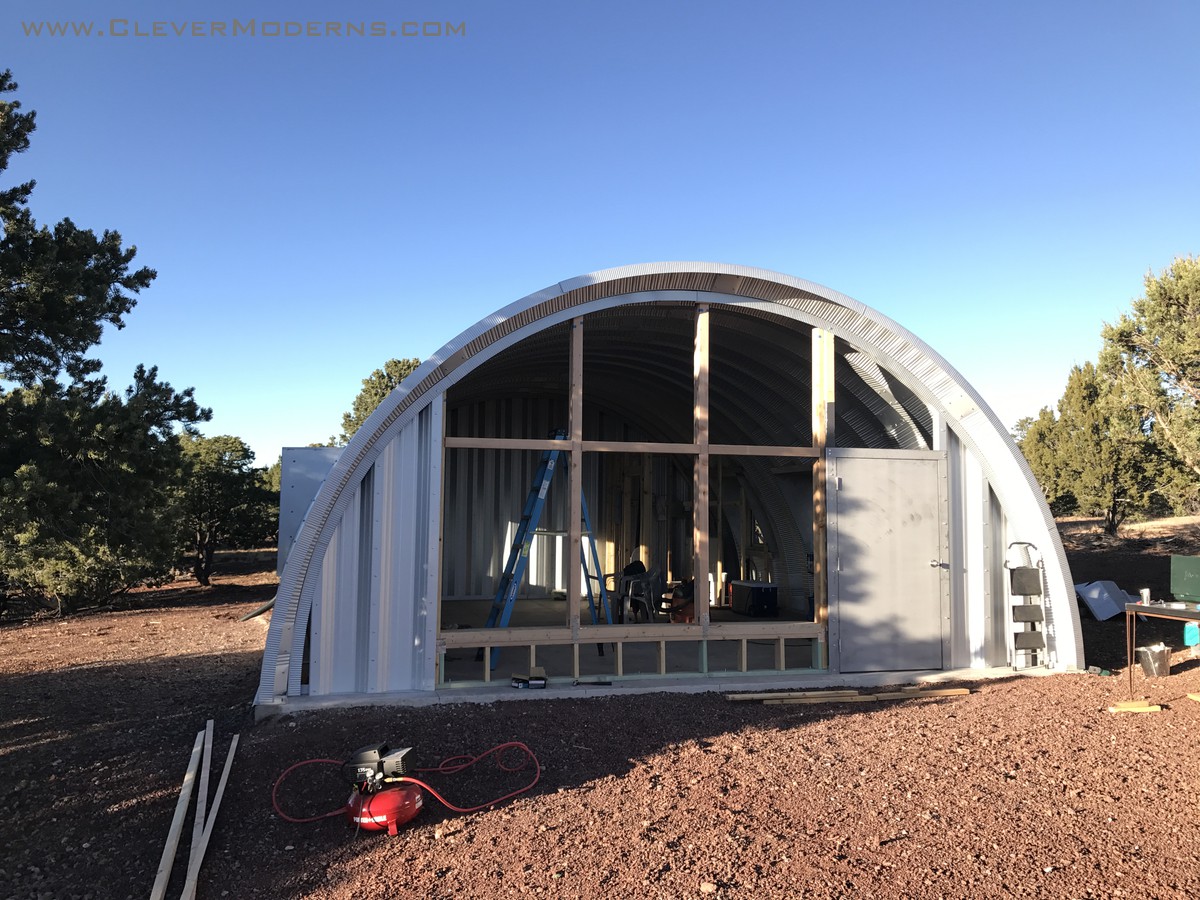
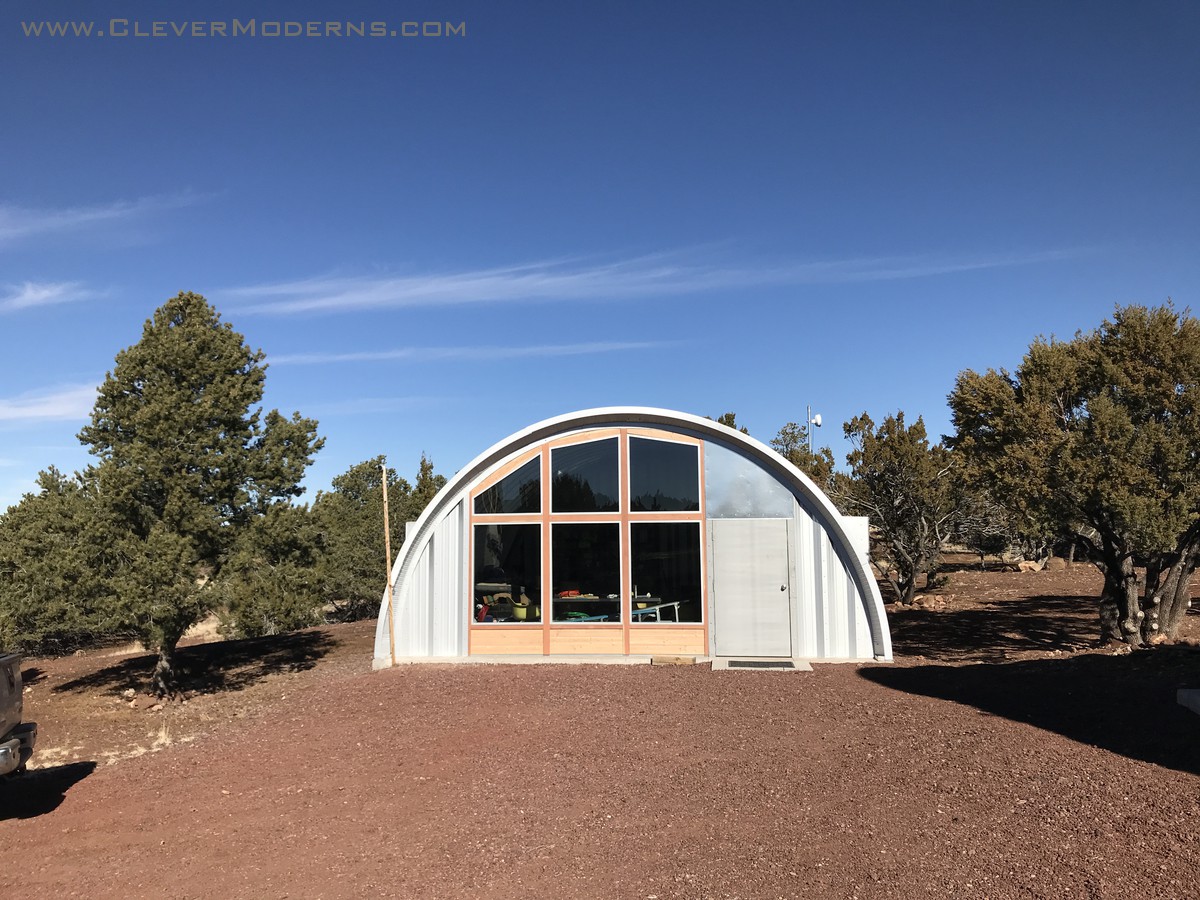
Now that our front end wall is essentially complete on the Headquarters Hut (aka the Side Window Studio Hut in my Free Plans library) I thought I would compile a look back at our overall process for putting it together.
Evolution of our Quonset HQ Design
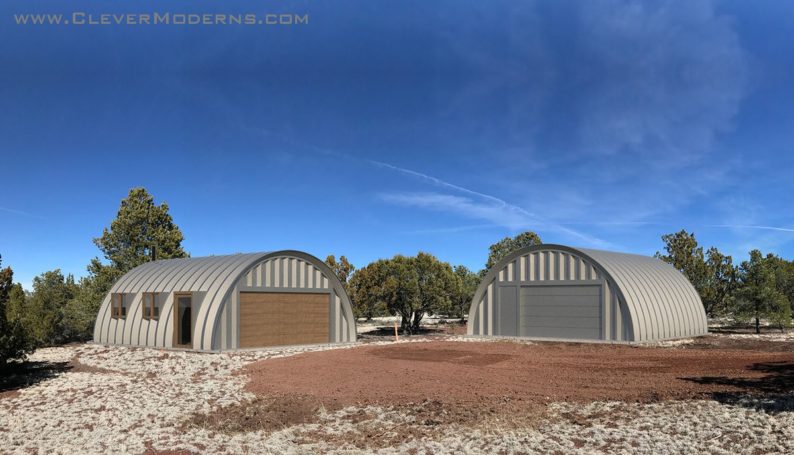
The original concept for both our HQ and Workshop huts can be seen below. We were going to do simple garage doors on both buildings. Ha!
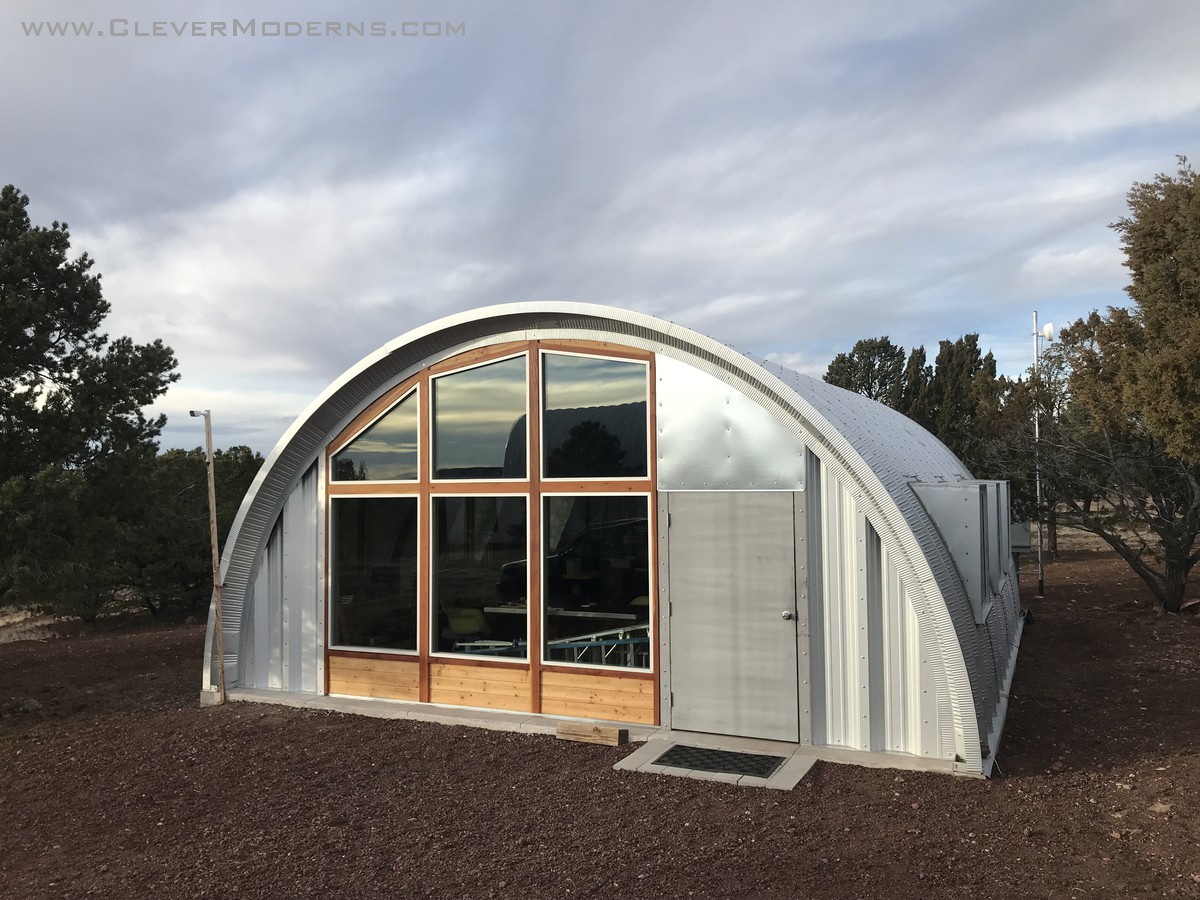
Also, the HQ hut was originally going to have its door on the side of the building. We changed that up and made it three windows on each side when we redesigned the end wall.
Building the Quonset End Wall:
Step by Step
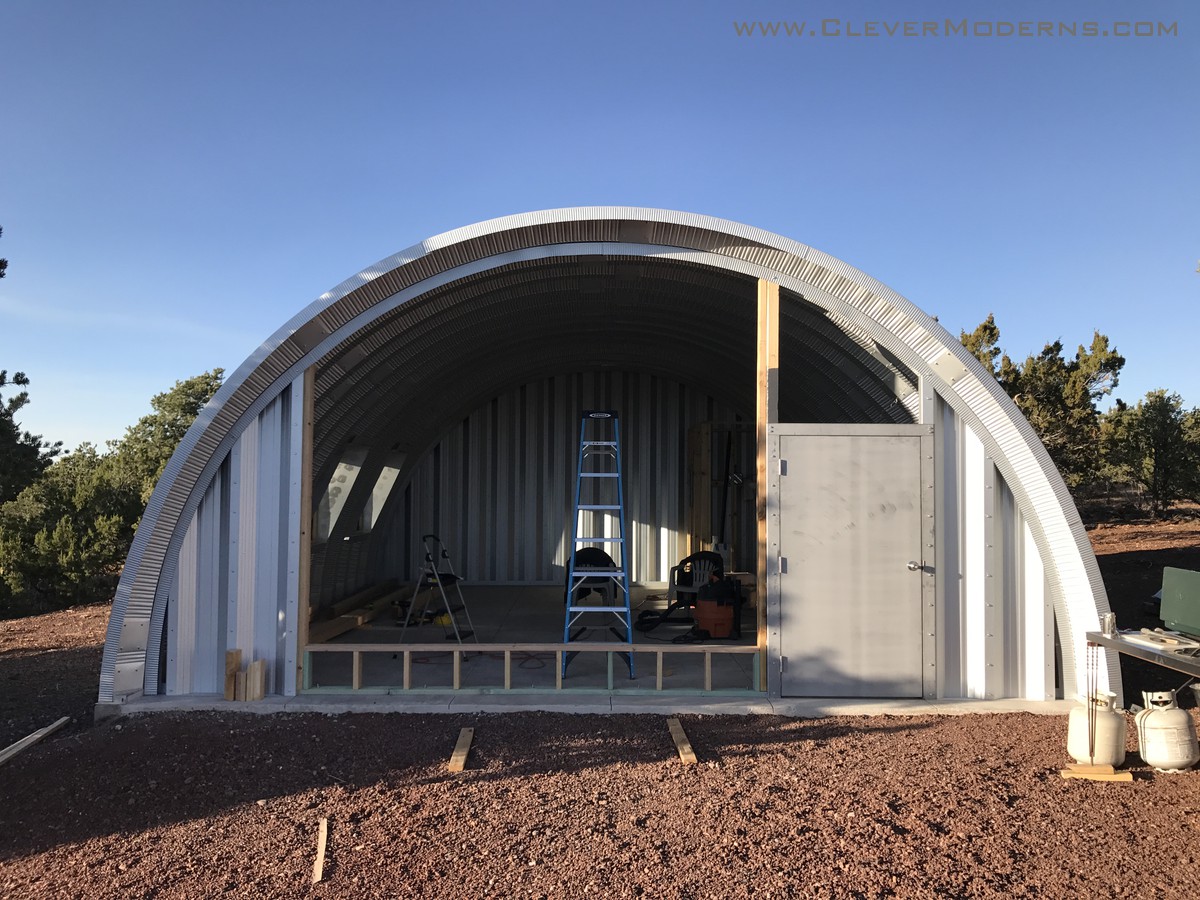
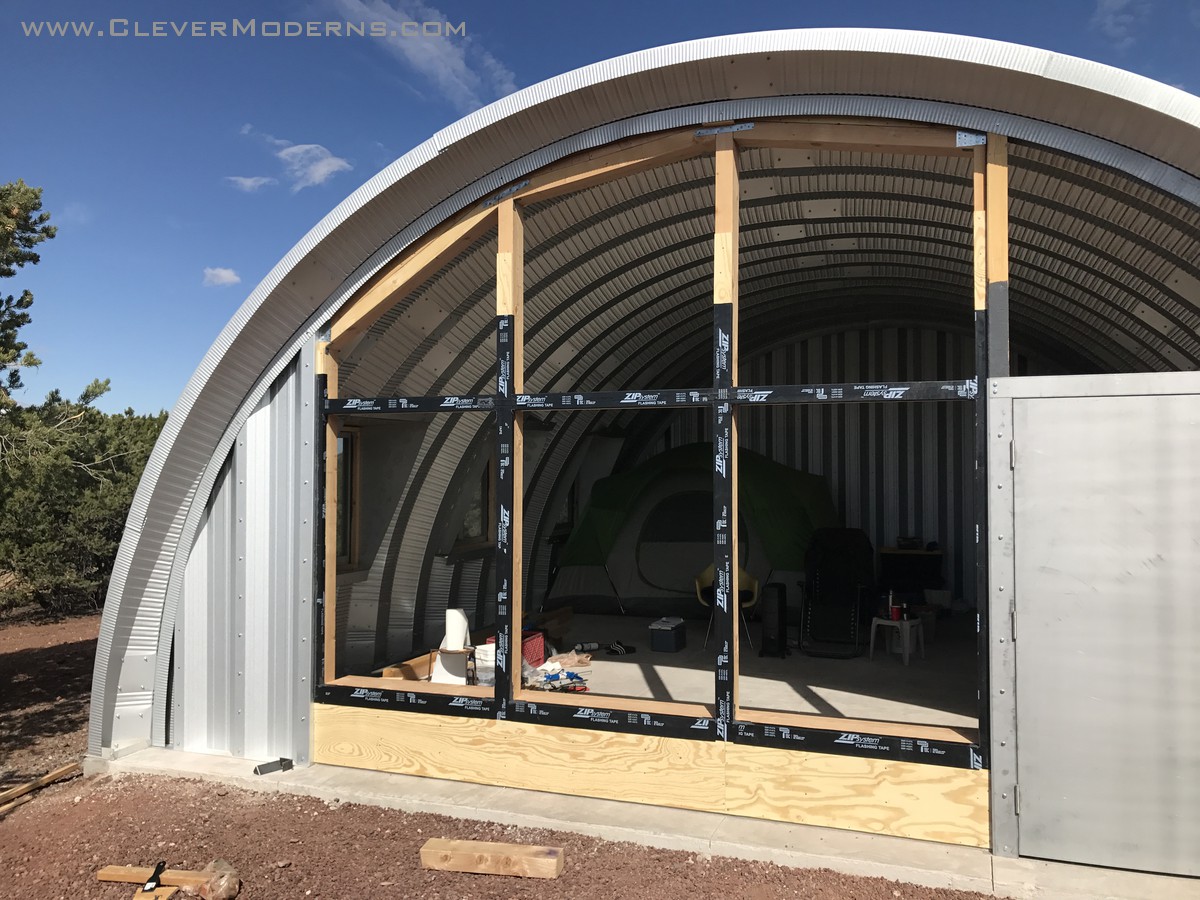
Our first step was to build the portions of the end wall that were part of the original Quonset hut kit from SteelMaster. Below you can see those portions framed in to the sides. Then we added a single post and set the door in place with its steel frame.
The post is just bolted to the arch trim at the top, and has a standard galvanized base plate at the bottom to hold it at the slab.

For more images from installing our SteelMaster end walls, you can check out this previous post.
Adding the Wood Framing
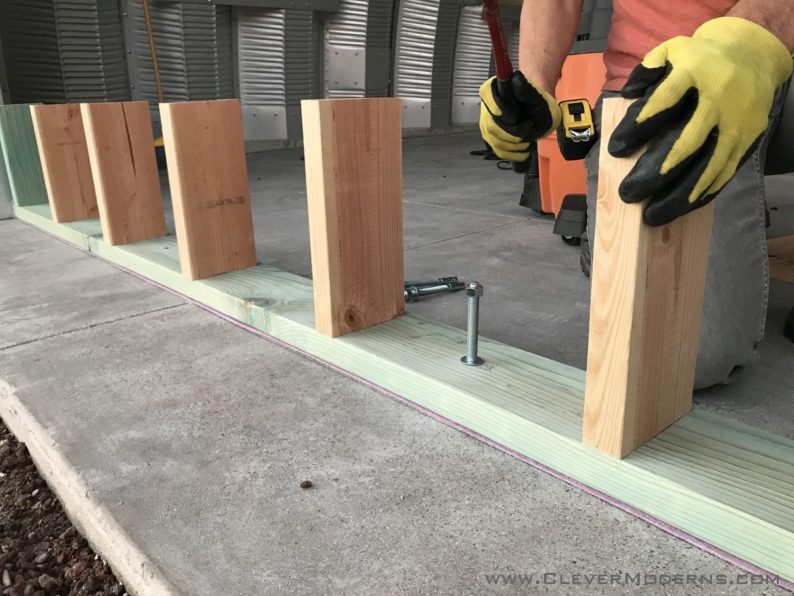
With the steel portion of the end walls built, the next step was to start building the wood framing. We used a pressure treated sill plate and put a strip of compressible sill seal foam between it and the slab.
We wanted a chunky wood window seat inside so we ordered a 4×10 and set it flat on the top of the little stem wall. We love this detail!!!
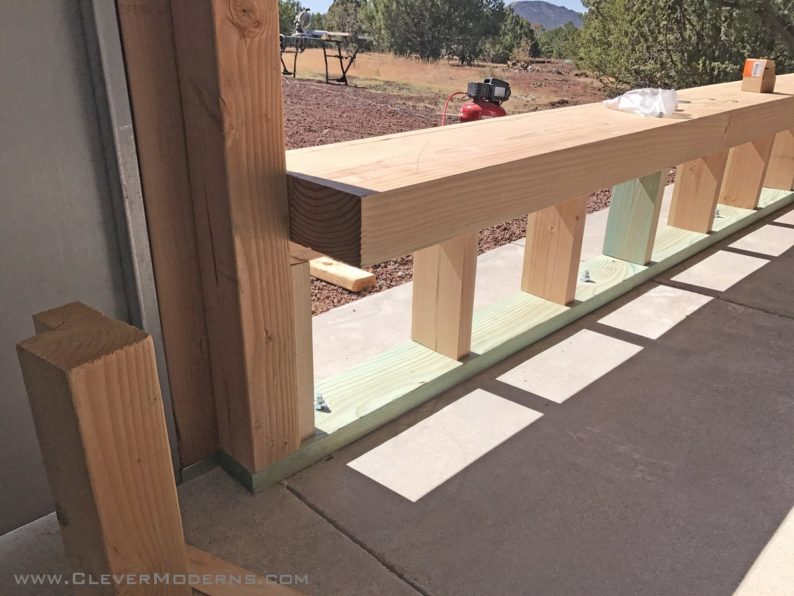
The Angled Window Headers
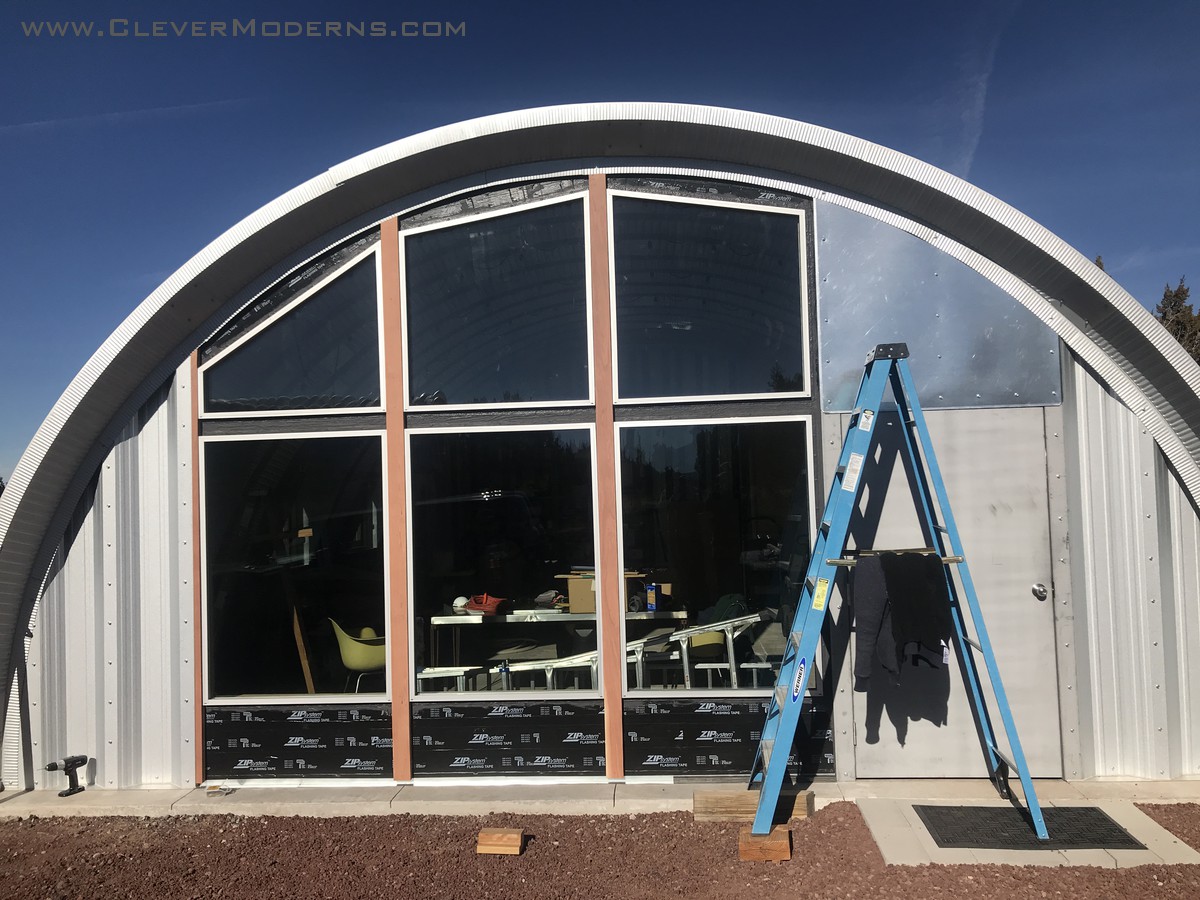
We decided to go with trapezoid windows at the top, rather than spend extra for arched tops.
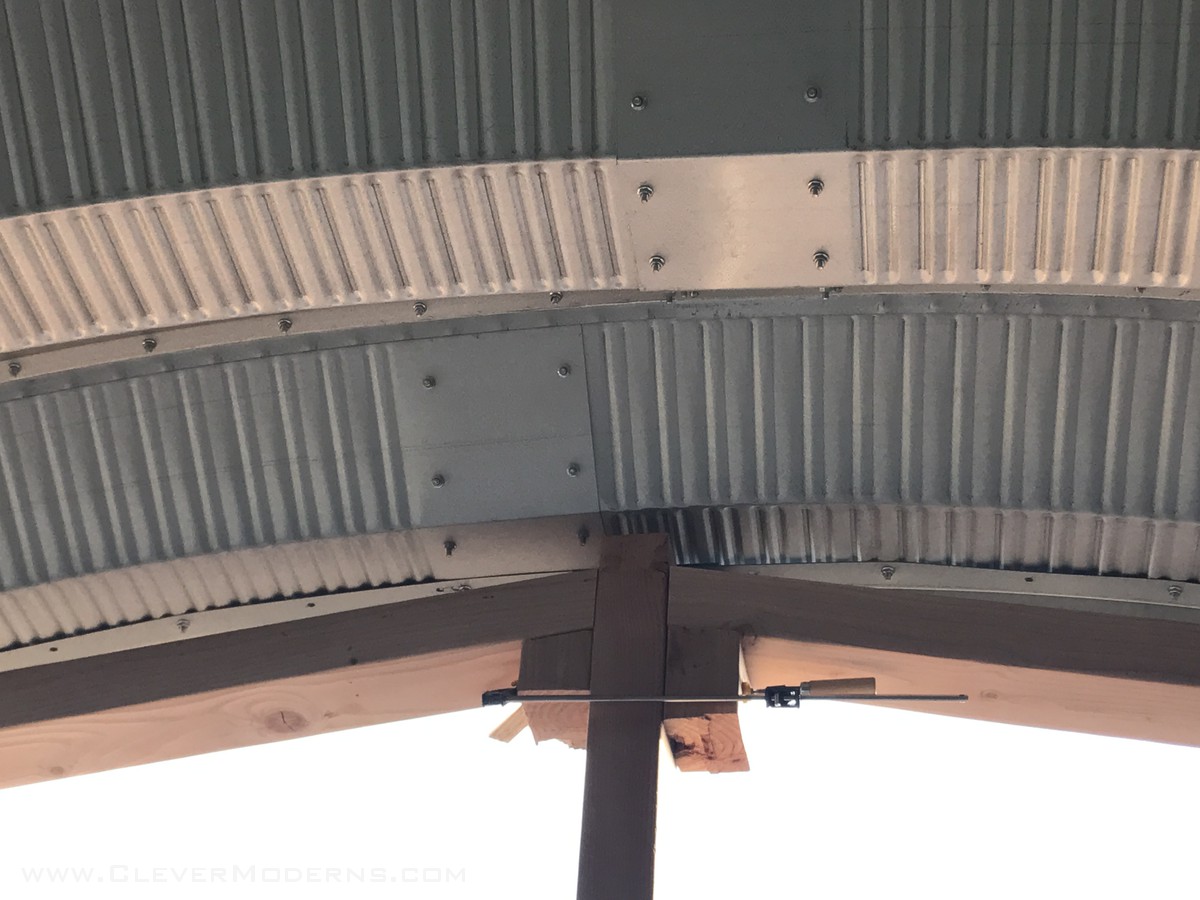
To connect the headers at the top, we used a combination of straps and angle framing clips. We didn’t want to see a bunch of galvanized hardware inside, and there isn’t any gravity load on these headers. If these headers were load-bearing, or in a high wind situation, you would definitely want something more robust than this.
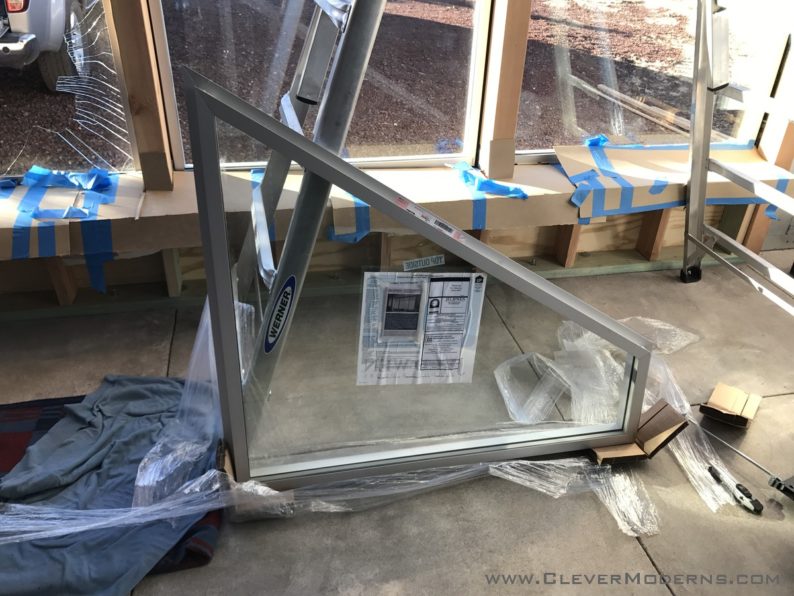
Installing the Windows
From there, the window install was pretty standard. We used Zip System self-adhered flashing as well as their liquid membrane flashing. First step was to wrap the framing members. Then you set your windows, and lastly you flash over them on the outside.
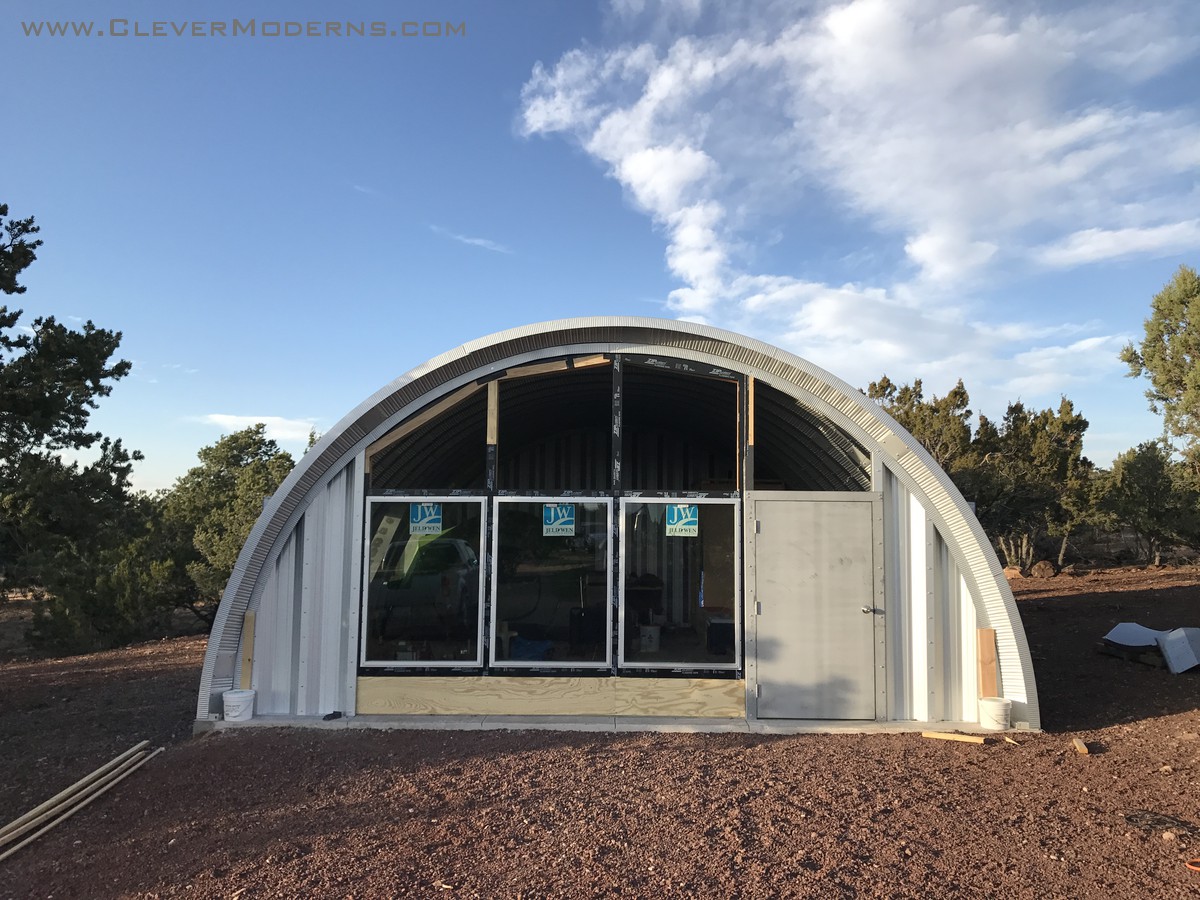

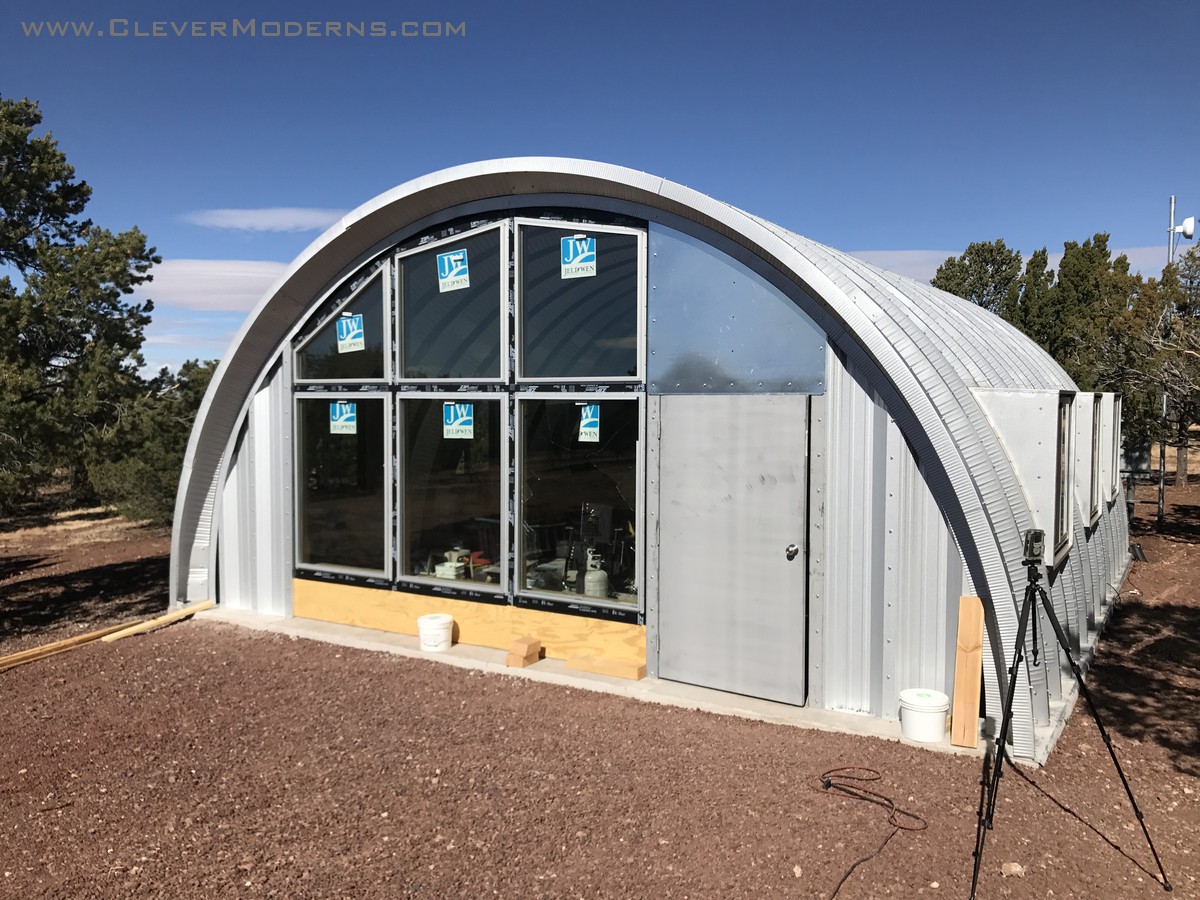
Above the door, we had a sheet metal panel made to fit the space. The door is an odd size because, as I mentioned above, it was originally intended to be in one of the side openings. We changed course after we already had the door. It’s 42″ wide and it’s actually pretty awesome having an over-sized door there.
But, the door and its frame were sized to go in the 24″ spacing of the arches along the sides, whereas the end wall panel bolt spacing is 18″ on center. We debated different ways of dealing with the space above the door, including adding another window, but in the end we decided to keep it simple and just have a flat metal panel made for us at a local sheet metal shop.
That decision also came along with the idea that we might one day paint the door, its frame, and the panel above it for a pop of color. That would hide the mis-matched super shiny finish on the panel.
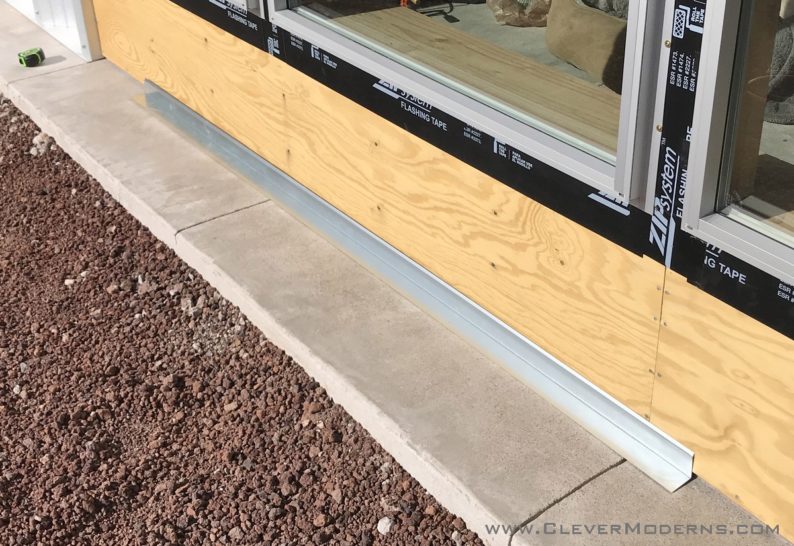
At the base of the wall, we set a piece of galvanized flashing, with a ton of polyurethane sealant under it. Then we just used some more lengths of Zip flashing to waterproof over the wood since it was such a small area.
Ideally the slab would end flush with the wall and not stick out like that. The way it is it kind of invites standing water to make its way under the wall. It’s one place I wish I had had a little more foresight. But, so far so good and we haven’t had any major issues with water getting in.
Finishing Up
The last step was to just add some wood trim to the little bit of exterior space between and below the windows.

We used a combination of redwood and fir and then sealed it up. We’re really happy with how it looks!
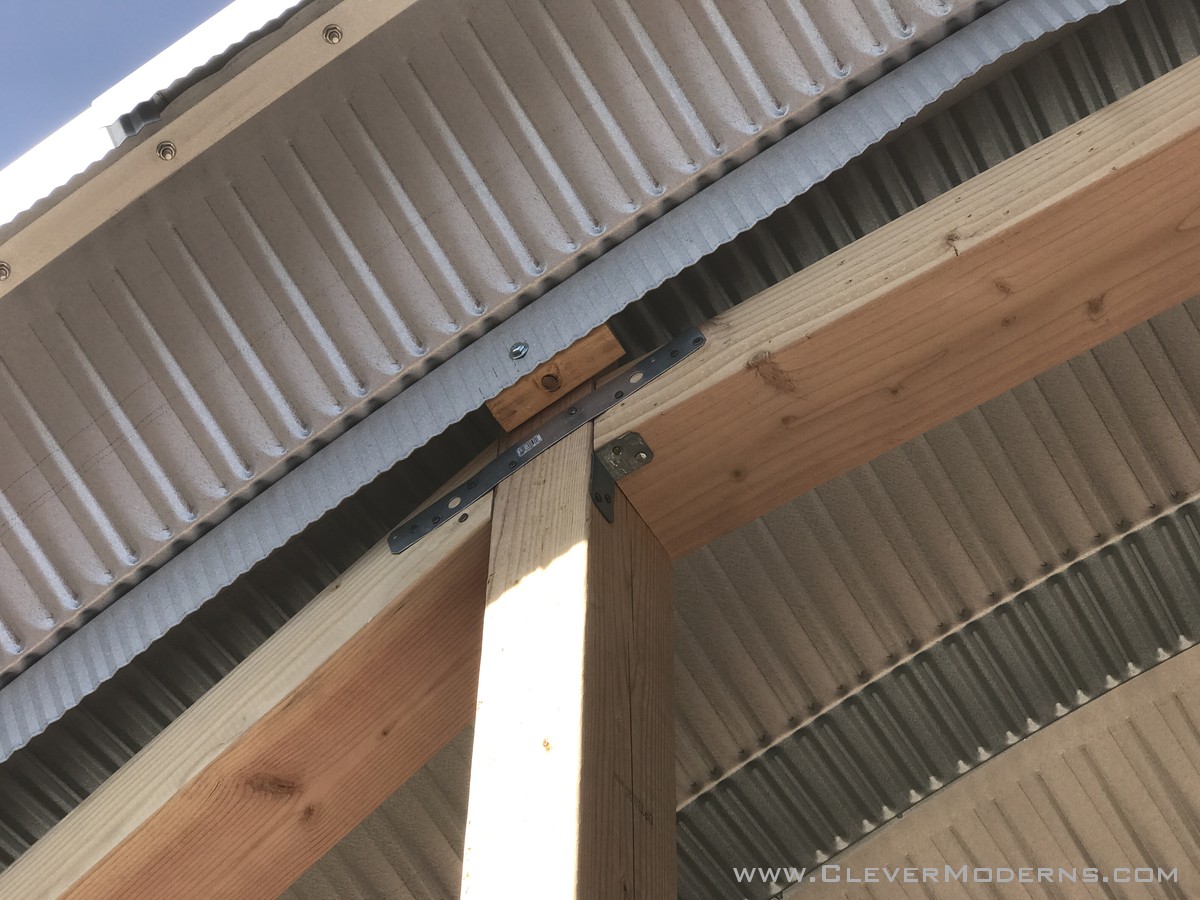
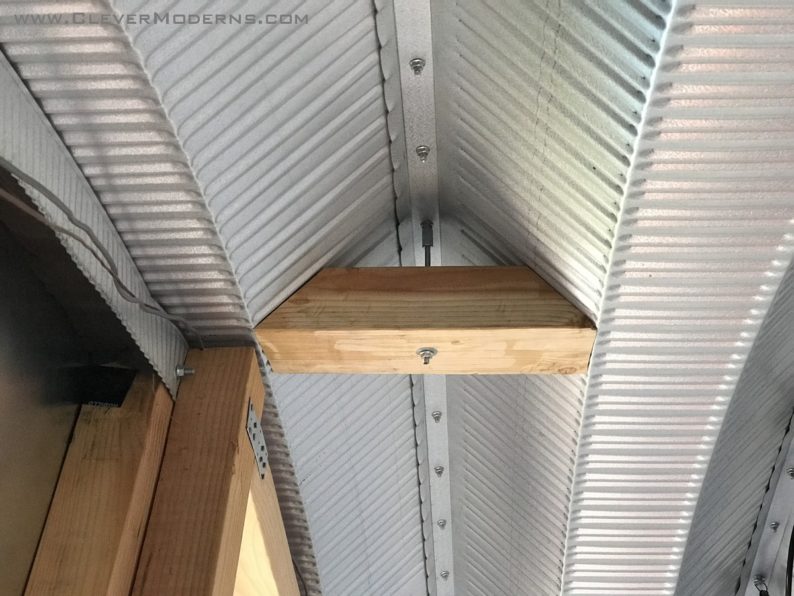
One Last Detail
Inside, we’re still finishing up one last bit. Since the tops of the posts are just bolted to the angle trim, we wanted a more robust connection up top. We cut some trapezoid-shaped scraps of 4×4’s and 4×6’s and used coupling nuts with threaded rods to bolt them into the arch panel space at each post.
The top of each post will get a heavy duty steel bracket to connect to these, that will help tie in the end wall and make it even more secure.
Follow our Quonset Hut Home Builds!
Laugh with us. Cry with us. Gaze the Arizona night sky with us. Our monthly newsletter will bring all our construction adventures to your inbox: the challenges, anecdotes, wins, and lessons learned as we build our prototype Quonset Hut Houses in northern Arizona, and launch the Quompound as a Grand Canyon vacation rental destination. Unsubscribe any time if it’s not for you.
Follow us on Instagram and Facebook. We also have a private Facebook group called DIY Quonset Dwellers, where we share discussion, design, and construction tips with others who are interested in building their own Quonset hut house. With over 900 members and counting, the Facebook group has grown into an amazing resource all of its own. Learn more and request to join the Facebook group here.