Finally!
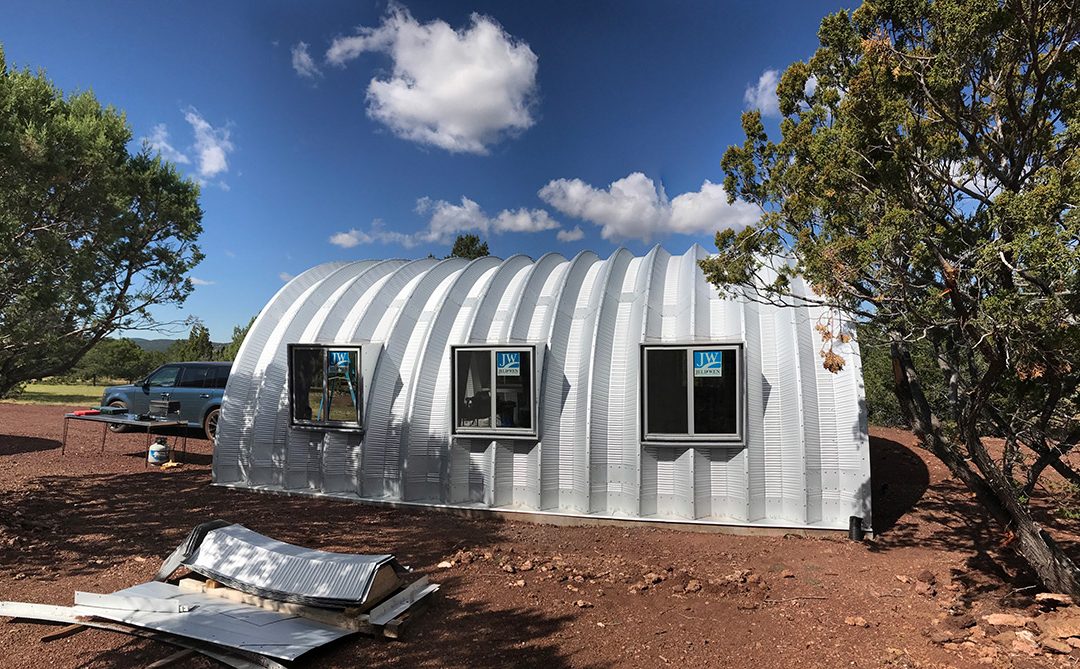
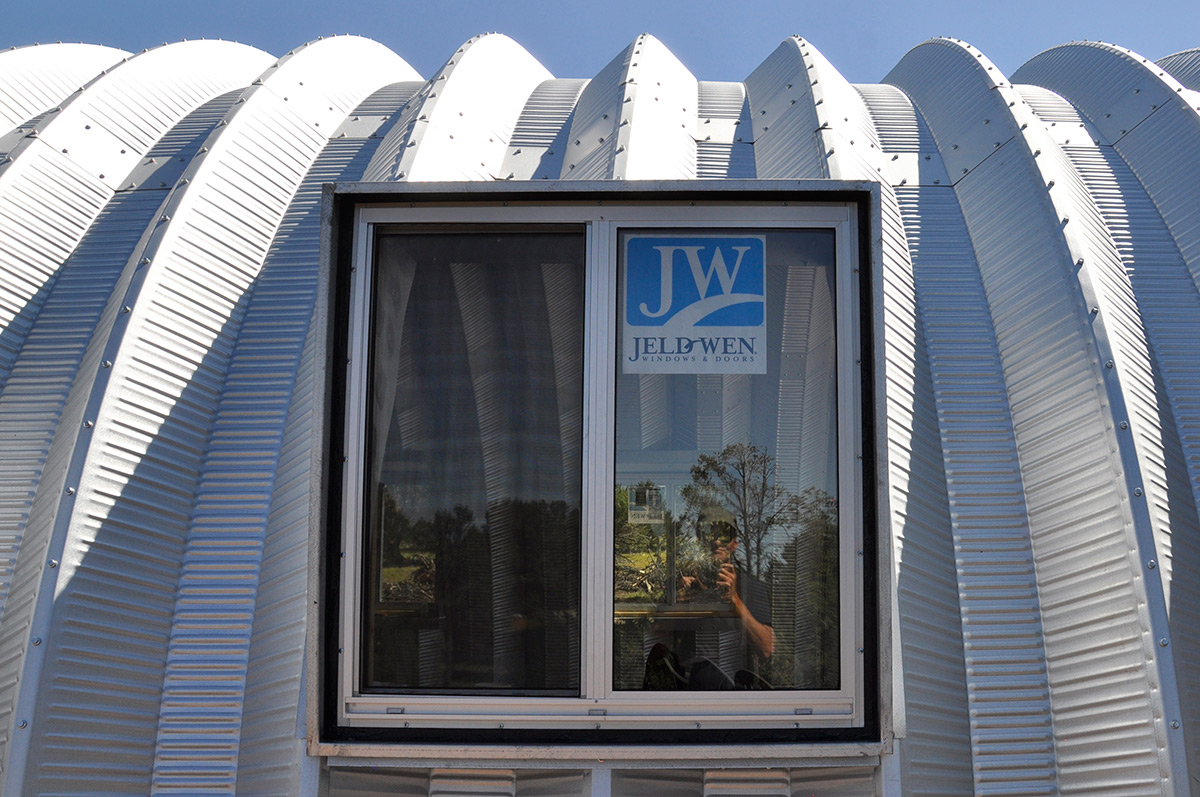
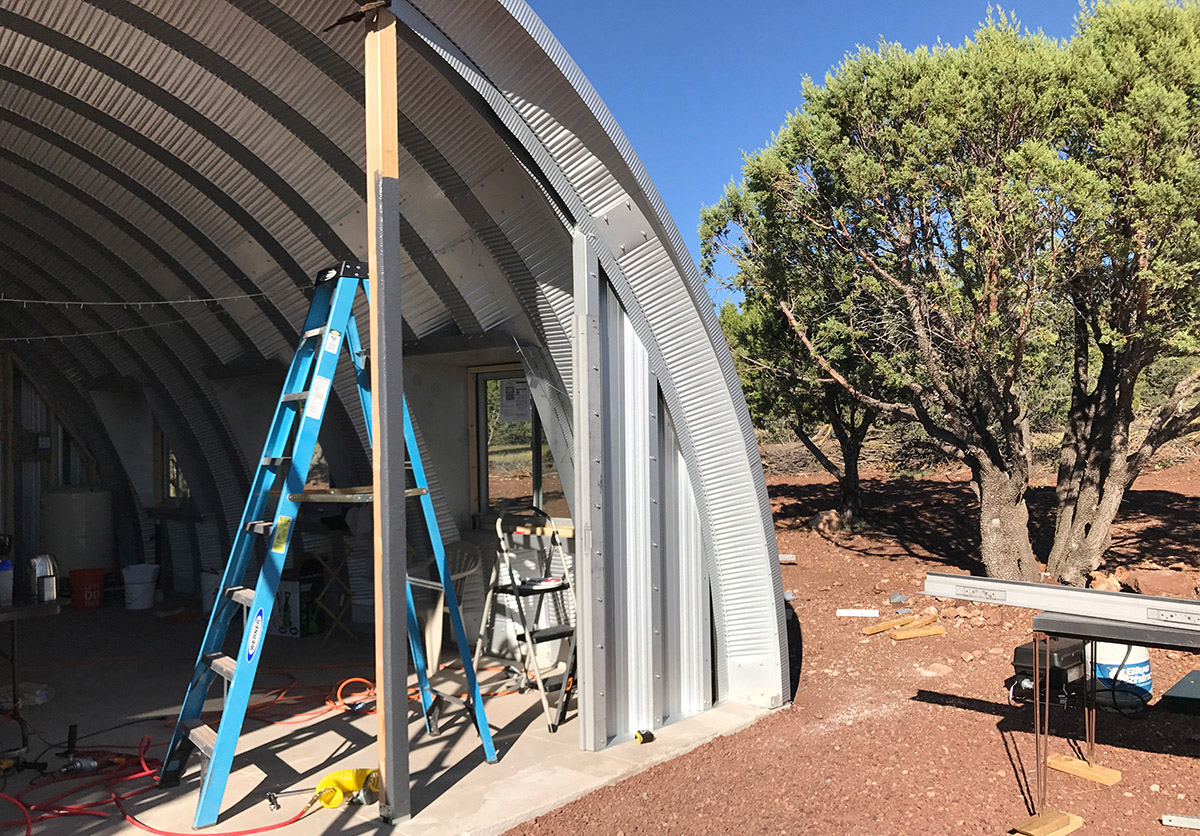
We finally got our side windows installed in the Headquarters building! These side windows have probably been the biggest challenge yet of our Quonset hut build. We were at the property for a long weekend, with four full work days, just Eric and me. We must be getting better at this, because every time we go work on the buildings for a few days by ourselves, we come away amazed at our productivity!
Preparing the rough openings.
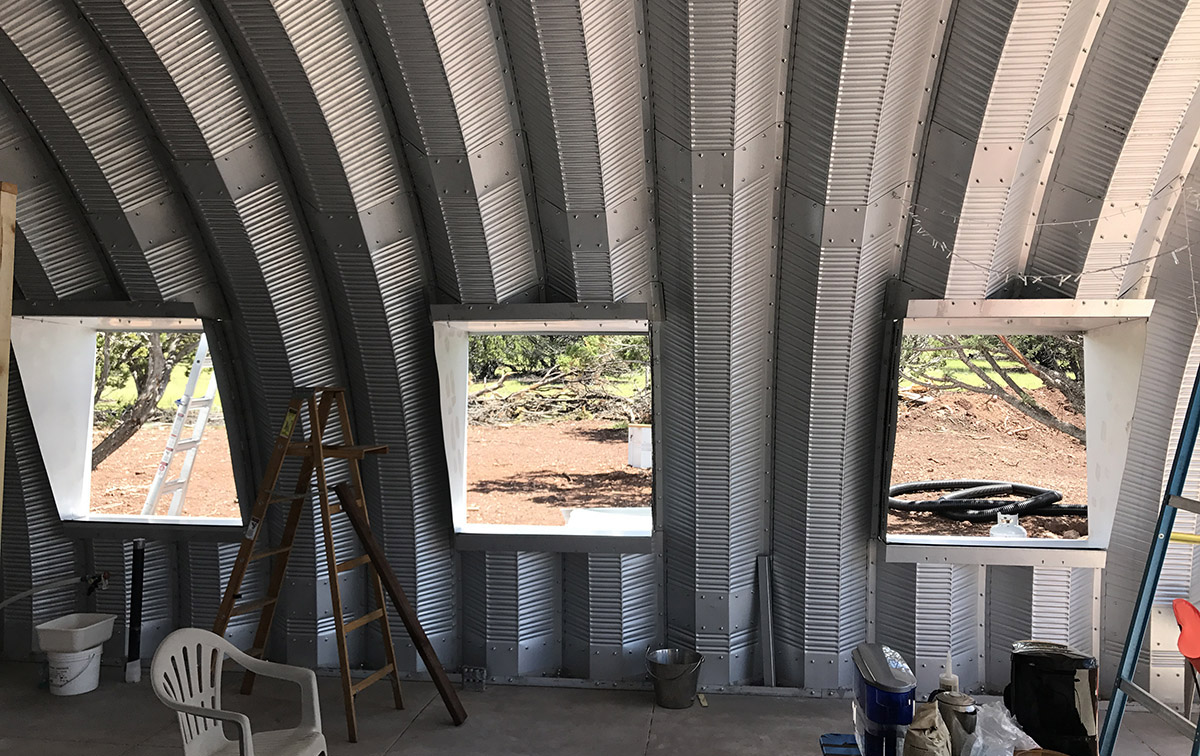
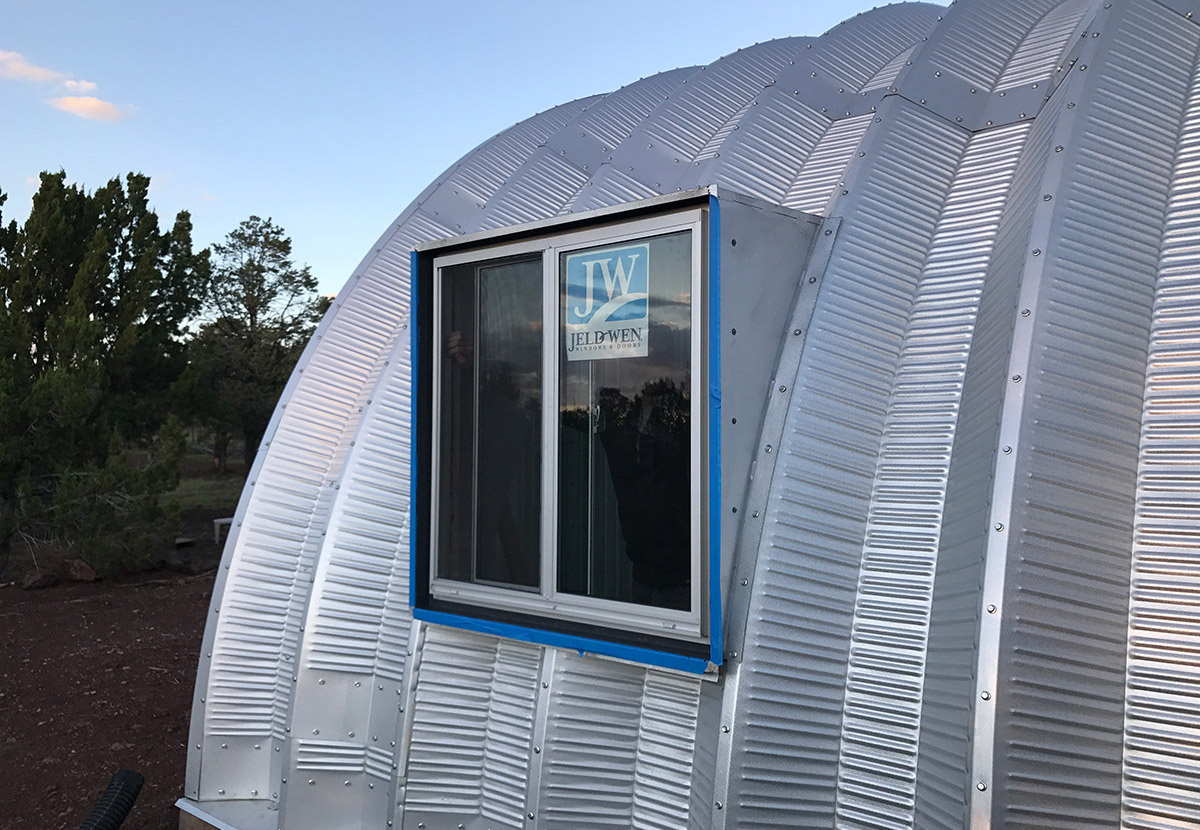
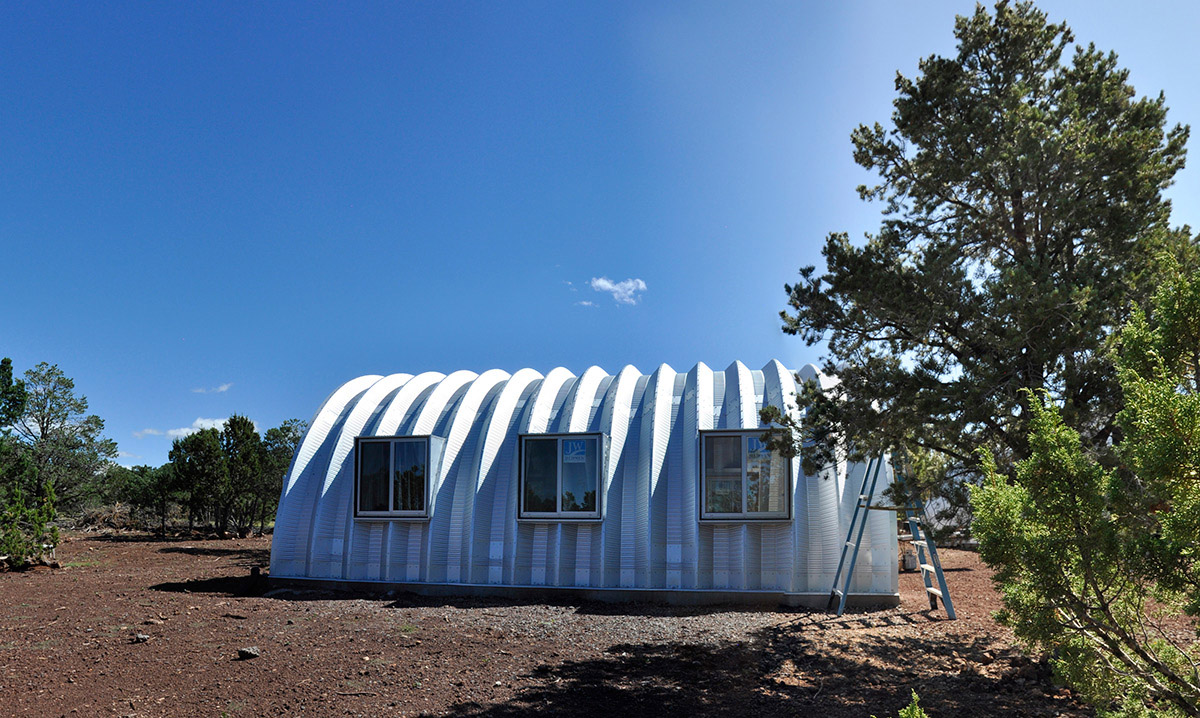
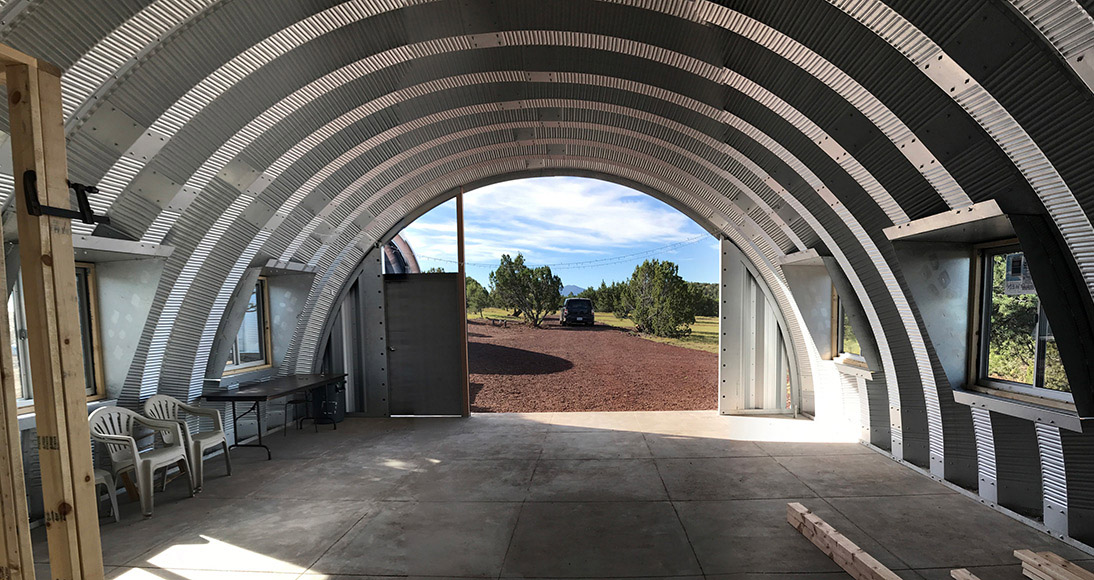
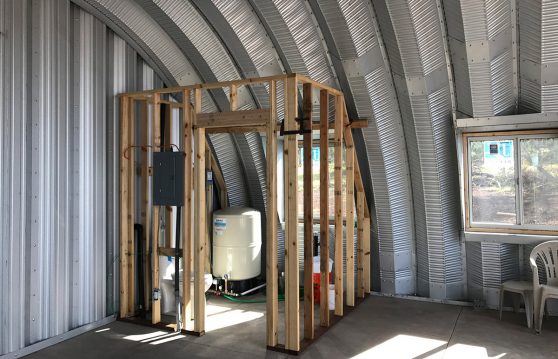
Our previous trip (read all about it here), we had installed all six of the metal boxes that create the window openings in the metal Quonset hut shell. Our building has three windows on each side. Each window is two arch panels wide, with two arches in between them. Here’s the interior view of the window openings, waiting for the sliding aluminum and glass windows to be put in:
Last time out, once we got the metal boxes installed, we had big problems getting them prepped for the window installation. The 3M flashing we tried was extremely difficult to work with, and we had problems related to its incompatibility with the silicone sealant we were also using. (It turns out almost nothing plays nicely with silicone.)
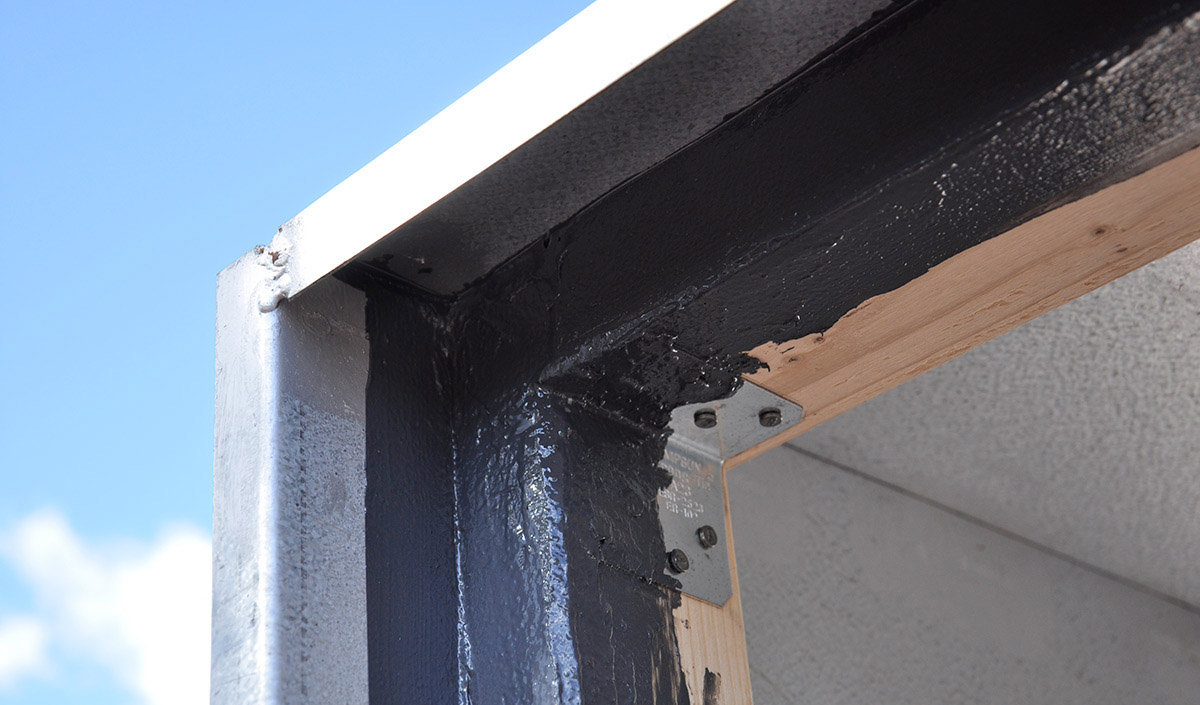
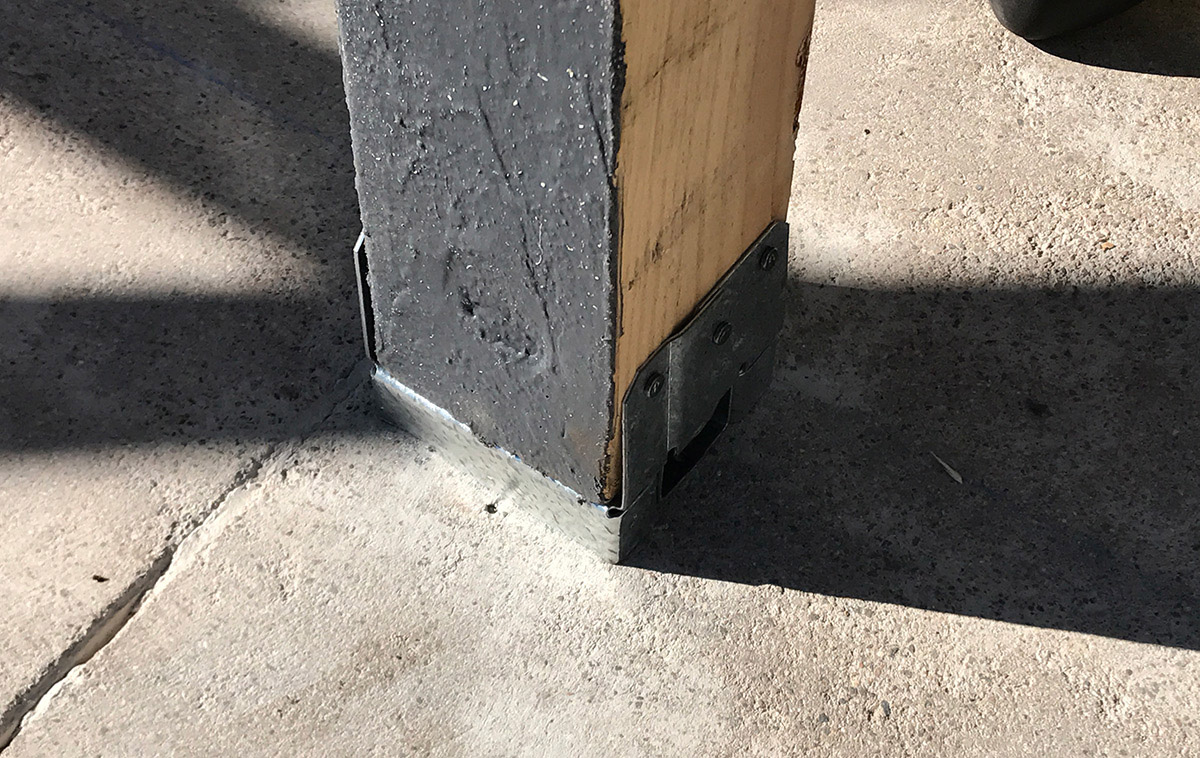
On this trip, when we went to peel the 3M tape off the one window where we had started installing it, we were horrified to discover that water had gotten behind the tape! We figured it could have only gotten in through vulnerable corners where the silicone and 3M tape refused to stick to each other. If you look closely you can see beads of water on the metal in the second photo below. The water had collected in the crevice where the wood and metal meet, where I’m peeling off the flashing tape in the photo. Boy were we glad we had abandoned that method! It was already setting itself up for a rotten moldy nightmare.
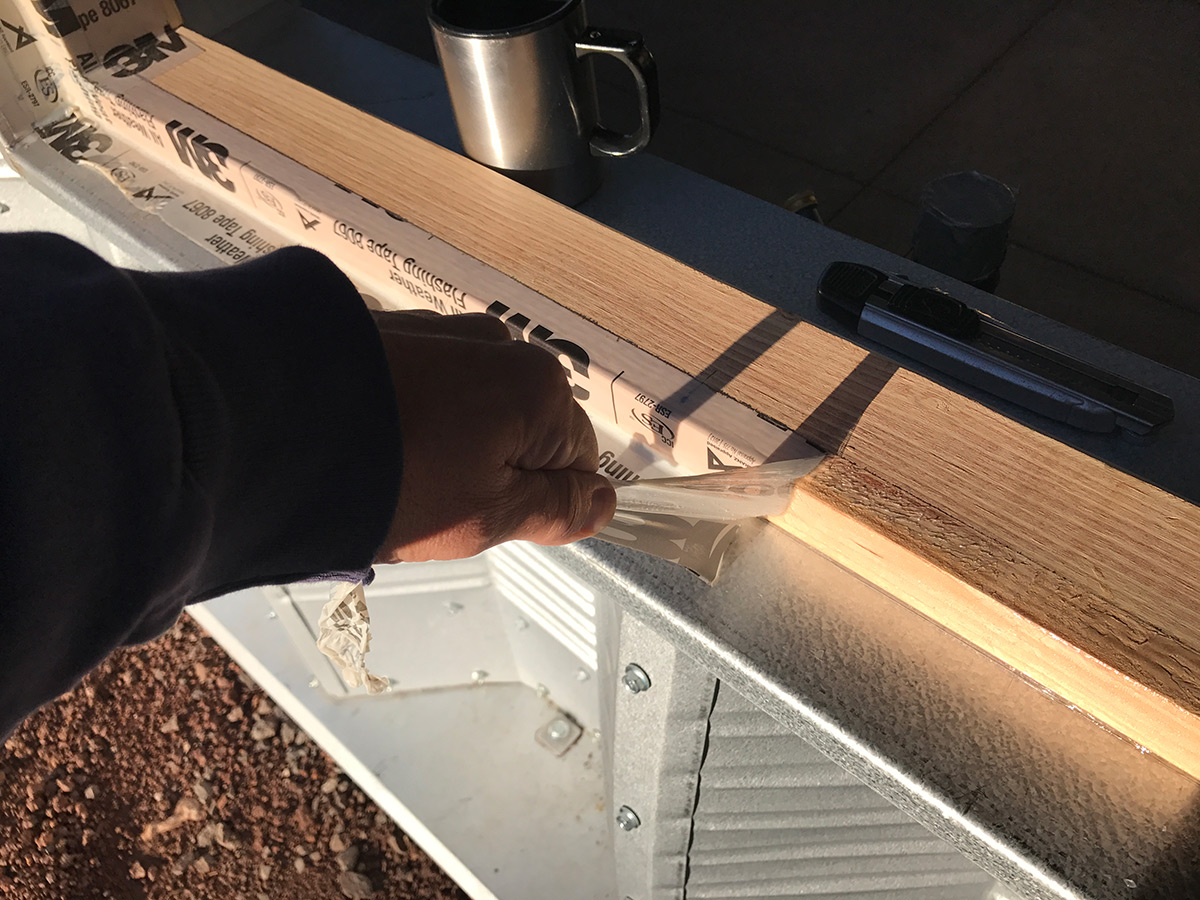

After abandoning that method, we came home and did more research. We found some good sources recommending liquid applied flashing for conditions like ours, where there are multiple inside corners that require coverage. We settled on Zip System Liquid Flashing, which was easy to get on Amazon.com. It worked really well, and I recommend it if you have a Quonset hut window situation similar to ours. We plan on using it again. It comes in a tube like regular caulking, except that the tubes are larger at 29 oz. than the typical caulking tubes you see in the paint department at Home Depot. It uses larger size caulking gun, which was not a big deal. They sell those on Amazon, too.
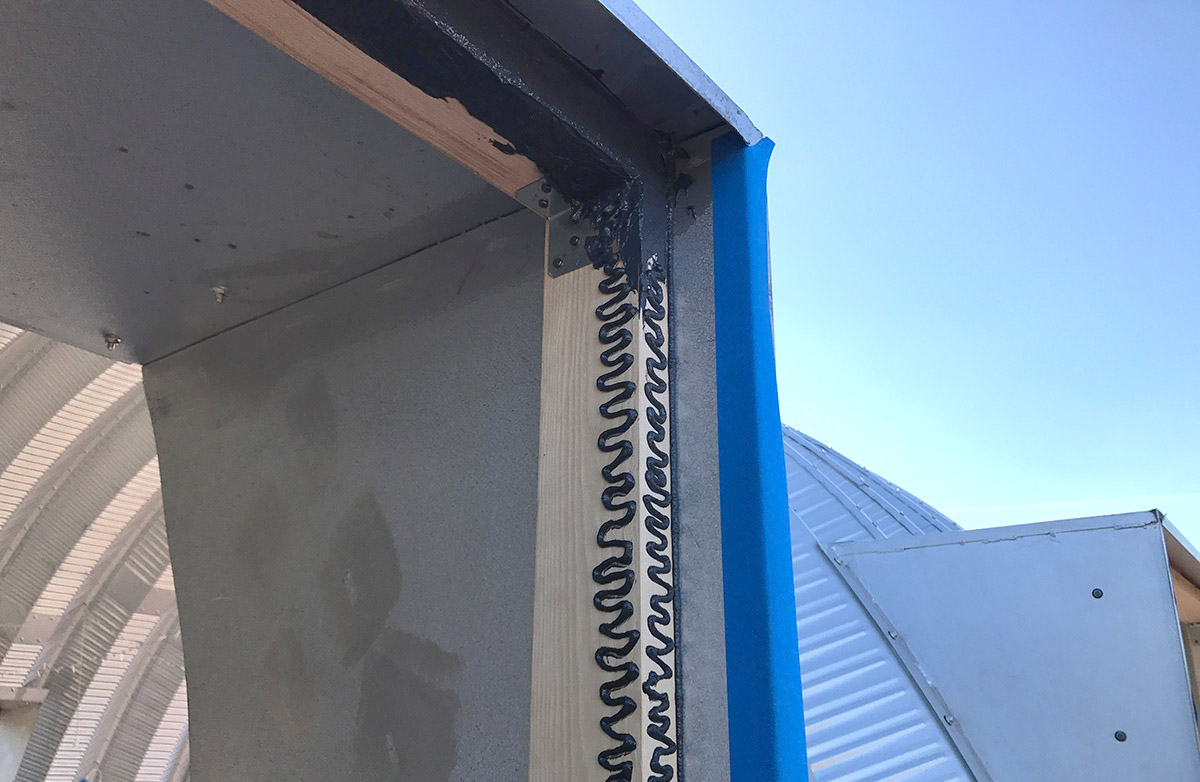
It was pretty easy to apply the liquid flashing, and although it was time consuming, it wasn’t as tedious and time consuming as the 3M tape. You just squeeze it onto your surface and then use a putty/spackling knife to work it into the surface and smooth it out. Getting it into the corners is a relatively trivial matter – you just squeeze a bead into the corner directly before you start working it with the putty knife. We used blue painter’s tape to ensure we would get a clean edge, which worked well, too. The manufacturer recommends around 4 hours for the liquid flashing to cure, so we kept track of the time as we went.
Once the wood bucking was installed and the liquid flashing applied and cured, installing the windows themselves was straightforward. We ordered our windows with a nailing fin, and we just used the type of screws specified by the window manufacturer to screw them into place. (Theoretically we could have used nails but there wasn’t really enough working room to make nails a viable option.)
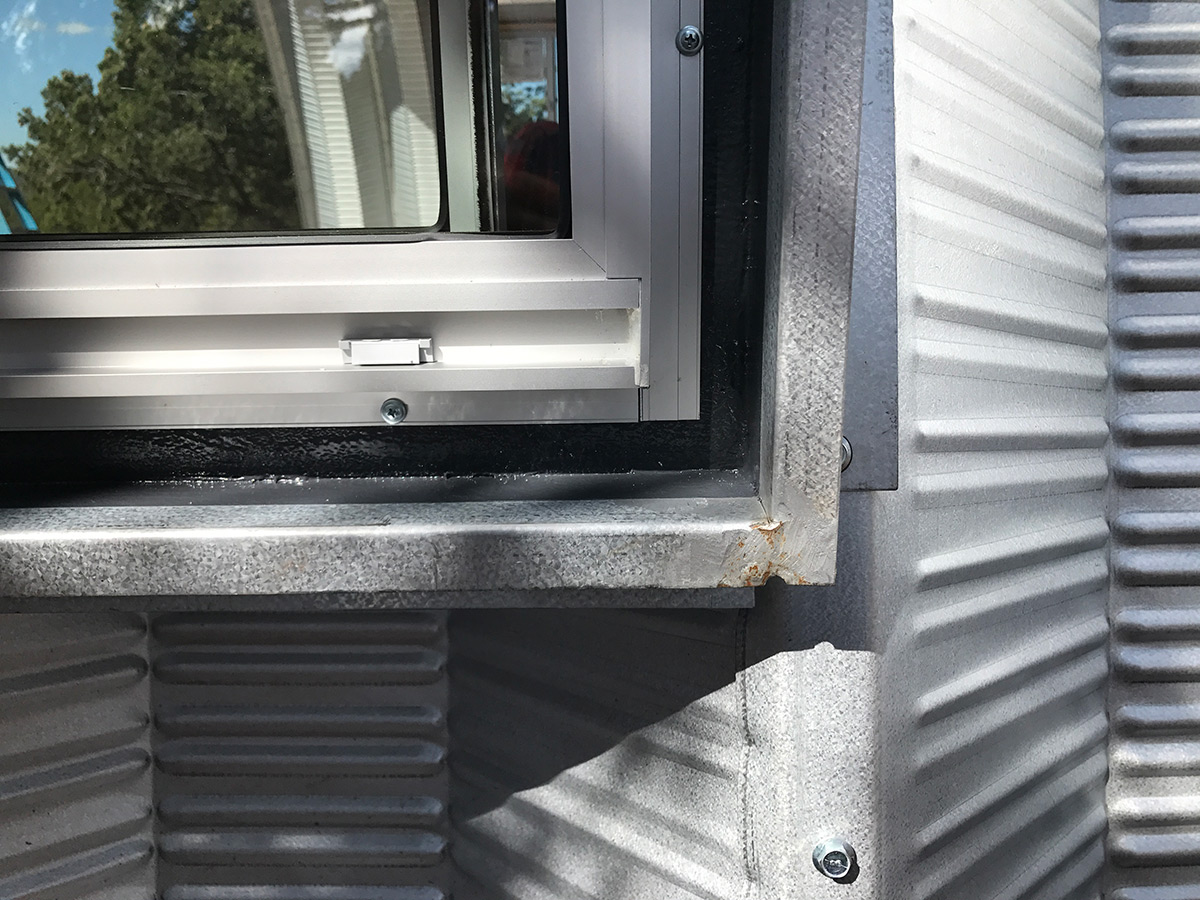
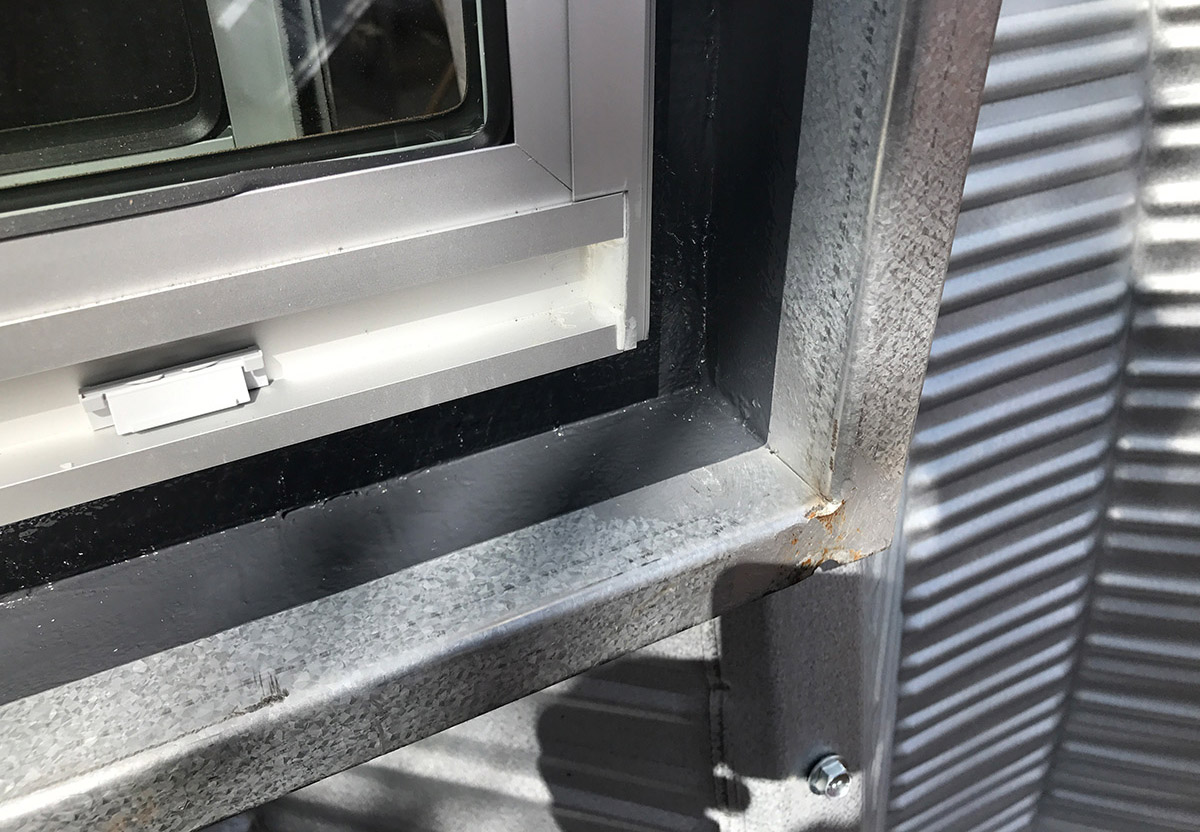
The cured flashing made a very tough, rubbery coating that gave us plenty of confidence that we had found the right product for what we were doing. We now have up to 6 months to cover it up, before UV exposure will begin degrading it. We plan to have some metal trim pieces made to cover the exposed flashing, filling in the space between the window frame and the metal box. Before that happens we will put a second coat of liquid flashing over the window nailing fin and screw heads.
Constructing the Front Wall
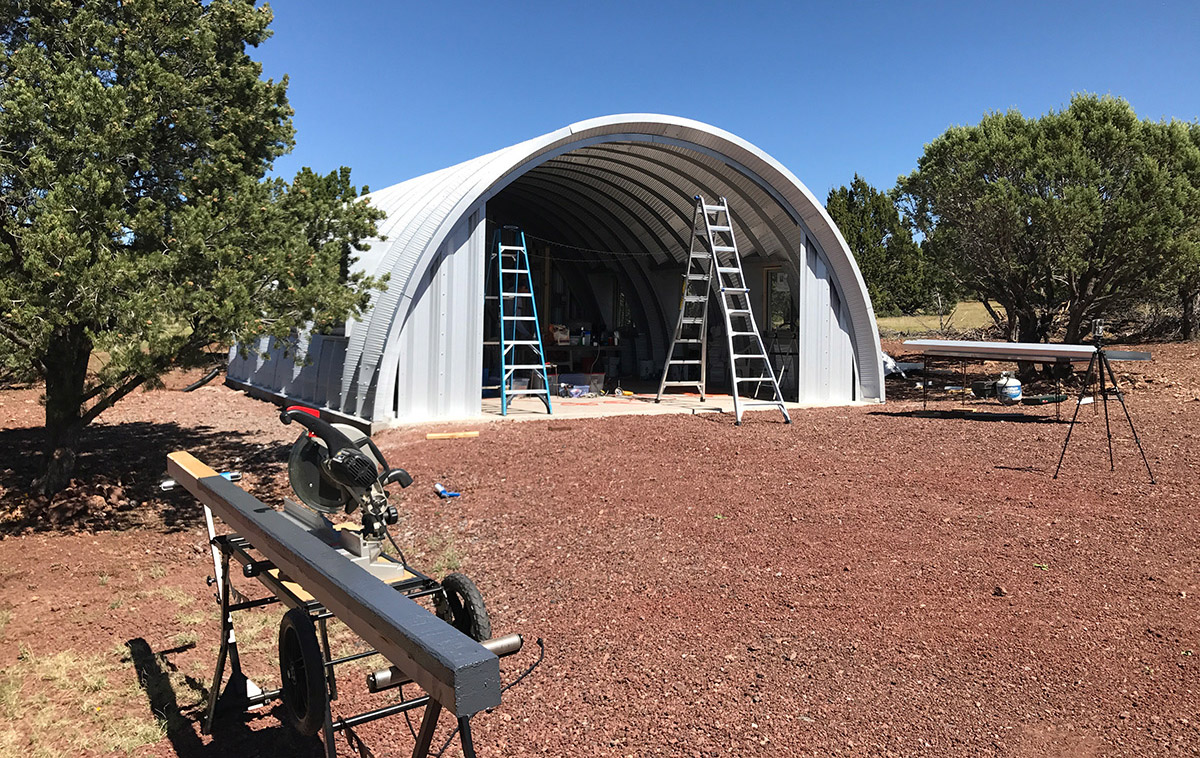
With the windows installed, we still had the better part of two days to work on the front wall. Originally, our front wall was going to be rather run-of-the-mill, with a 16-foot wide garage door. However, after falling in love with the asymmetrical facade of our workshop building, we decided to copy it instead, with a few minor variations. One variation will be that the Workshop will have a 12-foot garage door, whereas Headquarters will have a fixed window wall of matching proportions. Yes, we’re going a little window crazy here, but we can’t help ourselves! Anyway, the 12-foot window wall will be divided into a grid with wood posts, with the windows installed to the openings.
In other news,
…we finally have water pressure in the building! Now that the wood framing was in place, our plumber could come hook up the pressure tank and get our pump all connected. We had been getting our water by gravity feed, made possible by the fact that our cistern is several feet higher than the building. The tank is huge! But, we eventually hope to have a main house and guest house all running off of it, so we asked our plumber to size it accordingly. Thus we have a tank that is somewhat out of proportion to our little building.
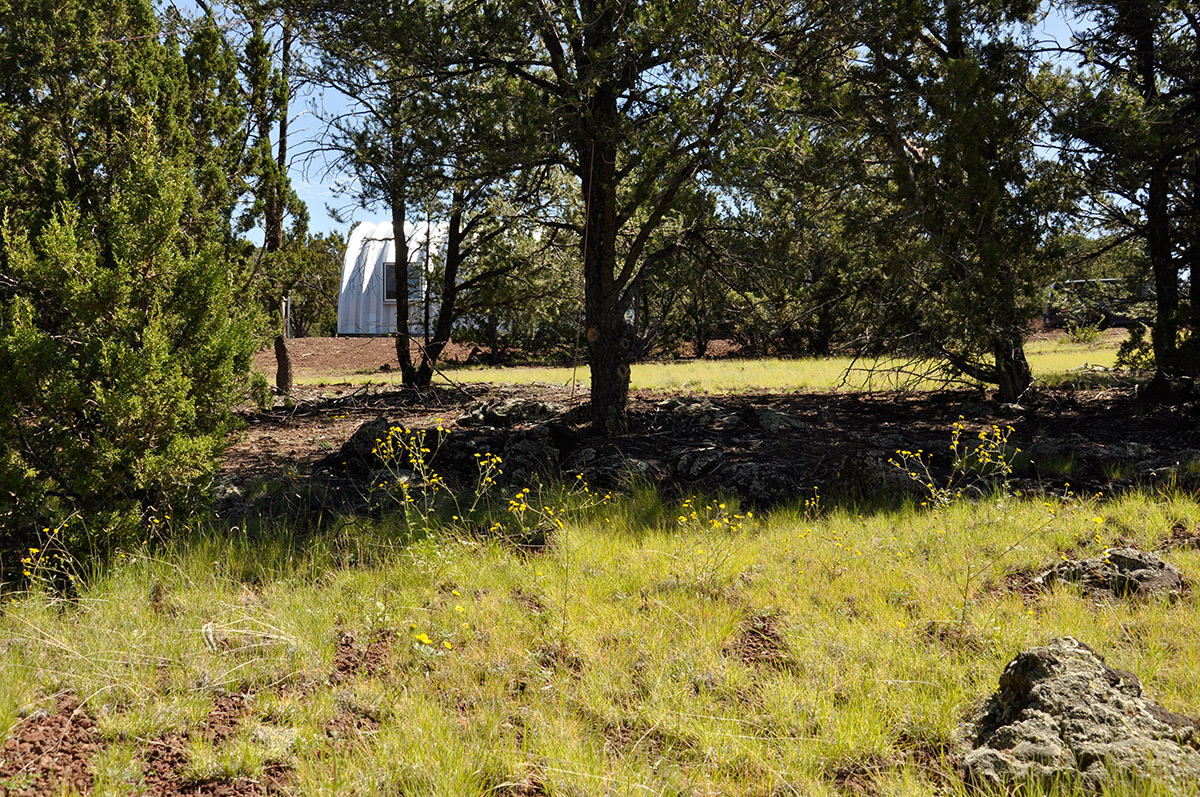
Normally, when I’m photographing the project, I’m trying to get the clearest photos of the buildings with as few distractions as possible. This past trip, it occurred to me that there are probably some good views of the buildings from out around the property. I am going to try and get more of these photos as we move forward. Of course I’ll share them with you here! Until then…
Curious about Quonsets? Ready to learn more about these bizarre, amazing, shiny, round, prefab structures? Drop your info below and I’ll start you off on my email tutorial series. Looking to build an inexpensive but beautiful home debt-free? Considering going off-grid? Or are you just tired of the same old same old and want something unique and beautiful? A Quonset House might be the answer for you.
Follow us on Instagram and Facebook. We also have a private Facebook group called DIY Quonset Dwellers, where we share discussion, design, and construction tips with others who are interested in building their own Quonset hut house. With over 6,000 members and counting, the Facebook group has grown into an amazing resource all of its own! Learn more and request to join the Facebook group here.
Could you possibly take a picture similar to 08 and 11 to get a top looking down perspective of the window system? I am trying to figure out how you keep water from getting into the building.
I am looking at the options of making a house out of a quonset hut and try to learn about it.
Thank you
Hi James, first let me refer you to my previous post, https://www.clevermoderns.com/installing-quonset-hut-side-windows-part-1/ and an earlier one where I made a YouTube video explaining a little bit about the side window boxes, before we installed them. https://www.clevermoderns.com/side-windows-quonset-hut-house/. Hopefully by referring to those you can get some answers. If you still have questions feel free to shoot me an email. These side window boxes are difficult to waterproof and we are considering adding a secondary little “rooflet” over each one in the spring to help make them more waterproof in the long run.
Thank you so much for taking the time to put this information together, it’s greatly appreciated. I’ve read online , that its hard to prevent water leaks from coming in under the base plates. I’m preparing to start my quonset build starting this spring, and fear of water leaks is my main concern. I live in Ohio, and we are fairly precipitation heavy in all seasons. Water worries me to death. I want the industrial base plate mounting system to be 100 percent water tight, and regardless of what the salesman says, ( they never leak) I’d take your word over theirs any day. If there’s any insight into this subject you could provide me, please provide me with it. I can’t thank you enough for taking the time to read this and/or respond. I wish you a safe and happy New Year. Again, Thanks, Shane, Logan Ohio.
Hi Shane, thanks for taking the time to comment. The base plates are definitely a “weak link” in the system. If you google “sill seal foam” you can find these lightweight compressible foam strips that are made to go under wood framing where it meets the concrete. We put that under our base plate on the Loft House. In my Facebook group some people were posting that they used the sill seal foam and went one step better by getting some kind of roofing tar type of sealant, thick black goopy stuff, and but it below and on top of the sill seal foam.
If you aren’t in there, you can request to join the Facebook group at https://www.clevermoderns.com/group. Good luck with your build!
Thanks Earl! That is exactly what I was hoping to see. I am thinking for building down in Texas that it would probably be best to build a house inside the quonset hut steel shell. As long as you install your membranes properly on the house/dormer the potentially leaky side window shouldn’t be as big of a problem.
Hi from Kentucky,
I am looking to buy a farm for hunting and fishing. And on this property it has a old 49X100 Quonset facing one of the big ponds. Would like to fix up the end (inside) facing pond but will need windows and a exterior door cut in. Quonset is in good shape with a few small holes that will need to be patched. Can this be done without a lot of trouble? Thanks for any help or websites that you know of!
Hey Lenora from Kentucky!
Wow that property sounds amazing. 49×100 is really big, I can see why you would want some side windows and a door to make it more practical.
The way they did ours (from the SteelMaster factory), the two side arches next to each window are thicker metal, to compensate for the weakness introduced to the structure by cutting a hole in it. Maybe you could cut yours up and it would be fine but since I’m an architect and public safety is part of my professional responsibility I can’t recommend it. Trying to retroactively engineer this to regular current safety standards could be done but might well end up entailing exactly the kind of “trouble” you seek to avoid – i.e. probably not worth the time and expense.
I have another way to solve this, though! Why not take 40′-50′ of building that faces the pond and make that the house, and then tear down a few arches to make outdoor patio space, say 12′-16′ or something, and then make the rear portion into a garage or storage shed or something. That way you can have rooms facing the pond and also get light and air and a back door into the rooms that face the other side also.
Hope this is helpful!
I would like to put a roll up garage door on the side of the Quonset hut that stays with the natural angle of the building. I know that it would need to be reinforced. Understanding that; Is it possible to do that without a lot of headache?
Hey there Vincent, that sounds like a really cool idea! It’s hard for me to answer whether that would be “a lot of headache” simply because I don’t know anything about your building or your own skills & abilities. Doing something like that while also ensuring water stays out of the building seems like a big challenge in itself, apart from the structural aspects of reinforcing the opening.
do you know if it is possible to add window kits to a preexisting quonset hut?
It is possible in theory but difficult. Your best bet is if you can contact your building’s original manufacturer and work with them on it. It requires a structural engineer’s input because you are tremendously weakening the structure to cut these kinds of holes in it. On ours, the arches on either side of each opening were much heavier gauge to compensate for the weakness introduced by the hole. This was all determined at the factory.