This post contains affiliate links, meaning I get a commission (at no additional cost to you) if you decide to make a purchase through my links. I only share affiliate links for things that: a) we have actually used (or comparable items if the original item is no longer available), b) that I would use again, and c) that I think would benefit your build. See my disclosure for more info.
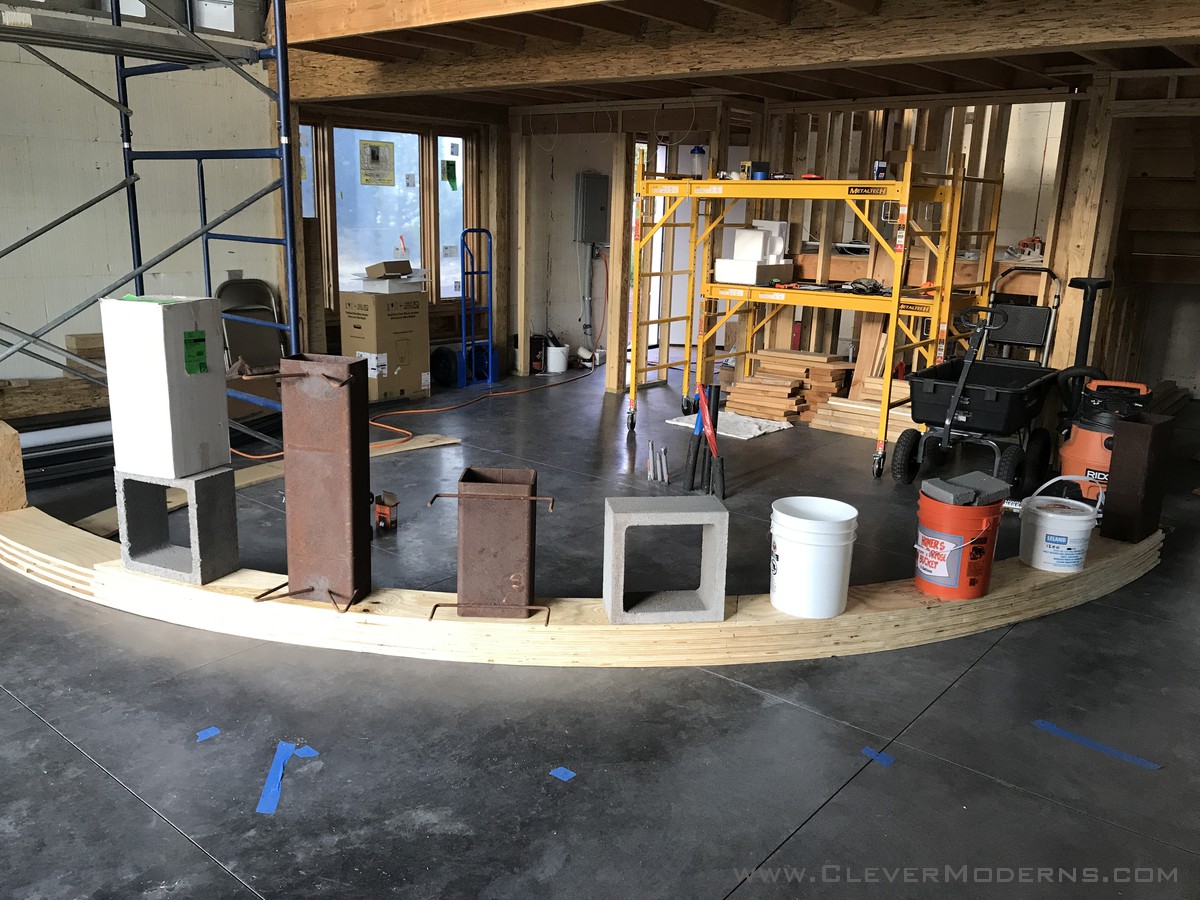
Over the past several weeks we’ve made great progress on interior framing in the Headquarters Hut! If you follow me on Instagram or are a member of my DIY Quonset Dwellers group on Facebook (both of which I highly recommend, btw) you have probably seen some sneak preview images of what’s to come in this post.
We’re super excited about how this is coming together. If you’re considering building a hut 30′ wide or smaller, this technique could be great for you – read on!
Quonset Hut Interior Framing: Basic Concepts
The most common way to finish the interior of a Quonset hut house is to bolt some wood framing (usually 2×4’s) to the metal, so that you can have some spray foam insulation put in, and then use the 2×4’s to attach drywall or plywood or whatever you want for your interior ceiling/wall finish. I briefly touched on the bolt-on method in this post from 2017, and again in this more recent post. The drawback with bolting the wood directly to the metal shell is that the wood typically acts as a “thermal bridge” and conducts some amount of the heat to the exterior. This “thermal bridging” as it’s called, is an issue in any conventional wood-framed building, and is not an issue that is specific to Quonset hut homes. Thirty years ago, thermal bridging wasn’t seen as a big problem, but in more recent years the building scientists have started taking on thermal bridging as one of the problems to solve, in order to make buildings more energy efficient. So, we wanted to come up with a method that would (1) eliminate the extra hardware necessitated by the bolt-on method, and (2) eliminate or greatly reduce the thermal bridging in the assembly.
The Plywood Arch Method
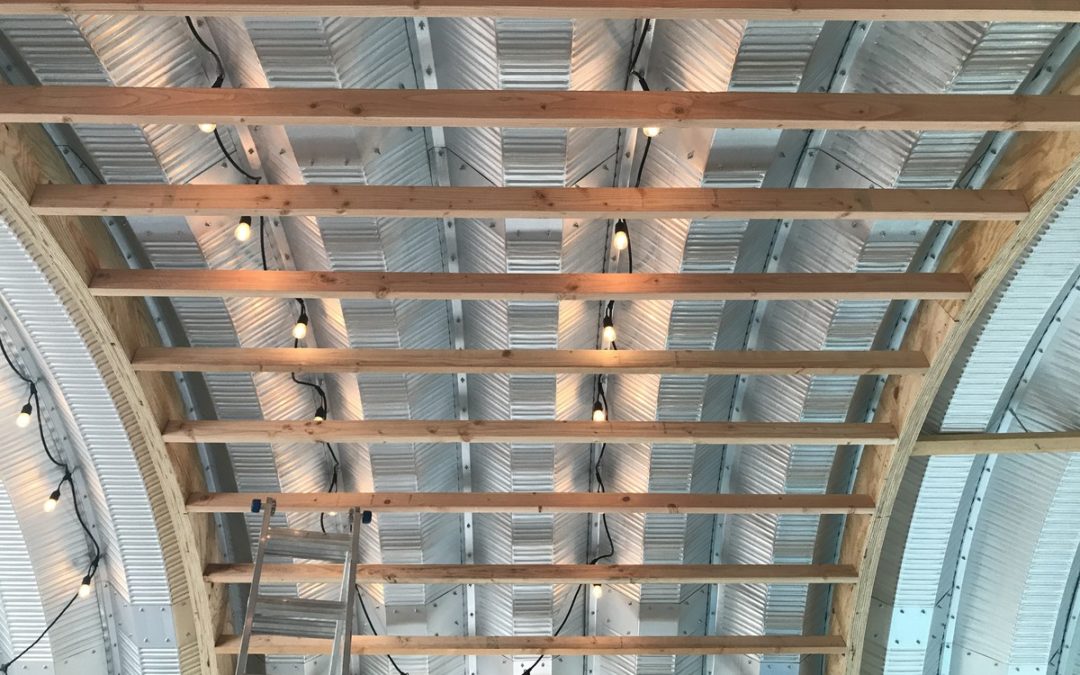
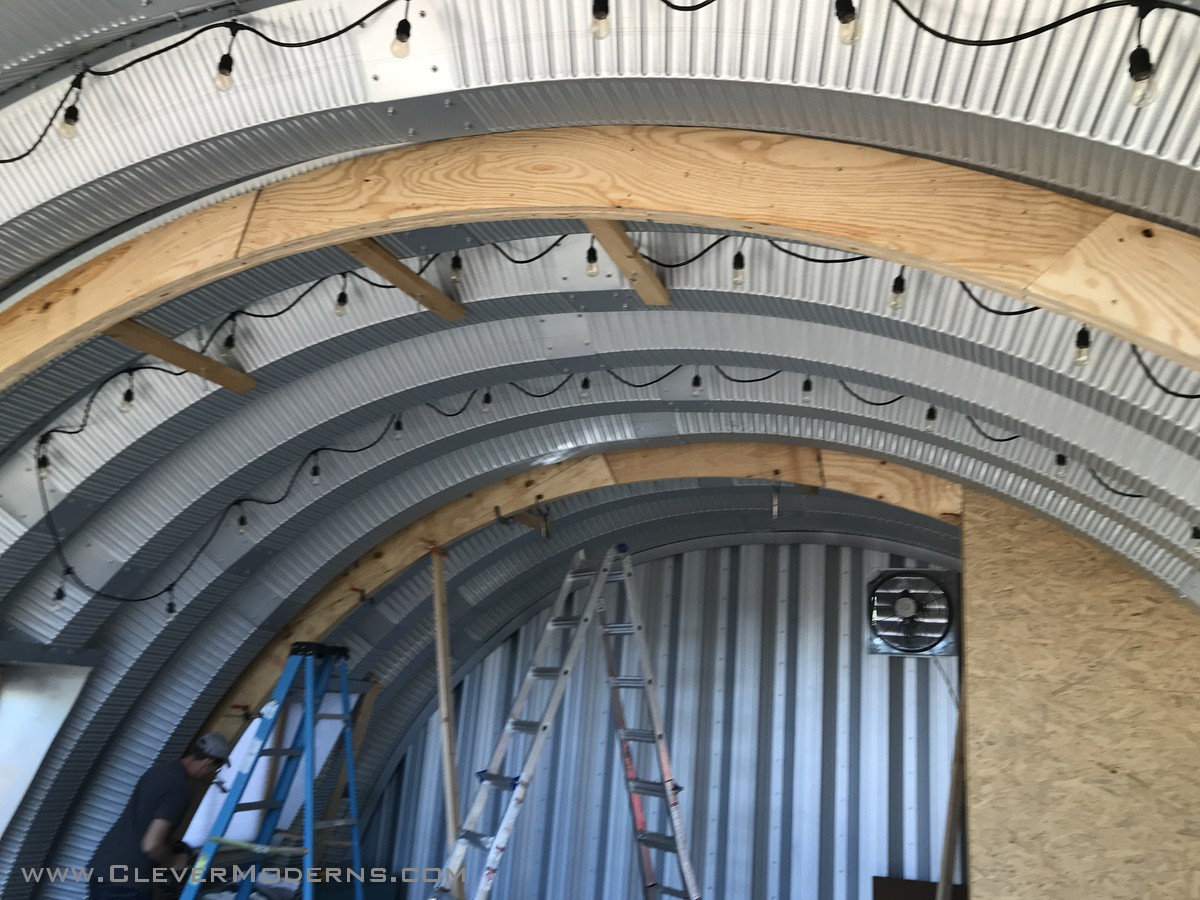
We’re calling our solution “the plywood arch method” because, as the name suggests, it employs an arch we built out of plywood to support the ceiling framing. By eliminating the bolts, coupling nuts, etc., and hanging the ceiling joists off of the arch(es) and end walls, we could put the joists a few inches away from the metal instead of touching it. Now when we have the foam insulation sprayed in, there will be a continuous layer of insulation that is uninterrupted by the wood. Say bye-bye to thermal bridging!
How We Did It
Let’s go through how we did it, step by step. As always, I feel compelled to note that this is just a generalized description of what we did. Every project is different and unique, and what worked for us shouldn’t be taken as a recommendation as to what will automatically work for you. This project is a work-in-progress and everything depicted in this photo essay of a not-yet-complete structure may not meet code. Your mileage may vary; do your own due diligence and hire a local expert familiar with your local conditions and building codes when in doubt.
So let’s get on with it already! First we used a tape measure to find the radius we needed, which we drew on a sheet of plywood. The depth of the arch was about 9 1/2″. We marked the edges, and then drew the arcs.
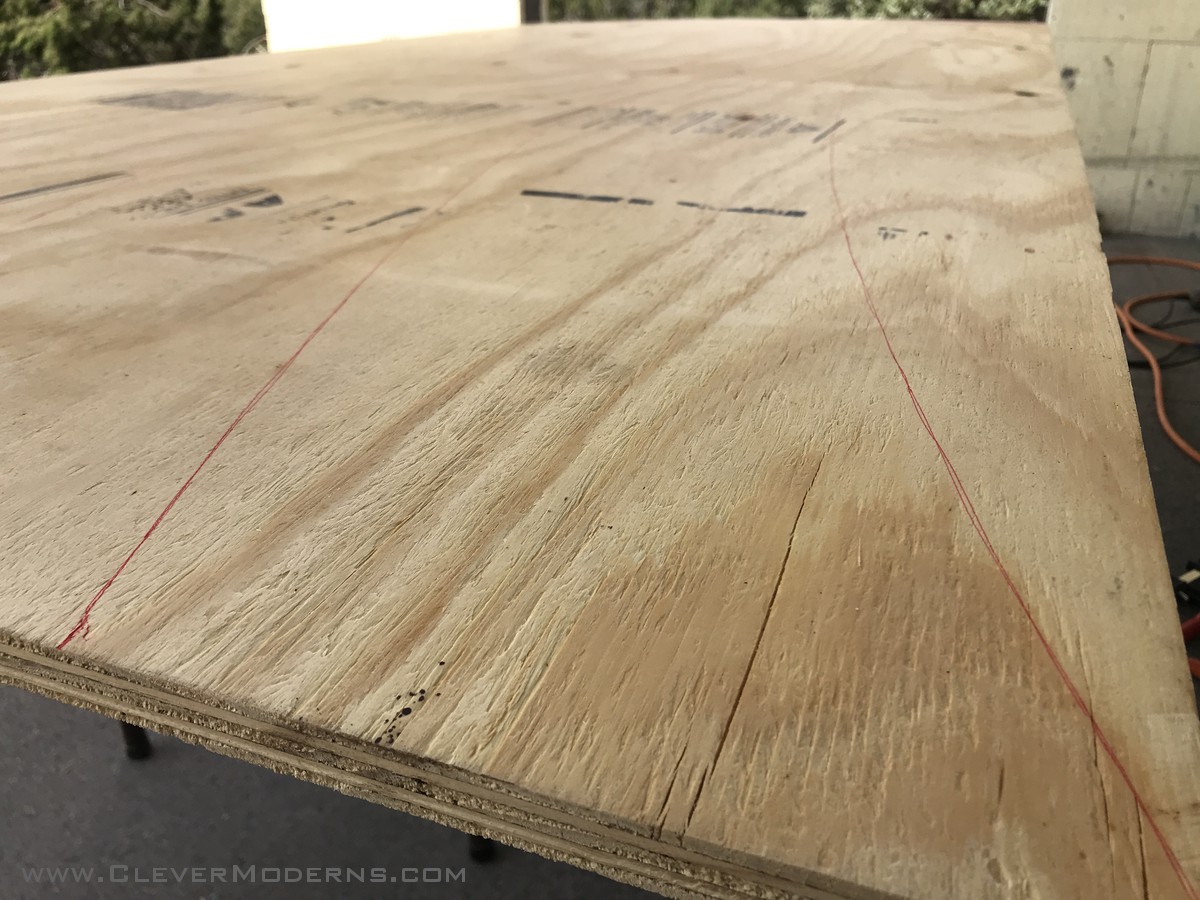
Then we cut them with a handheld jigsaw.

We determined that our arch thickness would be 4 layers of 3/4″ plywood, and that we would build them up in halves, two layers at a time, with a section overlapping at the top where the two halves could be glued and screwed together. This is definitely easier to explain with photos! See below.
Here we have two layers forming approximately half of an arch, placed so that the joints are staggered, and at the far end it’s only one layer. If you built another one exactly like this, and flipped it over on top of this one so the single layer areas overlapped, you would have one full arch, two layers thick. Then do that whole thing all over again and you end up with one big arch, four layers thick.
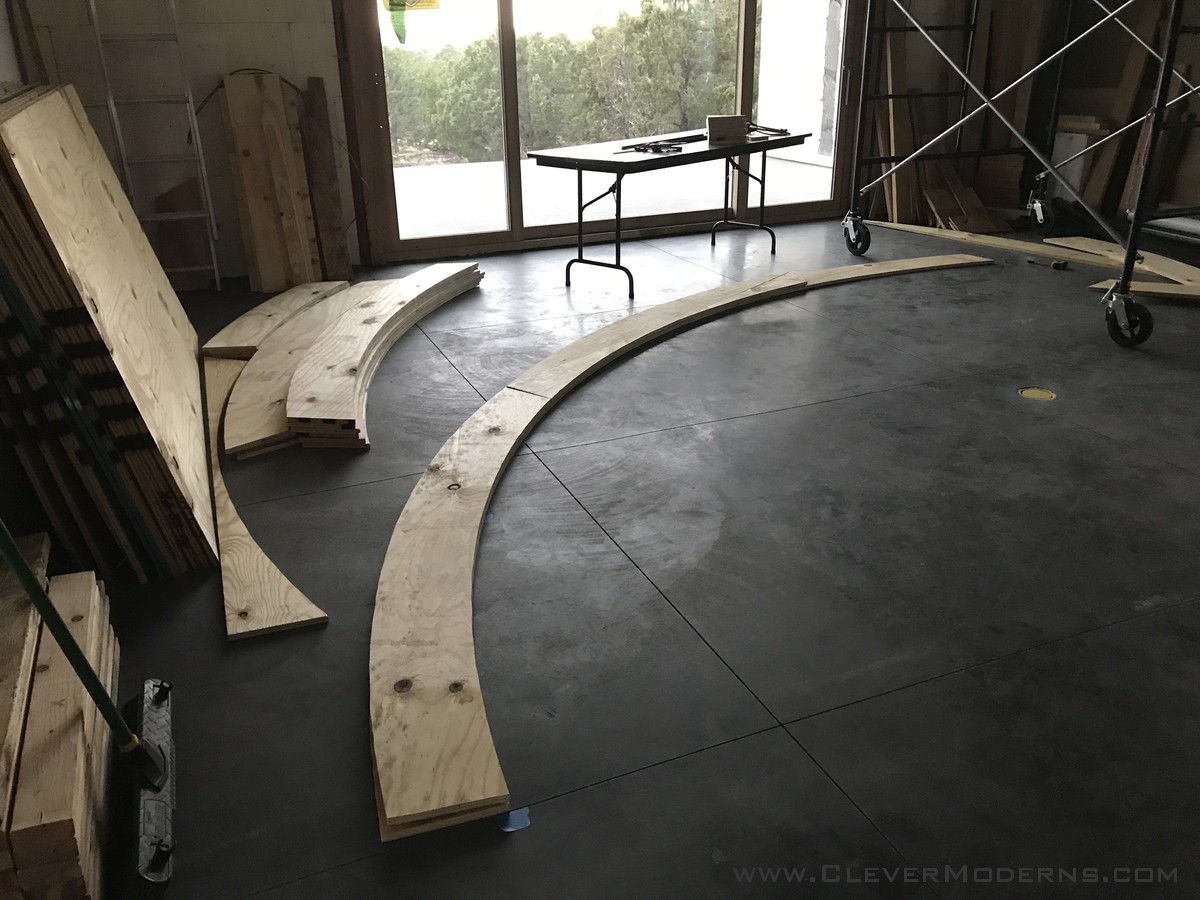
We built four of these sections like the photo above, gluing and screwing all the pieces together with generous amounts of heavy-duty Liquid Nails. Some of the plywood was a little warped and twisty, so we got everything heavy we could find and weighted them all down overnight.
Installing the Arches
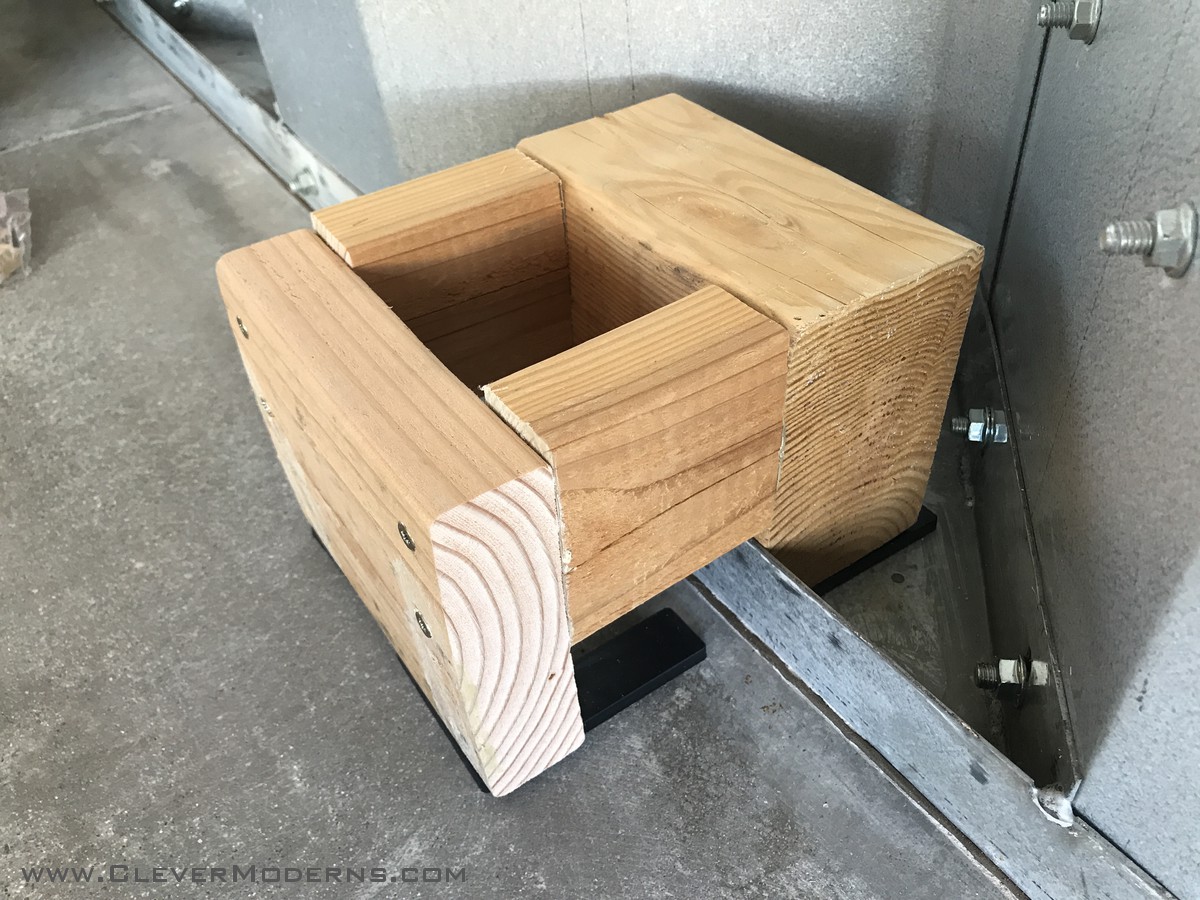
At each end of the arch we built a little wooden base, which was supported on 1/4″ shims in lieu of using pressure treated material to get it up off of the concrete.
Not shown: 1) before we set this in place, we vacuumed and wiped all the dust out of the base plate and coated it liberally with Flex Seal. The base plate is the weakest link in the whole assembly as far as potential for leaking. I strongly recommend sealing it up more vigorously than the manufacturers seem to think is necessary. 2) Underneath there where you can’t see it, there are a couple of holes drilled through the vertical leg of the base plate, with lag screws going into the 4×6 block.
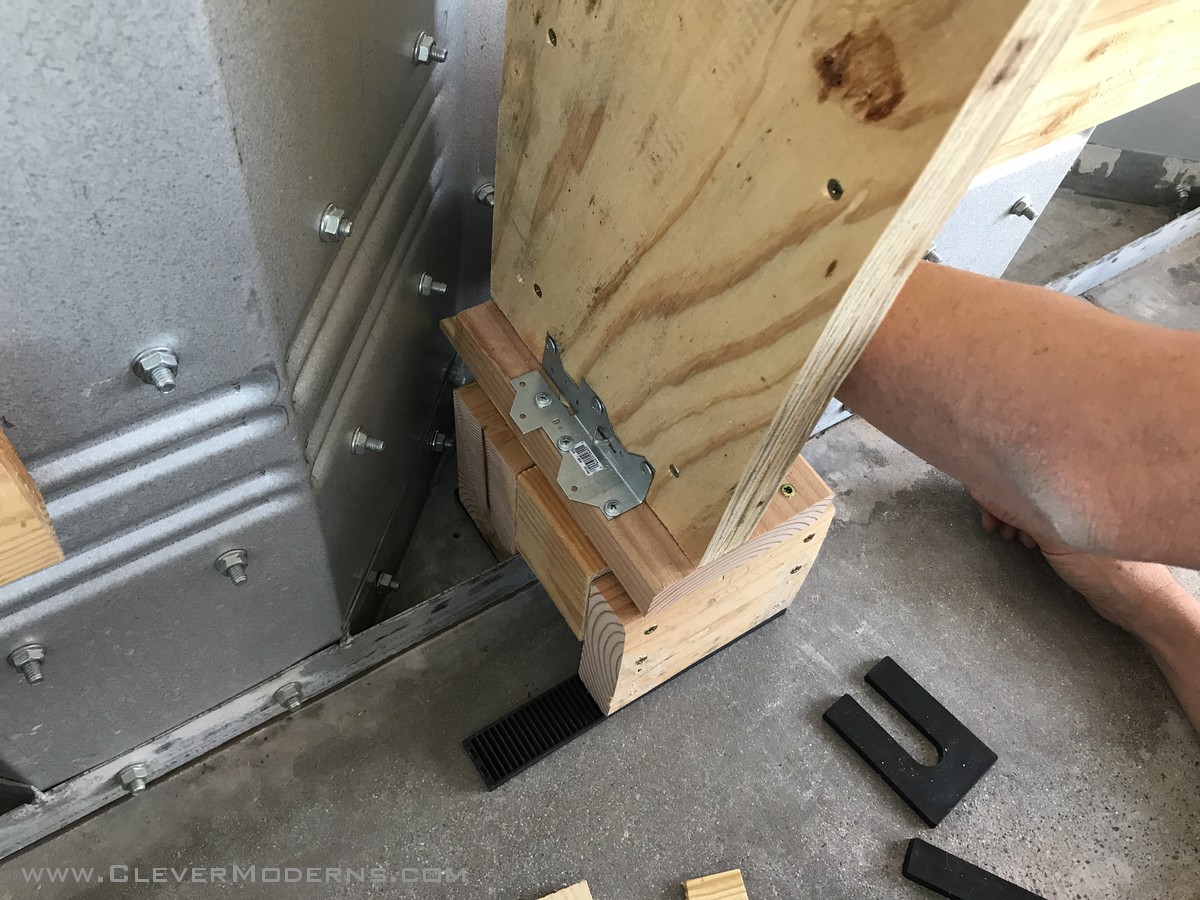
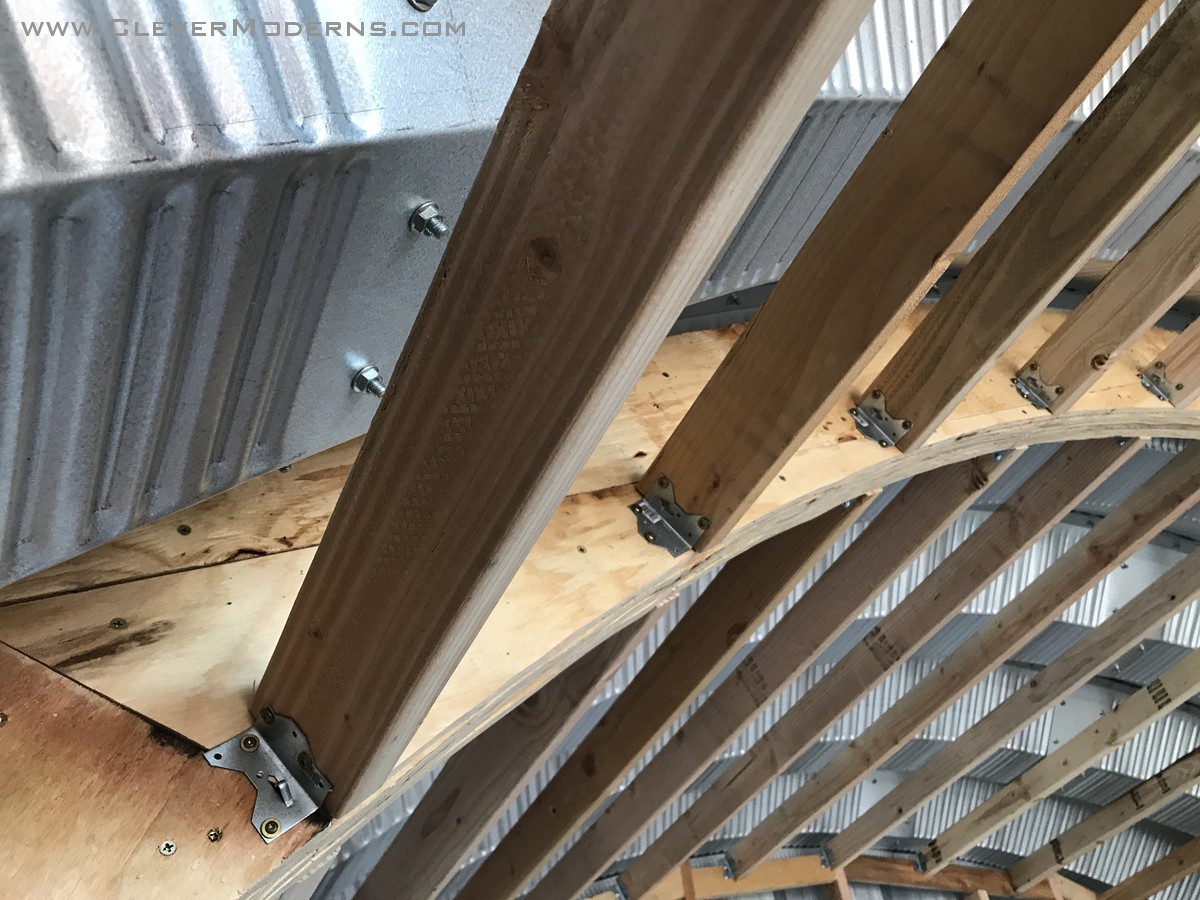
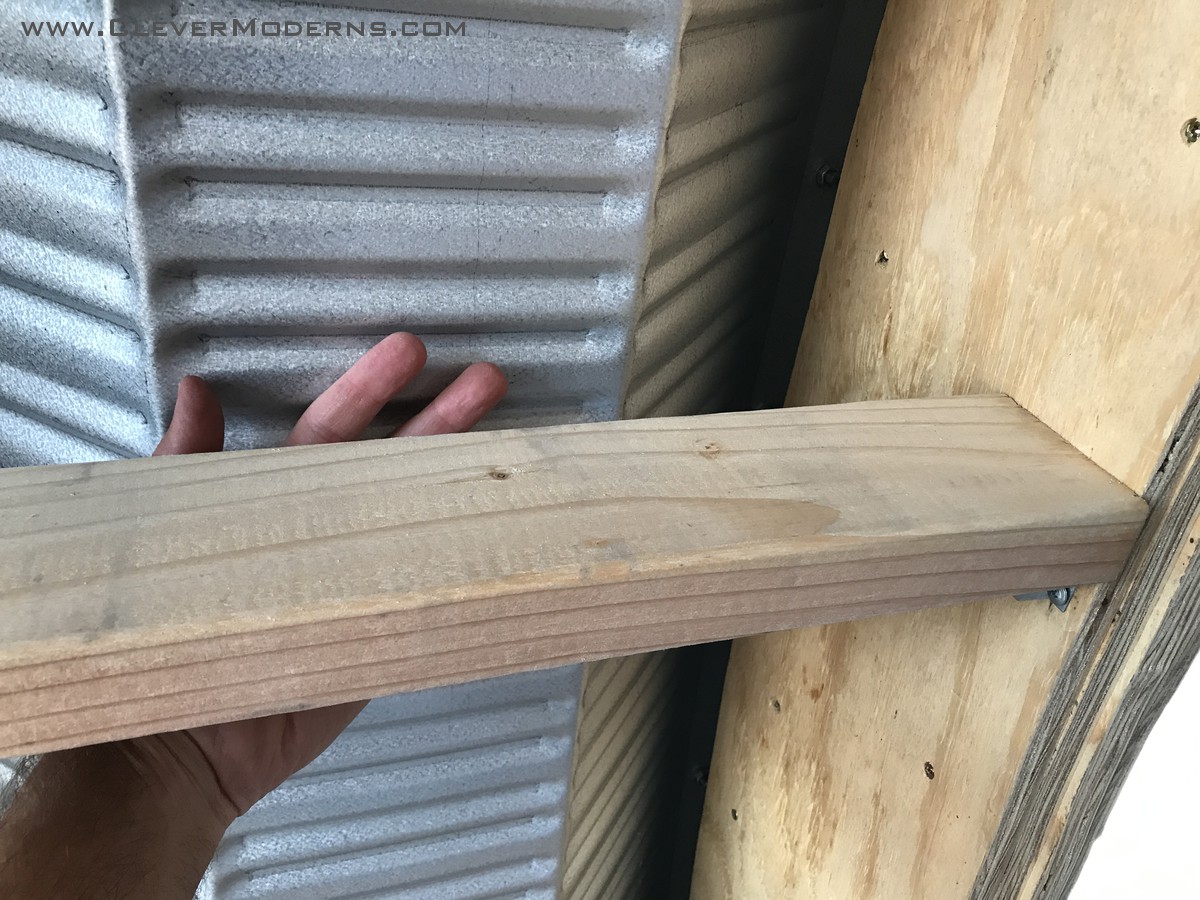
Below: We set a few 2×4’s in place as temporary supports, using the bolt-on method described earlier. We also used a 10′ 2×4 as a temporary prop underneath (visible at lower left). We just glued and clamped and screwed it all together as we went.
By the time the full four-layer arch was in place, it was really strong! Strong enough to support my 170 lbs. without any detectable deflection. A pretty encouraging sign!

Then we repeated the process to build a partial arch that is supported on one end by the corner of the bathroom walls.
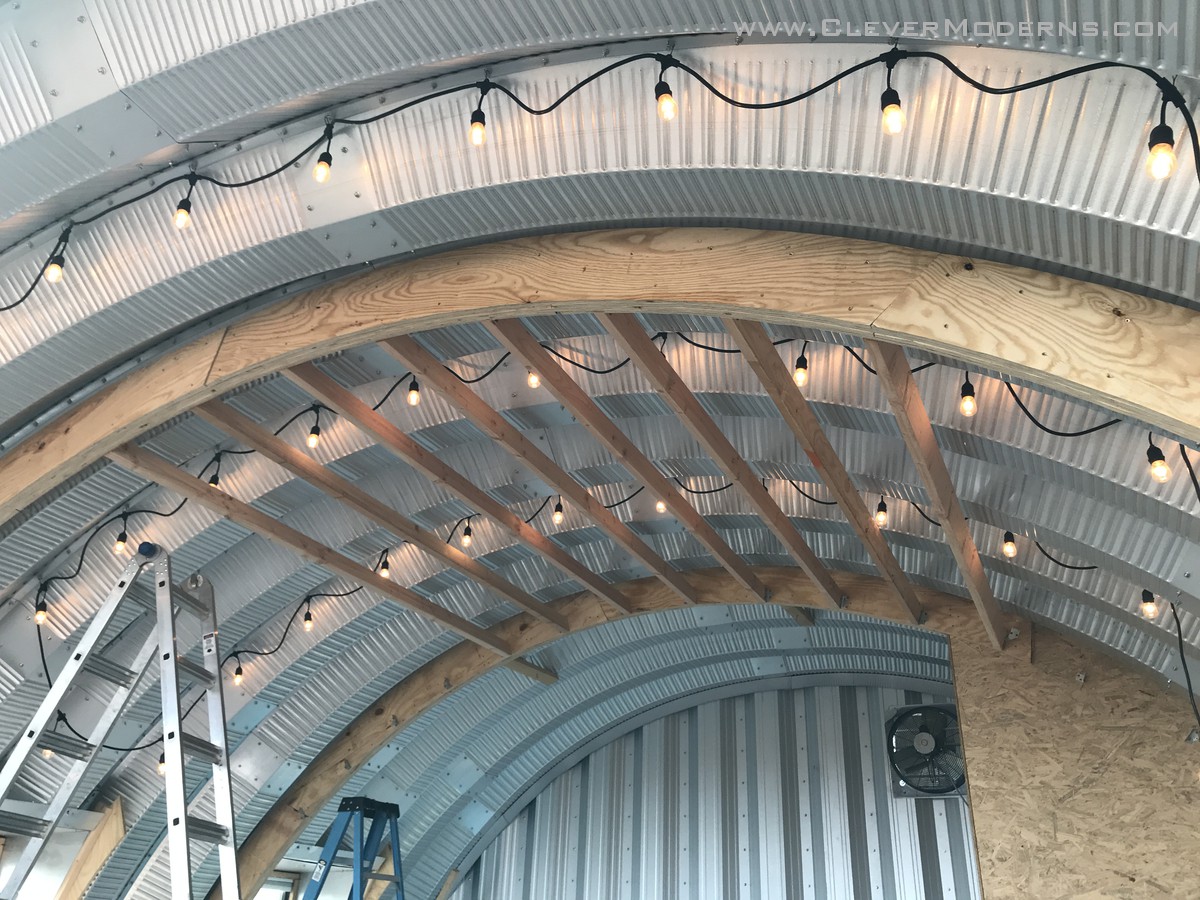
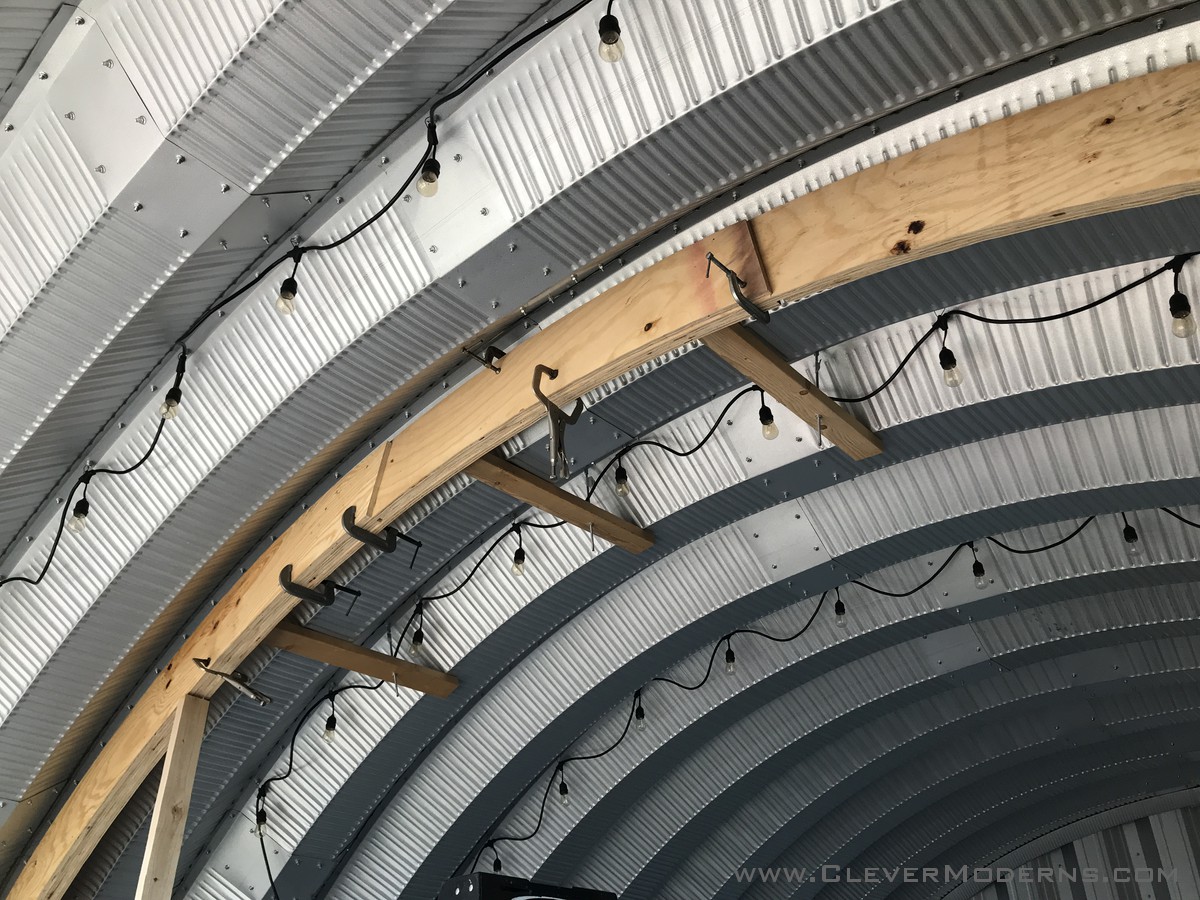
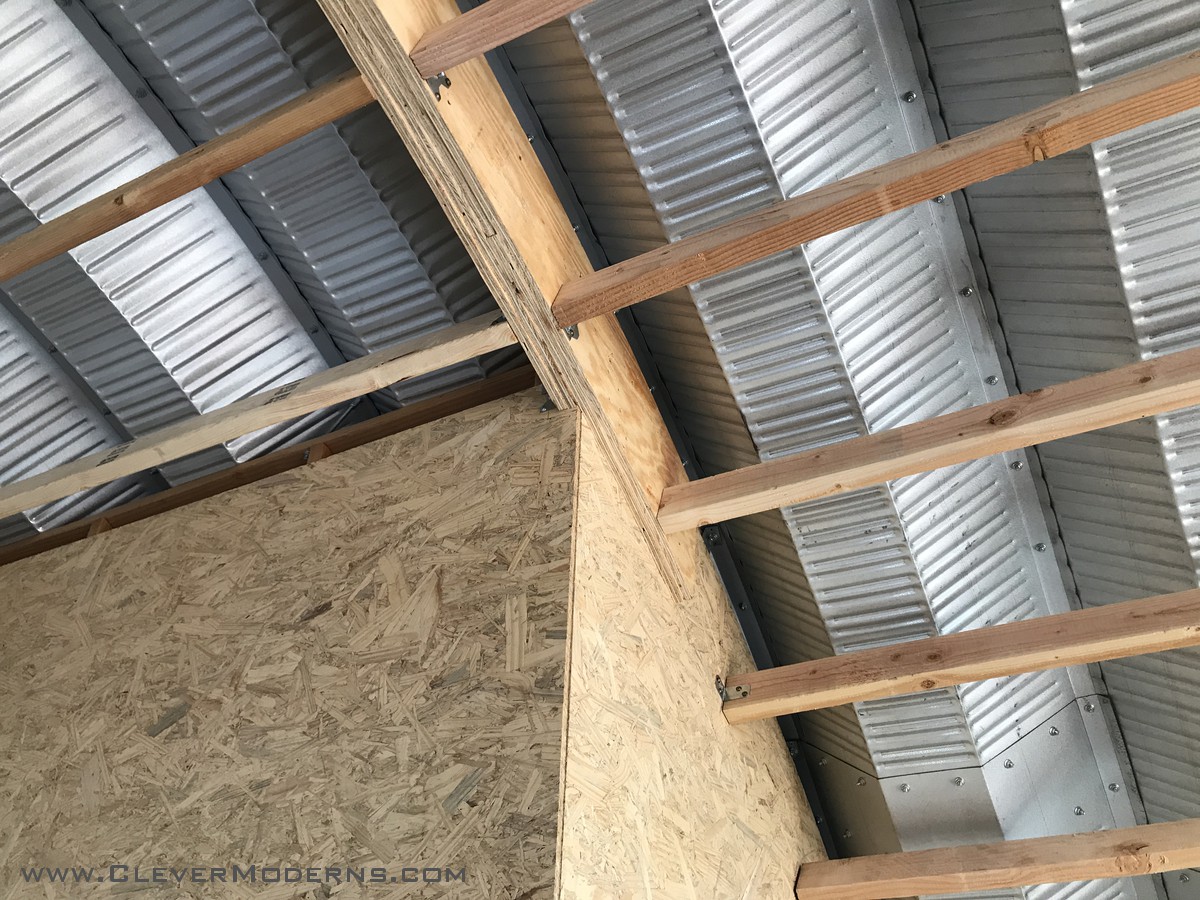
After that we filled in all the joists!
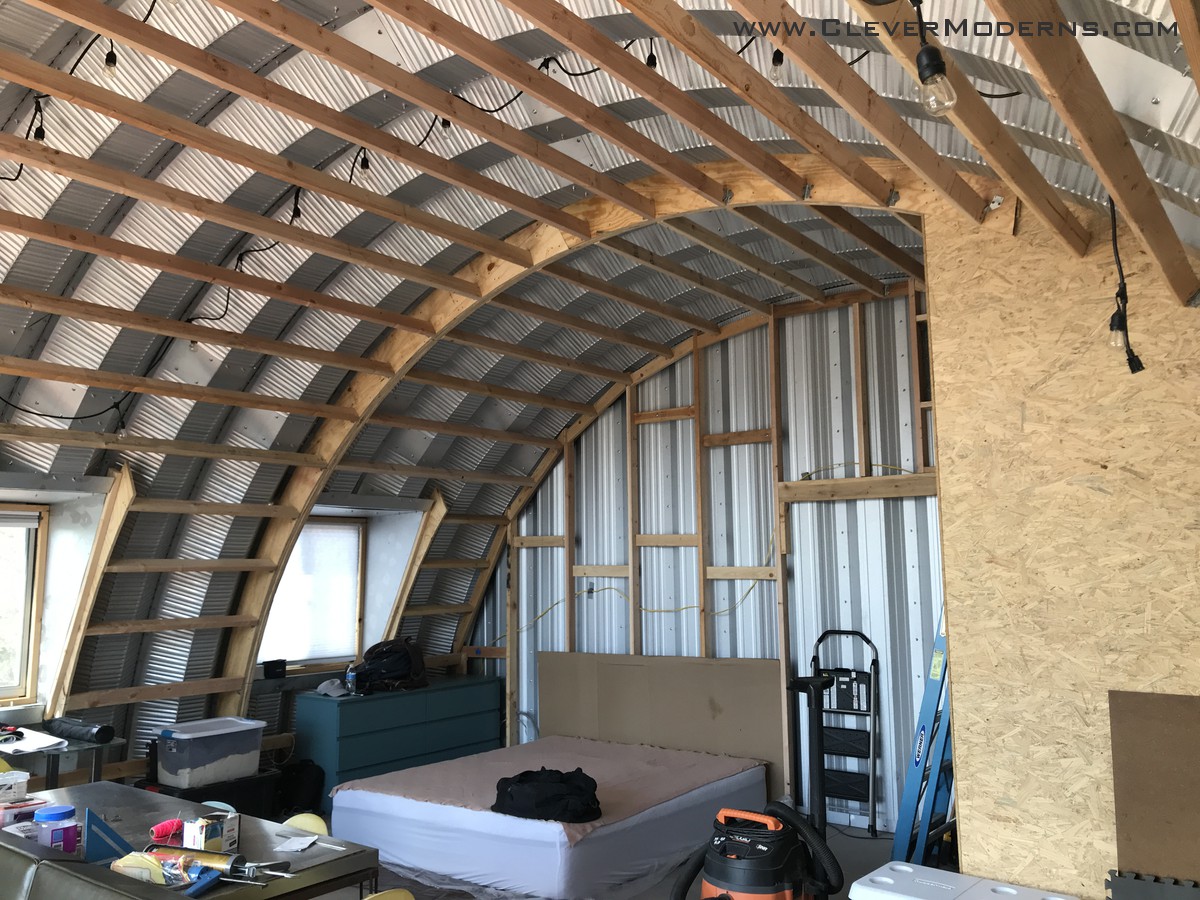
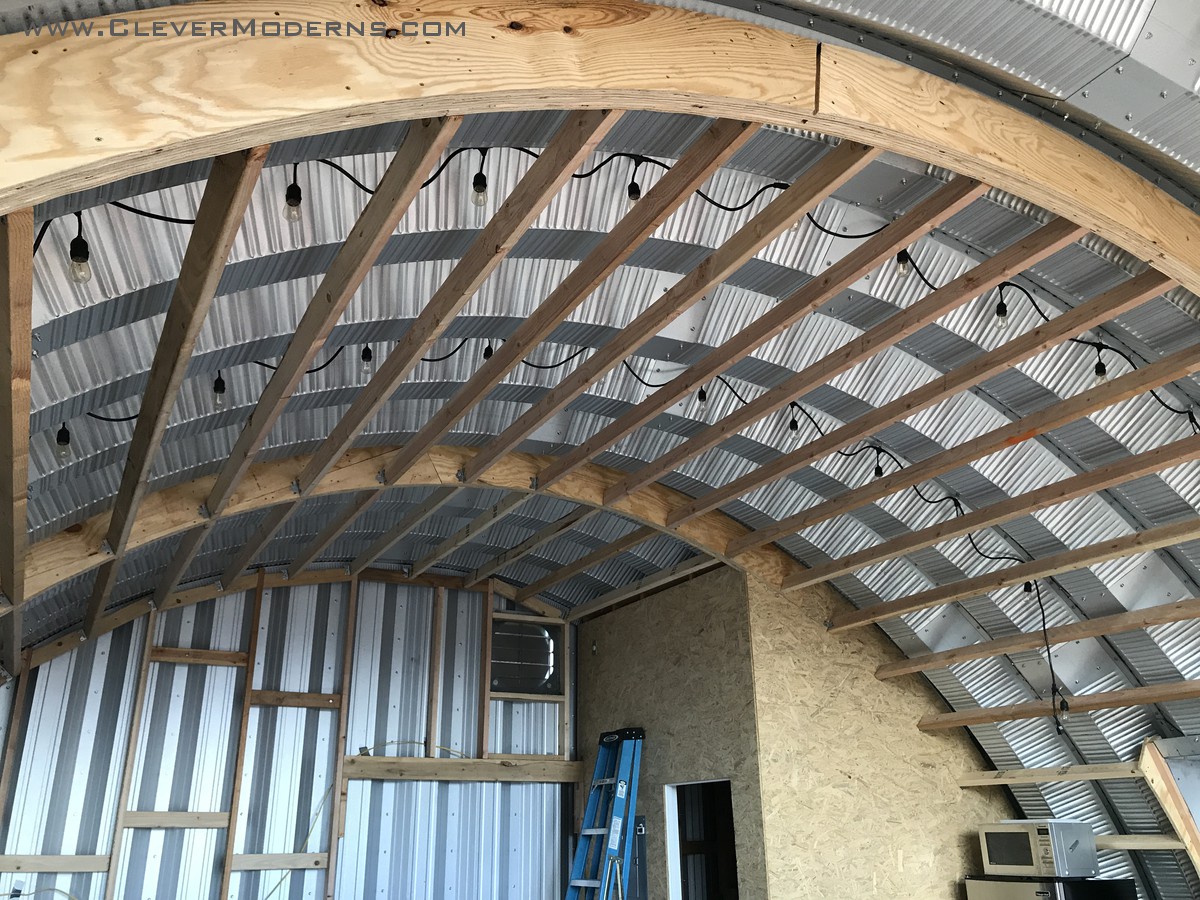
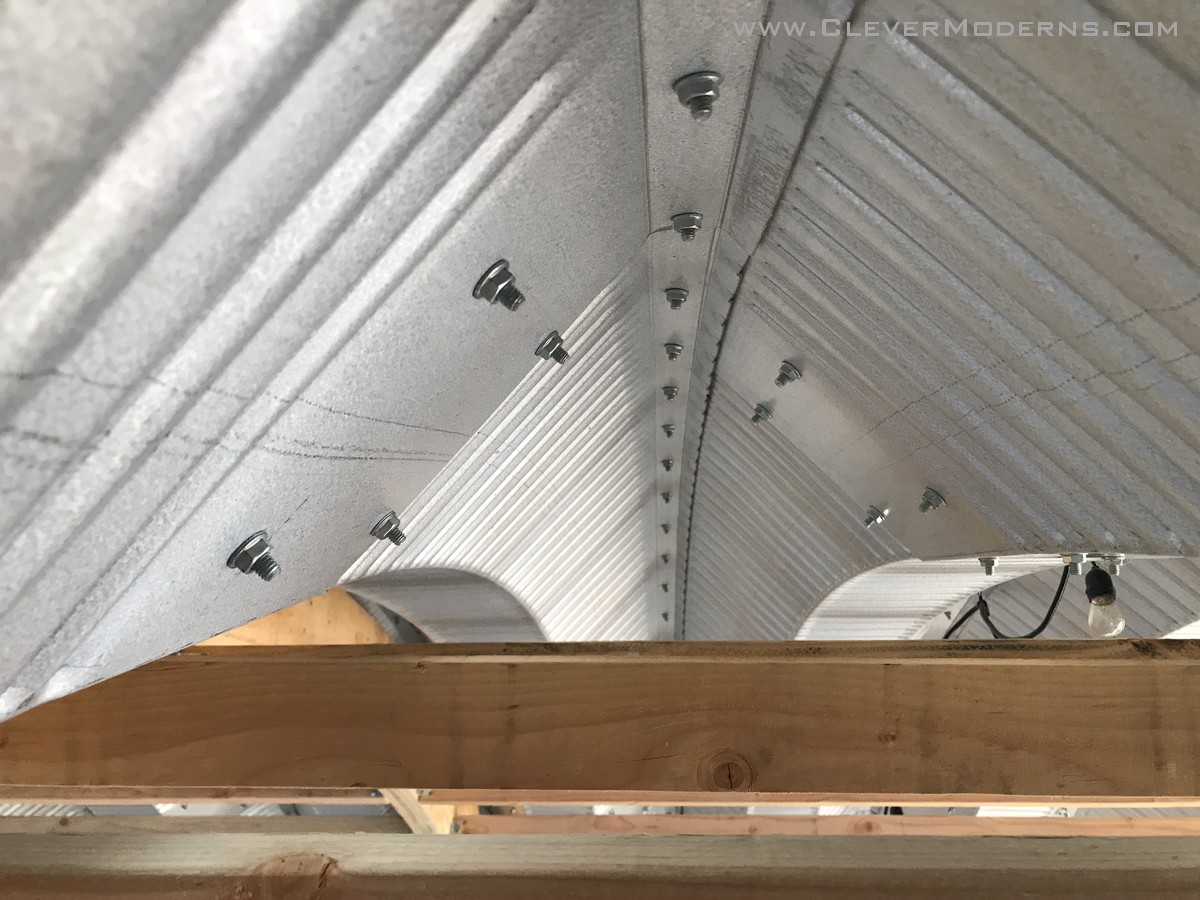
Here you can see the gap more easily, where the closed cell spray foam will fill in and engage the wood while leaving a continuous layer of insulation against the metal.
Once we have insulation we’ll be in great shape to get through the winter at high altitude, while continuing progress on the Loft House.
Curious about Quonsets? Ready to learn more about these bizarre, amazing, shiny, round, prefab structures? Drop your info below and I’ll start you off on my email tutorial series. Looking to build an inexpensive but beautiful home debt-free? Considering going off-grid? Or are you just tired of the same old same old and want something unique and beautiful? A Quonset House might be the answer for you.
Follow us on Instagram and Facebook. We also have a private Facebook group called DIY Quonset Dwellers, where we share discussion, design, and construction tips with others who are interested in building their own Quonset hut house. With over 6,000 members and counting, the Facebook group has grown into an amazing resource all of its own! Learn more and request to join the Facebook group here.
I would love to know the type and length of the threaded extensions you are using to frame the inside.
They are 5/16 threaded rods but the length varies by what you are doing with them. We bought a bunch of 12″ ones at Home Depot and cut to length as we use them.
Would you Happen to know the length of the threaded rod for framing using 2×4 or do I have to buy longer and cut down?
Since all the manufacturers dimensions vary a little bit etc there isn’t really any one size that is the right size. You just have to buy them and cut them down.
For 40 years I have lived the look of the inside of a q- hut, unfortunately once inside is framed to accommodate insulation,its ALWAYS hidden. I have contacted Steelmaster regarding a double walled hut with cc foam insulation between,no luck. Do I have to make my own or are you aware of an option ?
I discuss the nested hut-in-a-hut concept in my FAQ’s under “Can you nest two huts, one inside the other?” Click on FAQ on the top menu bar and look for that item.
Great job. How did you get the correct arc for the plywood arches?
We laid them out on the floor and used a tape measure to draw the radius.
Hello Earl
Thank you for all the great ideas and information. I have a lot and a 30 x 45’ Q model building in storage. I want to restart my project again after lumber prices have settled down. Now I need an architect to design construction drawings. Do you still design or shall look around where I live in northern Ohio. 🙏👍
I’m a little fuzzy on how you used a tape measure to find the radius you needed, which you then drew on a sheet of plywood.
Lucas, Worst case, for the width of the arch, make a mark on your floor at fixed intervals. Using a weighted string, hang the string down to your mark. When it stops moving, it will be plumb (straight up/down). Measure the string and you have your distance to ground. With enough measurements, you have a radius. If a second person helps you, a scrap board or cardboard can just have the marks written on them.
Your plans should also have something similar drawn on them, usually on the first page.
Quonset hut is half a circle, say it’s 30′ wide at the base.
Radius is half of that measurement, 15 feet.
Lay your plywood out, hook a tape measure to a point 14.5′ away.
Move the plywood to get as many templates as possible out of a single sheet and trace the 14.5′ mark with a pencil as you swing it around.
Then minus the height of the header you want and mark the bottom of your template.
Great summary, although it turns out many Q-model huts are less than the full radius in height, so it can be tricky.
I’m glad I stumbled across your posts. I think this is the best was I have seen to date on framing out and insulting a q hut. I am planning on building a winter home in AZ soon. I want to get away from snow so az is the logical place to go, and depending on where you are, building codes allow a q hut for living quarters.
Thanks for your posts. Great job.