Every year I have wanted to do this since I first started to become obsessed with Quonset huts circa 2014. In 2017 I attempted it but the arch collapsed on me. Then for three years, the Christmas season came and went and I never made time to try, try again.
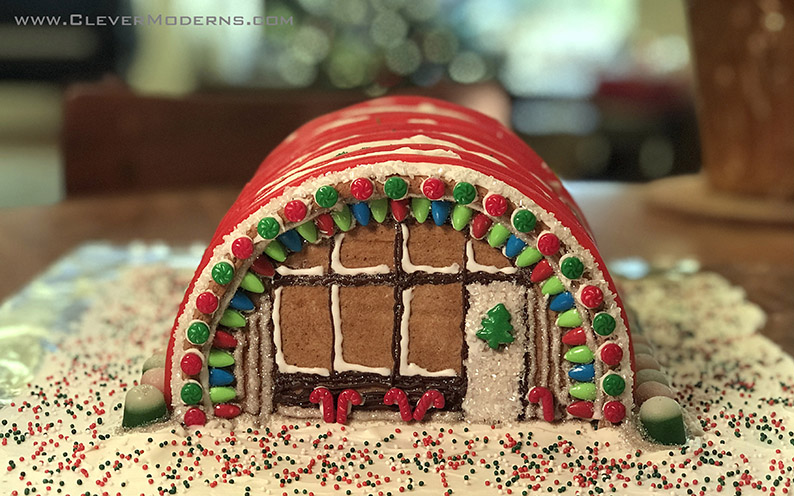
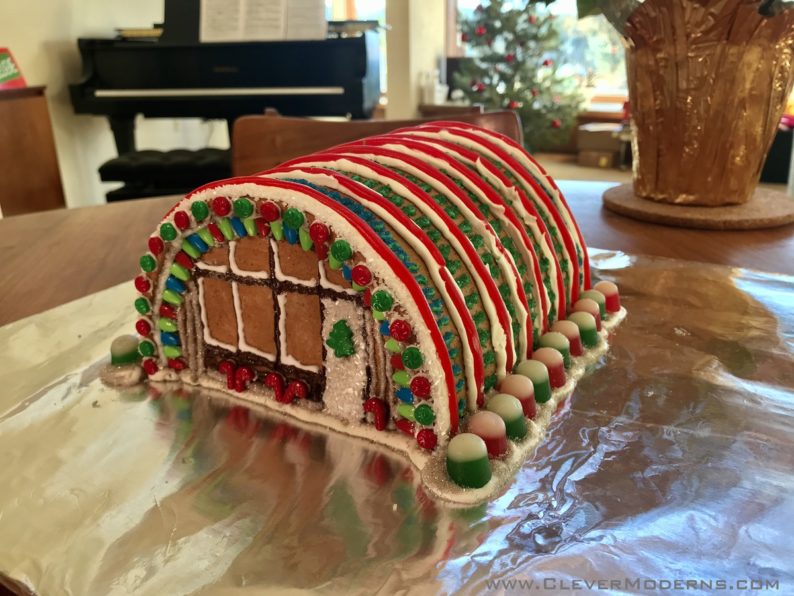
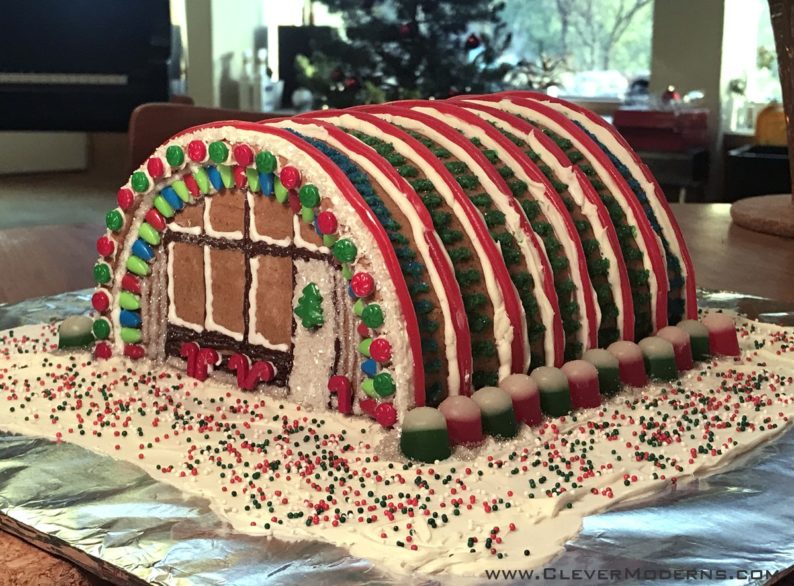
Well it looks like 2021 was the year! Behold, the Quonset Gingerbread Hut!

If you’re asking, “How on earth did he do that? And how can I make one?!?!” you’ve come to the right place. Read on for the full story & tutorial on how to make your very own Quonset Gingerbread Hut!
Long story short, the secret is to bake the arch over a metal form in the oven so it keeps its shape. After my arch collapsed unsupported in the oven four years ago, I went out and got a #10 can of something — it was probably beans or corn or something, I don’t even remember anymore — just for the can. And that can and my decorating sprinkles have been sitting sadly in the cupboard ever since.
But earlier this fall, I decided this was the year I would finally give it a go, one more time. My effort has met with success!!!
Gingerbread Hut Overview
Here’s the short version of how I got this to all come together. Each step will be expanded below in more detail, with pics.
- Assemble your equipment and make up a batch of “construction grade” gingerbread dough.
- Bake your arch and end walls.
- Once cool, glue them up (and by “glue” I mean “stick together with icing”).
- Decorate your end walls.
- Glue the hut to the base. (Steps 4 & 5 can be switched if you want – this is just how I did it.)
- Decorate the arch surface.
- Decorate the base, add any landscaping and decorative finishing touches.
- Enjoy and admire your creation!
- Share it on social with the hashtags #gingerbreadhut and #quonsethut, and if you really want to be my hero, tag me @quonsethouse in your post!
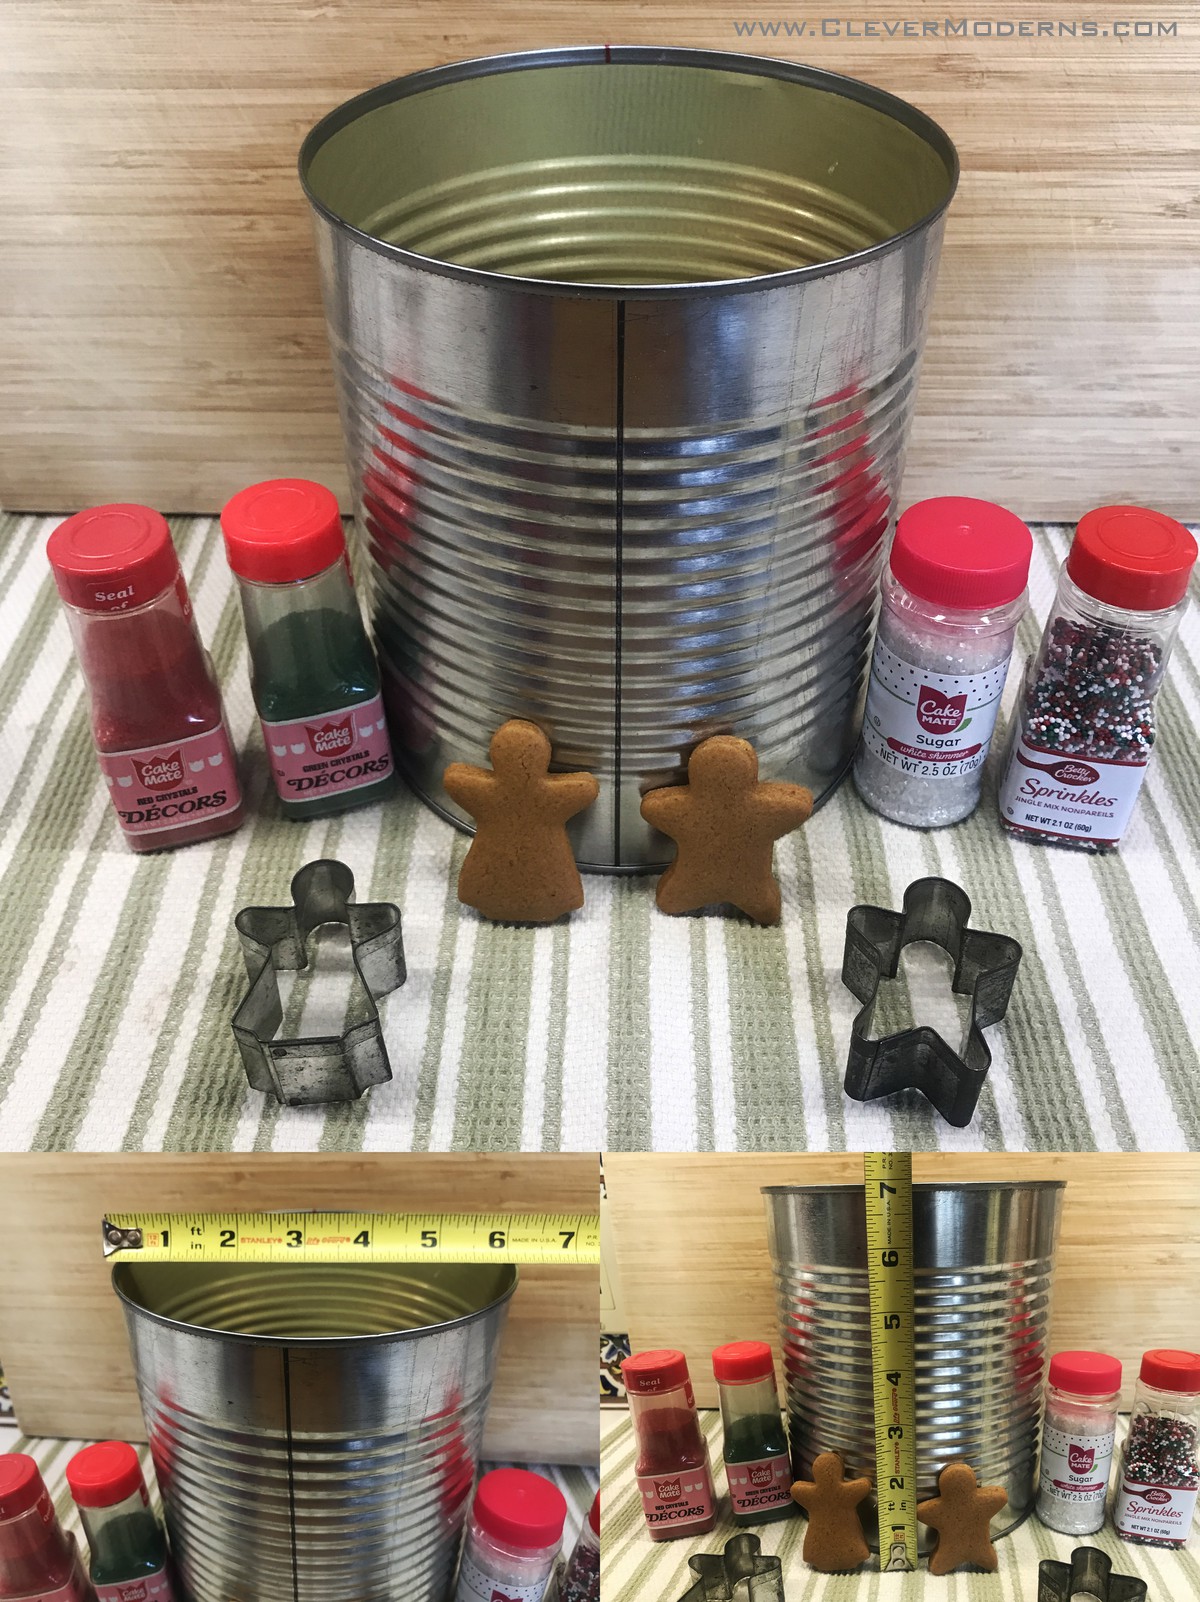
1. Assemble your equipment and make up a batch of dough.
- You’ll need a #10 can, parchment paper, and the usual baking stuff needed to make a regular gingerbread house. The #10 can (those big food service sized ones) is the best thing I have been able to come up with as a baking form for the arch, but it’s really just a suggestion. This size can is about 6″ in diameter and about 7″ tall, which is conveniently big enough to make a nice hut, and manageable in the oven.
When we lived in Southern California it was easy to find these cans at the foodservice supply chain Smart & Final. Where we live now in Arizona, I recently saw this size can of hominy at WalMart, and we also saw Costco selling both stewed tomatoes and tomato sauce in this size can.
- Take the label off your can, empty it out, and cut off the bottom like you did the top, to make a tube. You could optionally cut it in half lengthwise with tin snips if you have a sturdy pair, but I didn’t do that and I don’t think it’s essential. Save one of the round ends.
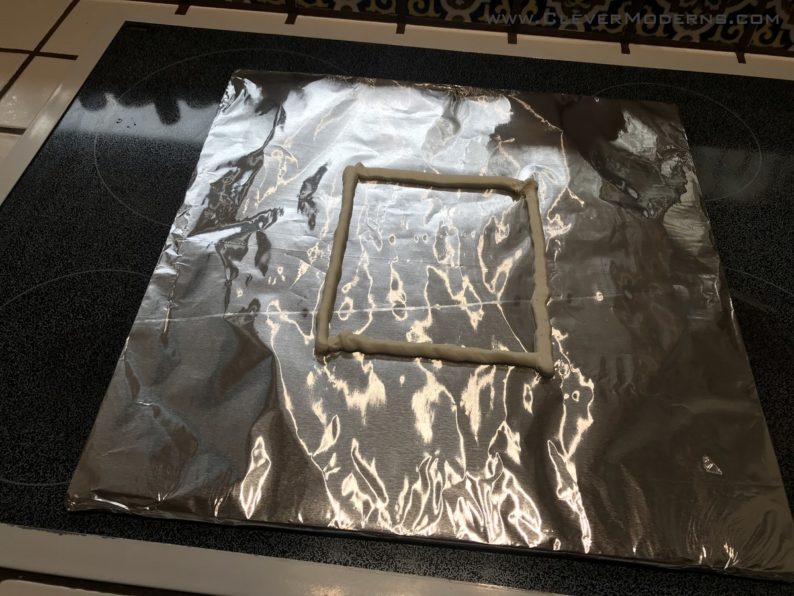
- You are also going to need some kind of base for your finished Gingerbread Hut. I used a sturdy piece of corrugated box cardboard, cut to about 16″ square, and wrapped in foil with the foil taped to it on the bottom. Easy and not a big deal!
2. Bake your arch and end walls.
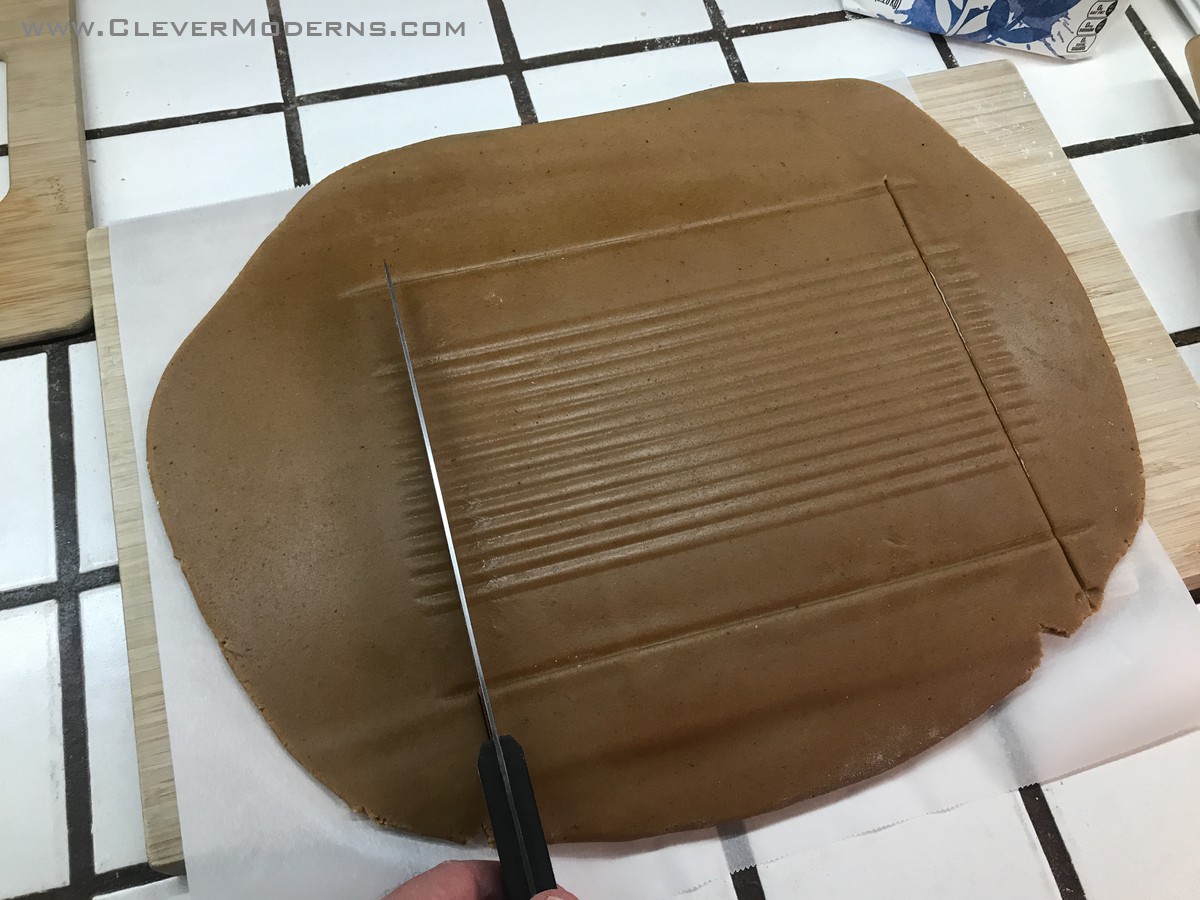
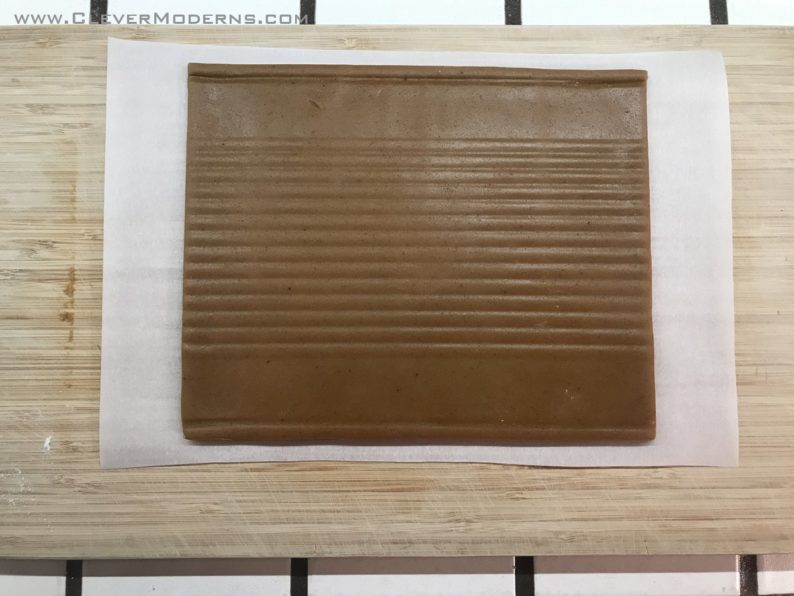
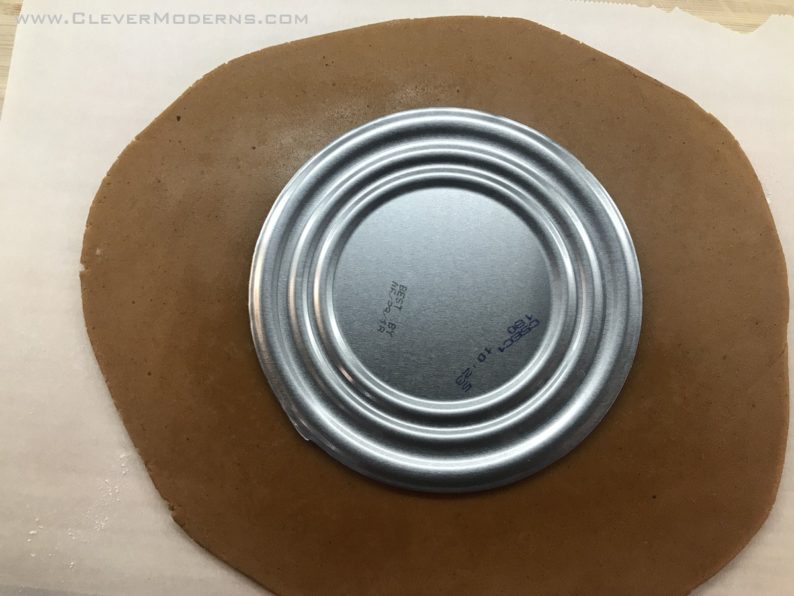
The arch requires a rolled out rectangle of dough about 7″ (the height of the can) by about 9 1/2″ (half the circumference).
- Roll out your dough on parchment paper. The parchment paper will be important for transferring your rectangle of dough onto the can.
- One way to measure the 9 1/2″ half-circumference dimension is to make two marks on opposite sides of your can and roll it across the dough (illustrated below via gif). Depending on how hard you press, this can leave the can’s indentations impressed on the dough, which can come in handy later as guides when you’re decorating. Or, if you don’t want the grooves, just measure out your rectangle with a ruler or tape measure.
- Cut by pressing straight down into the dough. Dragging the knife through the dough can distort the shape. A pizza cutter could be helpful here.
- Once you pull away the extra dough, trim your parchment paper as shown below, with about 1″ extra on the short sides, and about 1/4″ or so along the long sides.
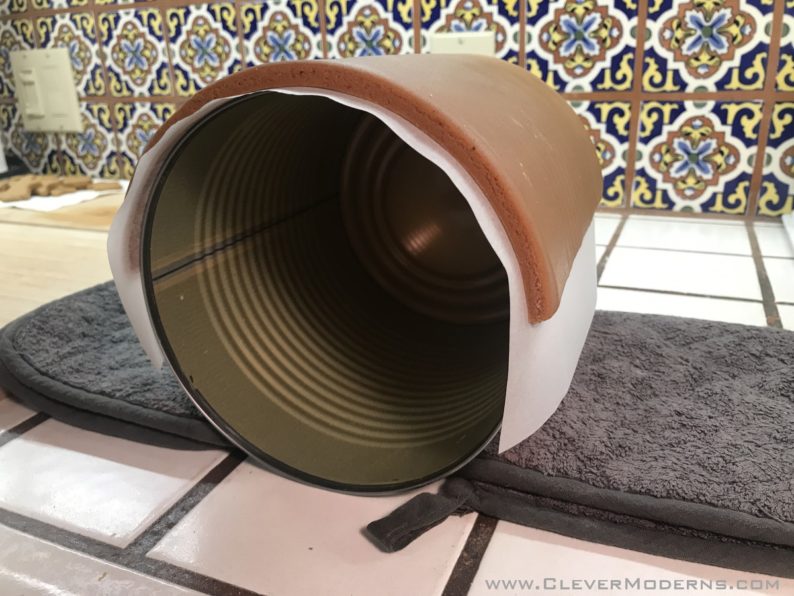
- Prop your can on the counter with something along each side to stabilize it from rolling around. I used a couple of potholders on each side (see pic below).
- Carefully lift the parchment paper with the dough and lay it over the can. This is a little easier with two sets of hands but I also managed it by myself for the second arch I made.
- Check the edges at all four corners of the slab to ensure as best you can that it’s laying squarely and evenly over the can. It’s easy for it to be rotated a little or slightly crooked. Look at it carefully straight-on from the end and make sure both sides come down evenly. You want to get it as good as you can make it, but at the same time don’t agonize over it too much. Your decorations can hide a multitude of flaws! The first arch I made developed a large crack at one end but I was able to hide it, as you’ll see later.
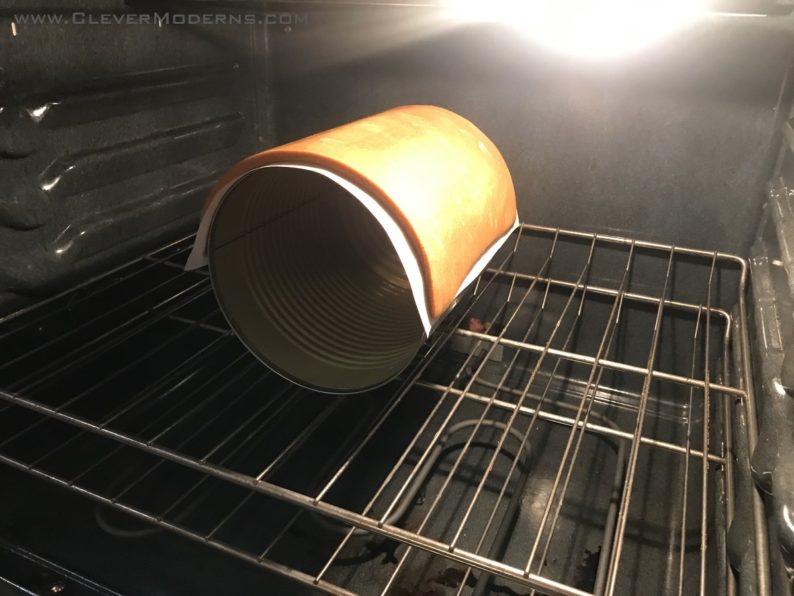
- Note that in the pics below, I hadn’t cut the bottom end off my can. The closed bottom end of the can was towards the back of my oven, and it definitely baked hotter than the front end. I haven’t tested this theory but I could easily imagine having an open tube would help keep the heat distribution more even within the oven. Also, if it looked like it was baking unevenly, you could rotate it partway through, which would be harder with the bottom closed off.
You might notice that in these pics of the arch over the can, the grooves I rolled into the slab are absent. I had a near catastrophe when I put it in the oven and had to redo things slightly. As I placed the can on the rack, I was trying to hold it and also get a picture of it. Things somehow got off balance, and suddenly before I even knew what was happening, the whole slab of dough, parchment paper attached, went sliding right off the can into a crumpled mess on the hot oven rack!
My initial impulse was that the whole thing was ruined and I would have to start all over. My second impulse, in the same split second, was that if I didn’t get that out of the oven STAT there was about to be a huge baked on mess on my oven rack. I grabbed the crumpled mess and it came out of the oven in relatively good shape!
The only meaningful problem was that it had marks seared onto it from the oven rack, but it seemed otherwise salvageable! I laid it back out on my big cutting board, laid a fresh piece of parchment paper over top of it, and sandwiched it with a second cutting board on top of the parchment paper. Holding it firmly together, I turned the whole thing over. I peeled off the original piece of parchment paper, and laid the thing back on the can for a second try. It was fine, and I couldn’t believe my luck.
Bake it for about 15 minutes and take it out to cool. You don’t want to be in a hurry to get it off the can. In fact I think the longer you can leave it over the form to cool, generally speaking, the better.
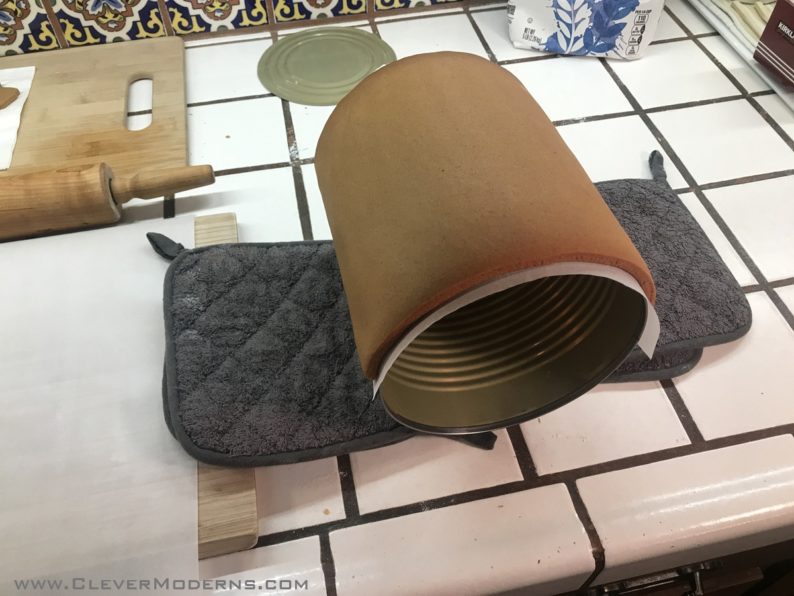
Bake the end walls.
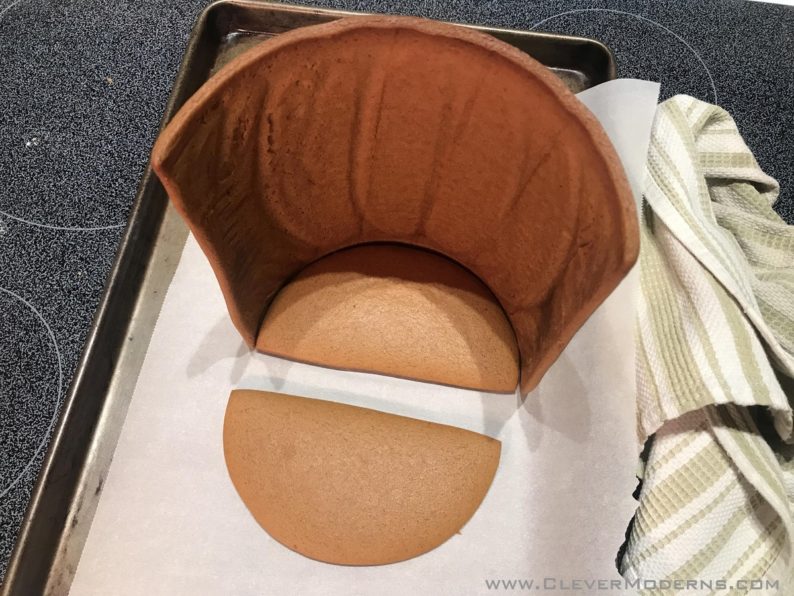
If you’re going to assemble your hut in relatively short order, I suggest using the cut off end of the can to template your end wall. Cut the circle out carefully, cut it in half, and bake the two pieces.
The other way you could do it is to let your arch cool completely, and then use it to make a light impression in the dough to get your end wall shape to cut out. The first arch I made, I had had a burst of energy for Christmas decorating over the weekend following Thanksgiving, and I baked the arch (which was the one with the crack in it). Then work deadlines and life intervened, and the thing ended up sitting around on the kitchen counter for a few weeks before I got back to the project. During that time, it dried out a bit and kind of shifted asymmetrically to one side. Not enough to notice in the finished decorated hut, but enough that a perfectly semicircular end wall from using the can as a template didn’t work very well anymore. But, I did get very nicely fitting end walls by templating them directly off the ends of the arch, and then subtracting another 1/16″ or so as I cut, to compensate for expansion during baking and allow a little room for the icing to glue it together.
So again, if your arch gets a little misshapen as it cools, don’t fret! Just work with it and I bet you’ll be fine. Cover it up later with icing and no one will be the wiser!
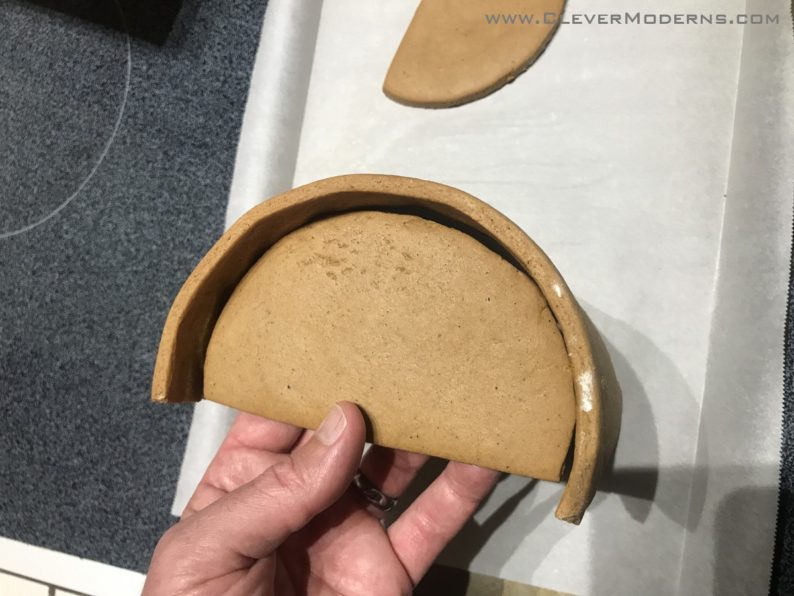
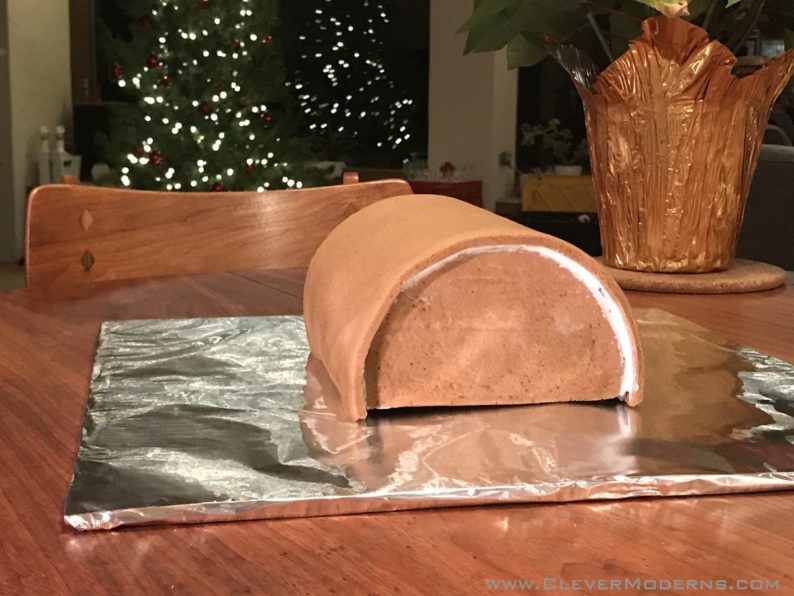
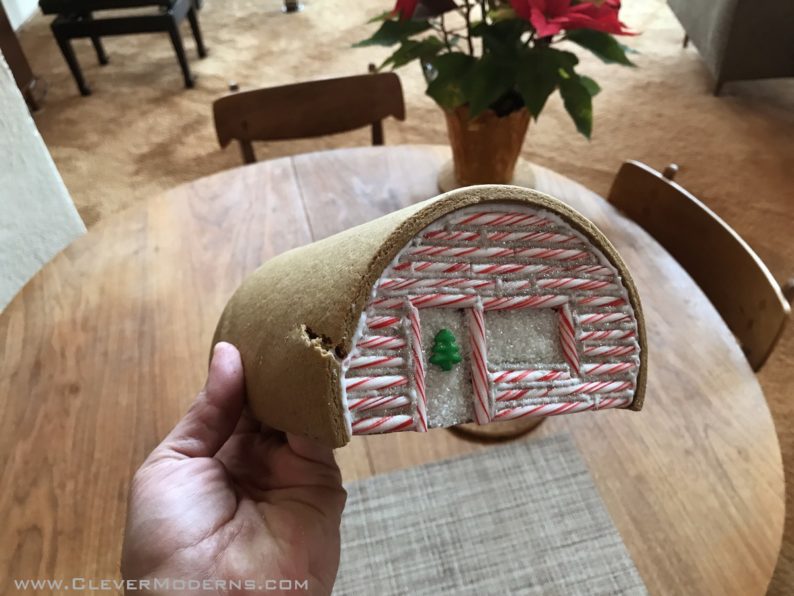
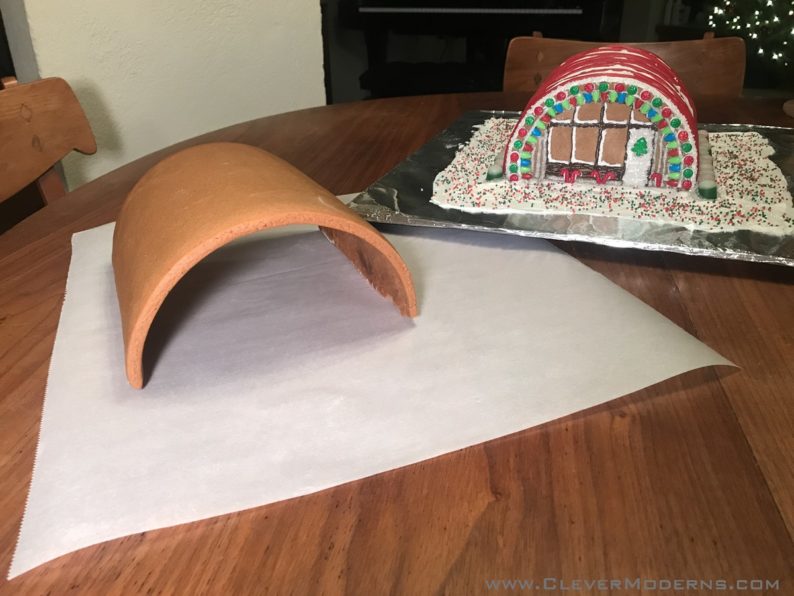
Below you can see the baked end wall pieces with the arch in a test fit-up.
3. Glue your end walls to the arch.
If you have reasonably well-fitting end wall pieces and a half decent arch at this point, then the rest should be pretty easy and fun!
- Before you glue on your walls, you might want to think a little bit about what you want to do for your end wall decoration. I set my end walls back about 1/4″ from the end of the arch and I was glad I did. I hadn’t anticipated the thickness of the candies I was going to use to decorate and wished I had set the ends back even a little further. You probably don’t want to set them flush with the end of the arch.
A lot of the online tutorials want you to make up a batch of “Royal Icing” from scratch. Feel free to go for it with your royal icing but I just used a can of cheap & easy Duncan Hines vanilla frosting and it worked fine.
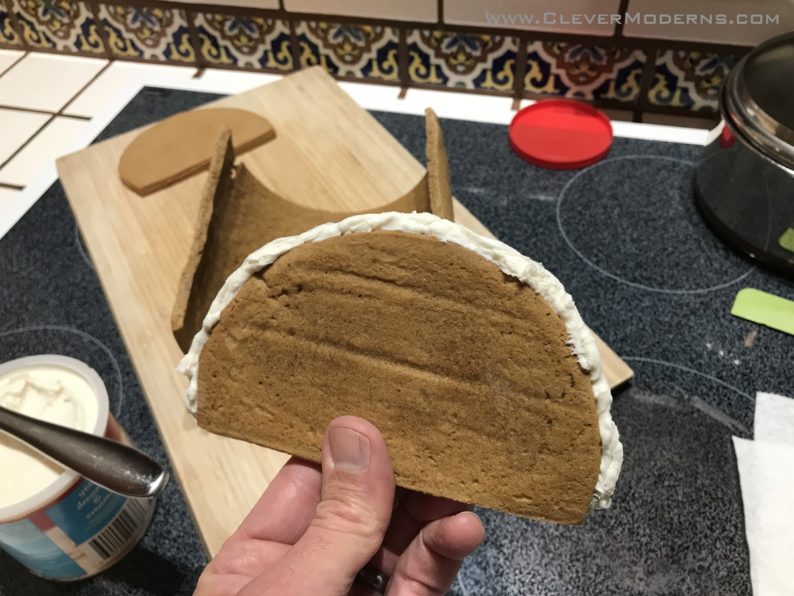
I was a little messy getting the end walls glued up, but once the icing set up I was able to scrape the excess off carefully with a knife. I even wiped over it gently with a slightly moist paper towel after scraping it and it cleaned up pretty well.
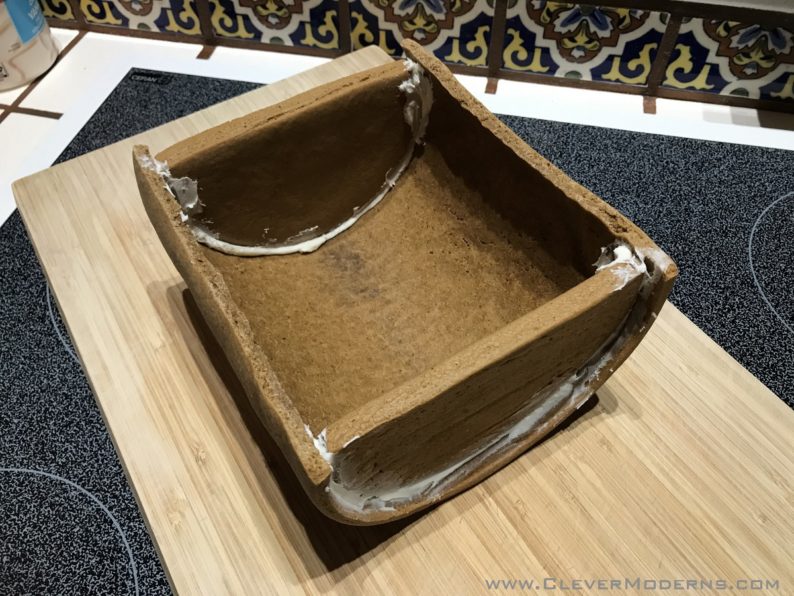
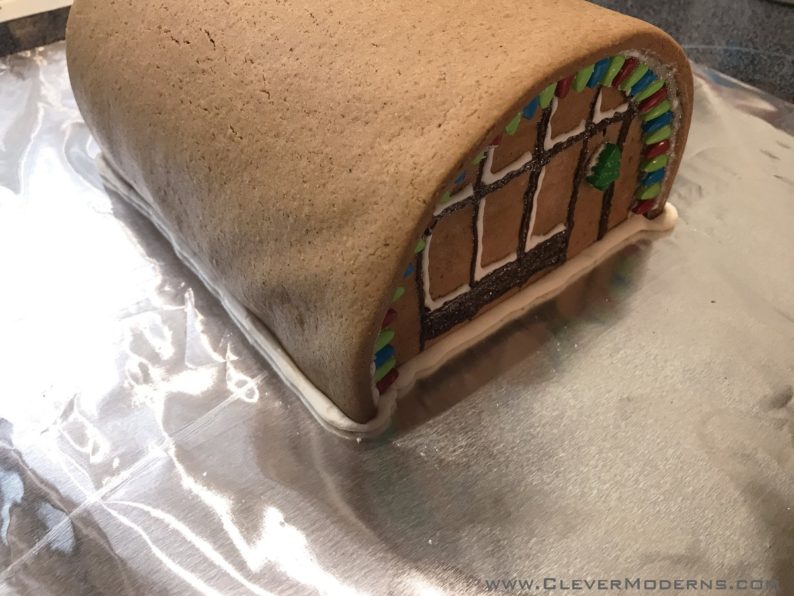
Here’s the finished shell! You can see how it doesn’t sit perfectly flat on the base – don’t worry about that! It will be easy to hide the gaps with icing and decorations.
4. Decorate your end walls.
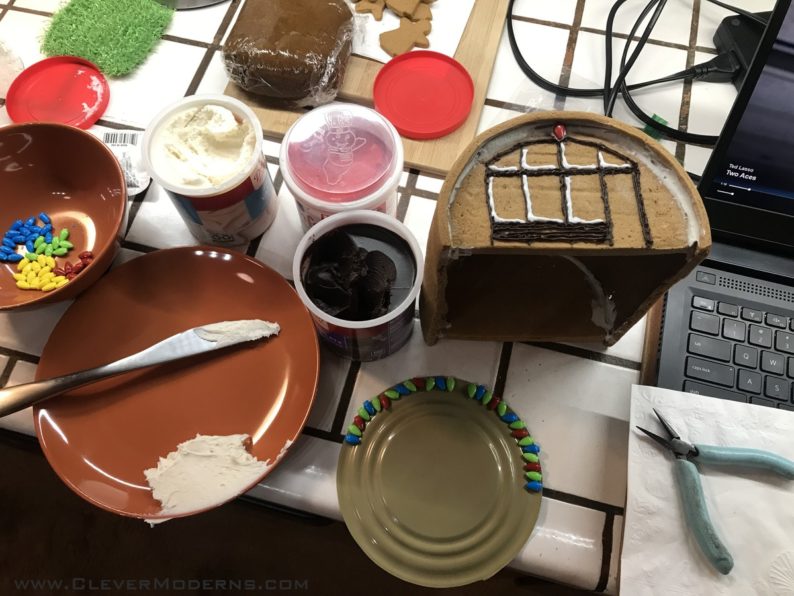
- After letting the end wall glue harden overnight, my next step was to decorate the end walls. It seemed like it would be easier to set the hut on end and work on each end wall like in the photo below, and then glue it to the board. If you want to go right to decorating the end walls without letting the end wall glue icing harden, then it might be better to glue the completed shell to your base first, and then decorate everything.
- I used a snack-sized ziplock bag with the corner cut off to pipe my icing. I drew lightly on the end walls in pencil for some things to help with my layout.
- The cut off end of the can might come in handy for laying out and spacing some of your decorative elements before you glue them on. In the pic below, I laid out my colored Christmas light candies to make sure I had enough of each color before I started gluing them on.
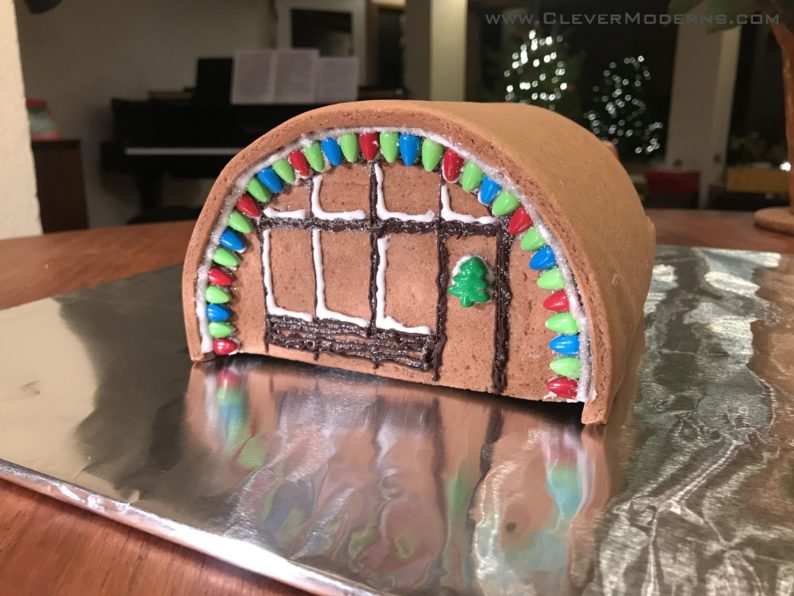
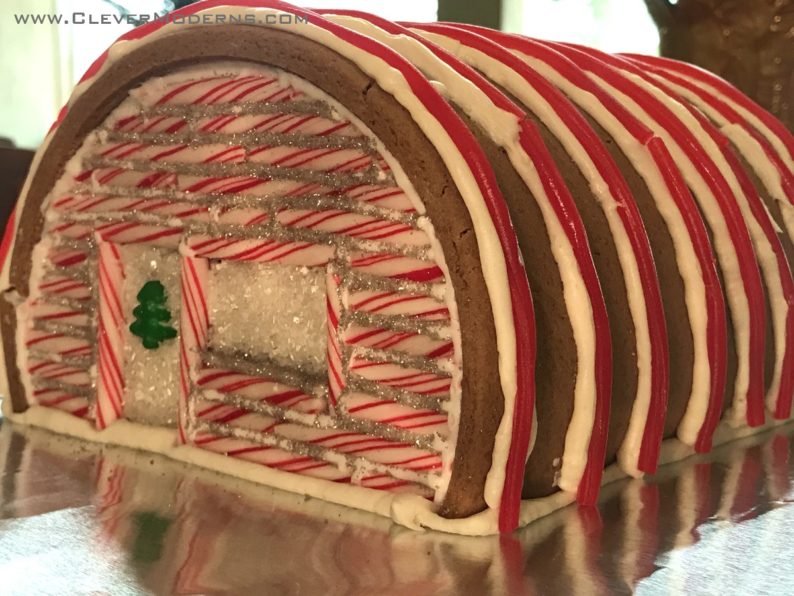
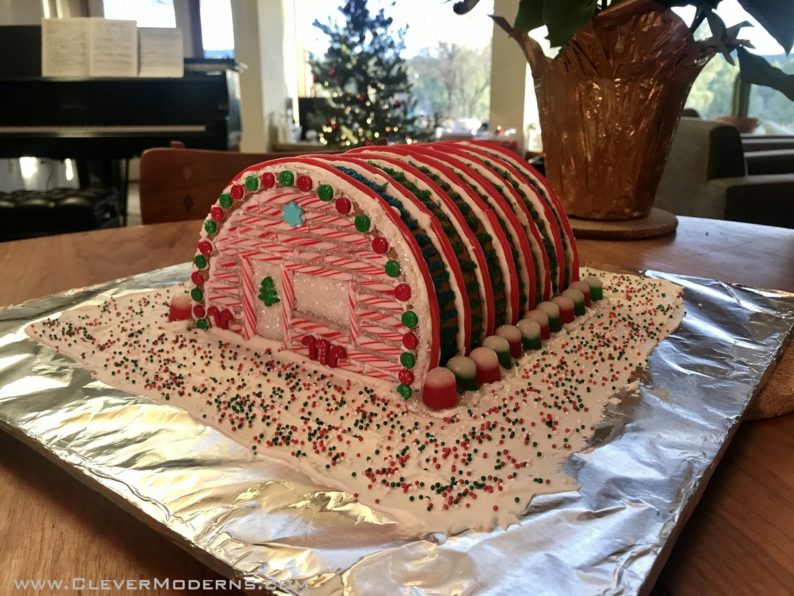
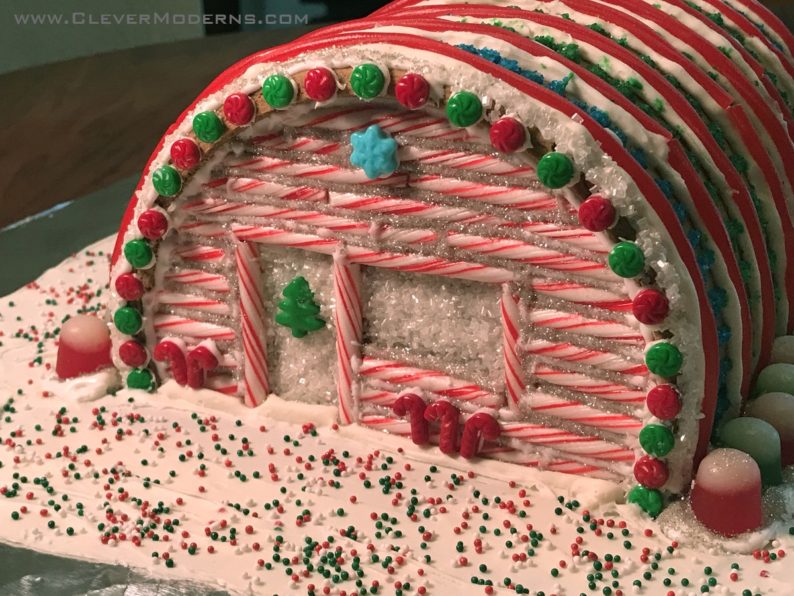
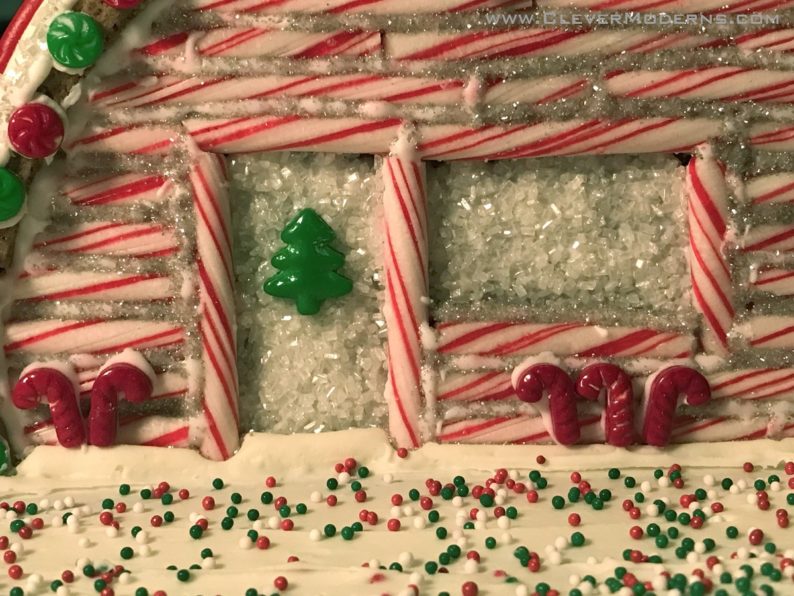
I decided to do completely different things with the two end walls. The first end wall I did, I loosely modeled after our Headquarters Hut at the Quompound. Below, the candy cane log cabin side started out as an idea to frame the door and window out of candy cane pieces. Then as I was playing with those pieces and laying it out, it occurred to me to do a log cabin over the whole wall with the candy canes. This was where I was glad I had set the wall back from the edge of the arch.
Also, this view really shows the crack that developed during baking. It’s not clear to me exactly what went wrong there. You can also see in this pic how the arch went a little lopsided as it sat on the counter for two weeks before I glued it together.
5. Glue the hut to the base.
- Set your hut on the base and lightly trace around it in pencil. Use those lines to guide your icing. Again, this icing was just piped out of a ziplock bag corner.
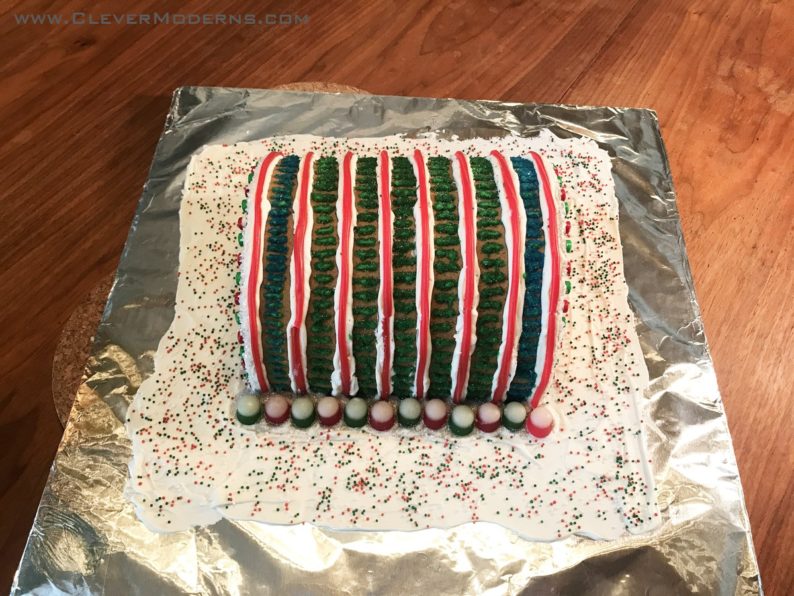
6. Decorate the arch surface.
Get creative! I used icing and strips from pull-apart Twizzlers to create the idea of arches. Go zany and zoomy or go minimal. It’s your call. Give it arches or cover it in gumdrops. You do you!
7. Decorate the base.
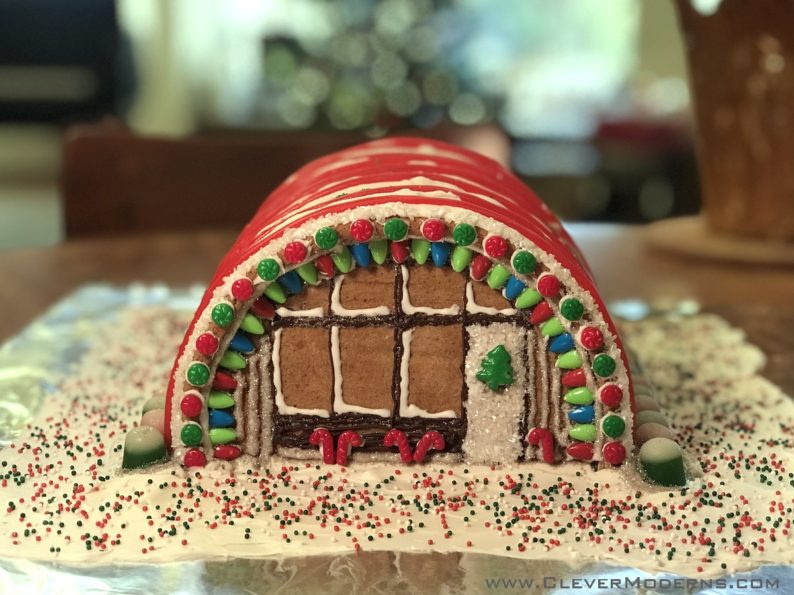
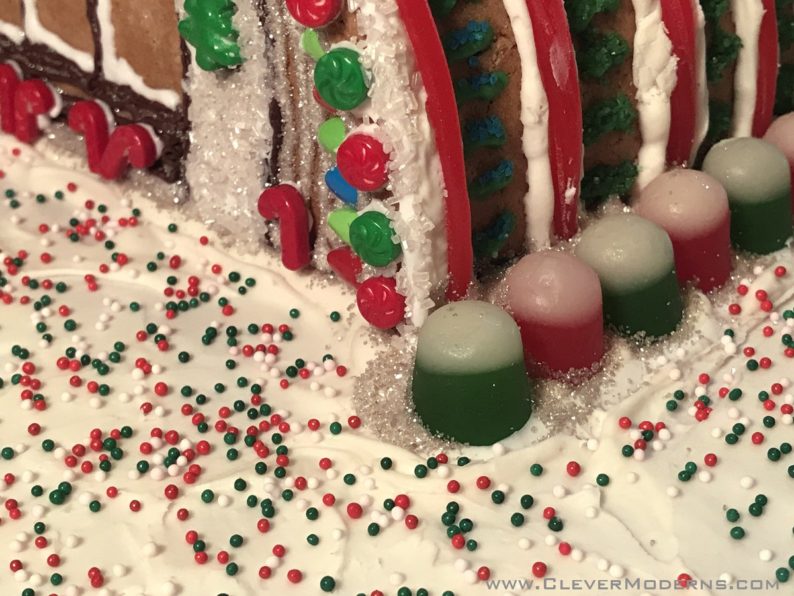
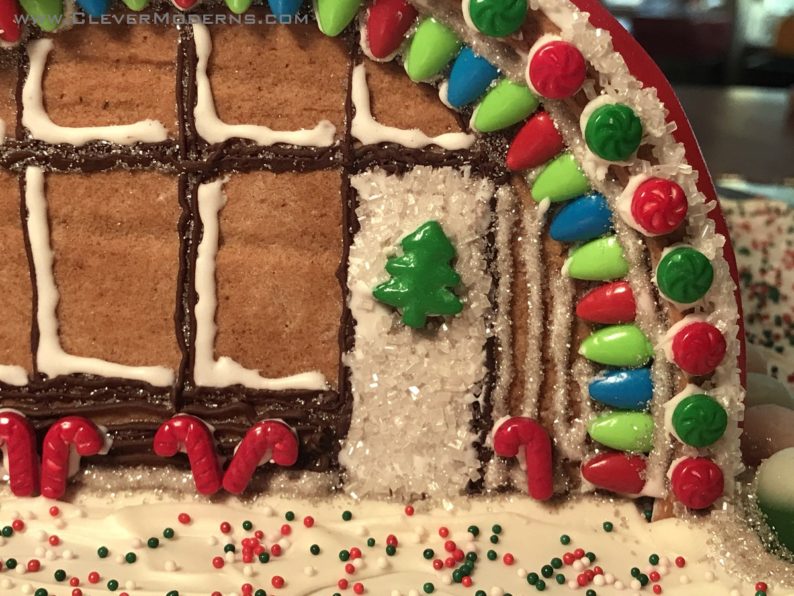
I used red and green Dots along the sides at the base of the arch, and sprinkled some decorative sugar over the wet icing. At this stage I also added more embellishments like the red and green circles on the end of the arch, and the mini candy canes under the windows.
Once I was happy with everything else, I added the icing around the base with red, green, and white sprinkles. Some people go all out with their landscaping and the sky’s pretty much the limit! Have fun!
Enjoy and share it on social media!
Don’t forget to use the hashtags #gingerbreadhut and #quonsethut, and if you really want to be my hero, tag me @quonsethouse in your post!

The hut I decorated was my first successful experimental arch, and the second arch shown here was the one I baked for the tutorial. Since I was able to replicate my process reasonably well enough, I think anybody could follow these instructions and make their own Quonset Gingerbread Hut.
Was there anything I left out, or that was unclear? Please let me know in the comments!
And stay tuned, because next year we’re having a contest! Sign up for my email list below to stay in the loop on that.
Merry Christmas and Quonset On!
Curious about Quonsets? Ready to learn more about these bizarre, amazing, shiny, round, prefab structures? Drop your info below and I’ll start you off on my email tutorial series. Looking to build an inexpensive but beautiful home debt-free? Considering going off-grid? Or are you just tired of the same old same old and want something unique and beautiful? A Quonset House might be the answer for you.
Follow us on Instagram and Facebook. We also have a private Facebook group called DIY Quonset Dwellers, where we share discussion, design, and construction tips with others who are interested in building their own Quonset hut house. With over 6,000 members and counting, the Facebook group has grown into an amazing resource all of its own! Learn more and request to join the Facebook group here.