Who doesn’t want LED lighting in their Quonset hut house project? The benefits of LED lighting are many: It is small, so it’s easy to tuck out of the way or fit into a small space. It is amazingly energy efficient, using only a fraction of the power of incandescent or fluorescent lighting. It contains no toxic mercury, which is one of the main components of fluorescent lighting tubes. Even CFL’s – compact fluorescent lamps – contain mercury. And lastly, LED lights run on low voltage, which can help simplify things when you’re installing them in your Quonset House.
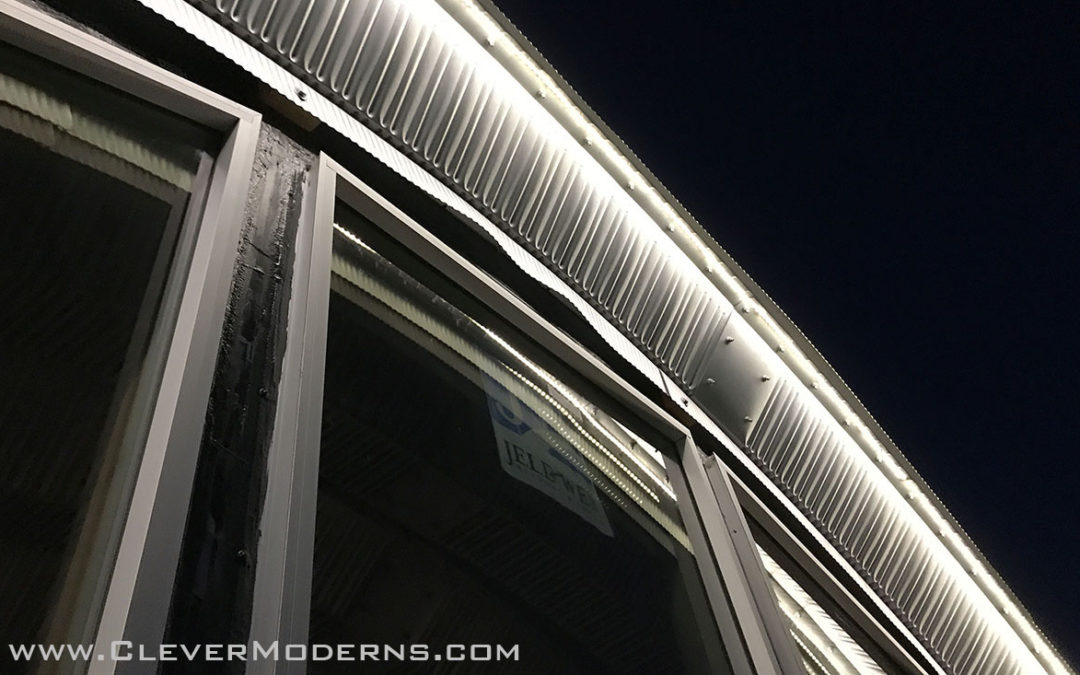
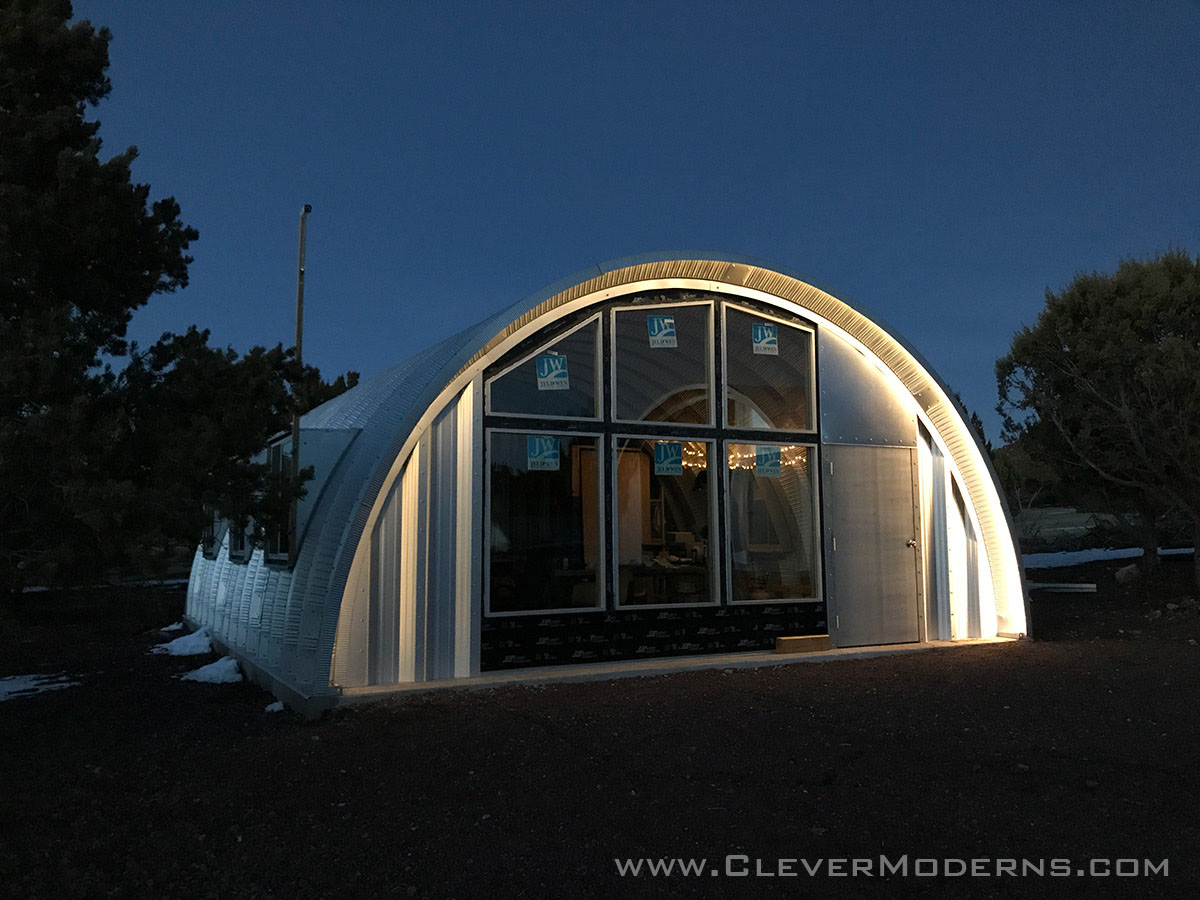
We gave our Quonset House Headquarters the LED treatment. The building code requires an outside light at an exterior door, and we couldn’t find anything that we felt was worthy of putting on the front of our building. When we realized how the front edge of the arch trim sets up the perfect configuration for an LED strip, we had to do it!
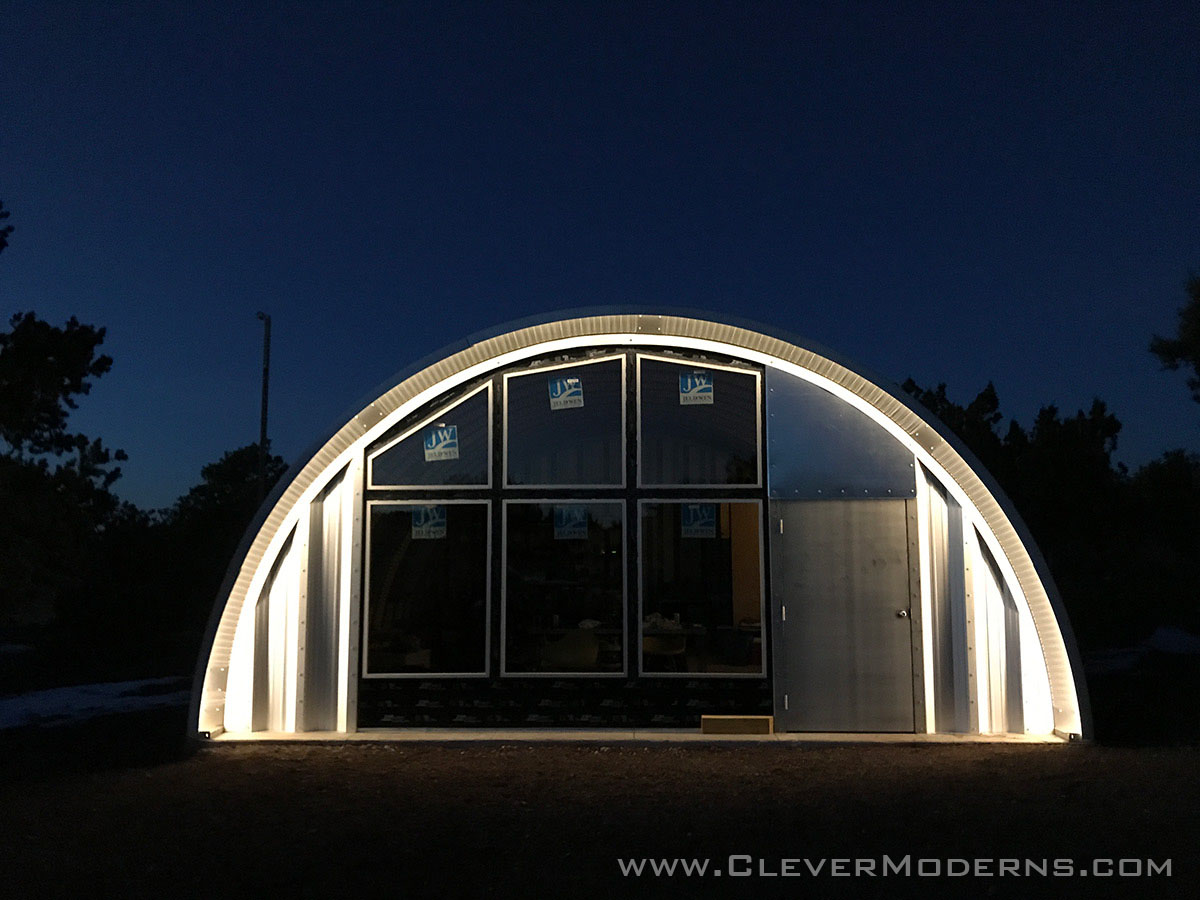
Here’s our finished product. Isn’t it kind of magical?
The LED light strip is connected through a transformer to a light switch right inside the door, where you just flip them on and off like any regular outside light. If you wanted to, you could wire them to plug into an outlet, and I’ll cover that type of installation as well.
The basic setup is the same whether you’re installing these inside or outside, the only difference being whether your LED strip itself is rated for outdoors vs indoors. The outdoor-type LED strip has a silicone coating to make it weather resistant. You can use an outdoor LED strip inside, but you shouldn’t install an indoor one outside.
Let’s dig in and I’ll show you how we did it! I’ll link to all the products on Amazon as we go. You can probably get all this stuff from other sources but we got ours all from Amazon.
The Basic Components
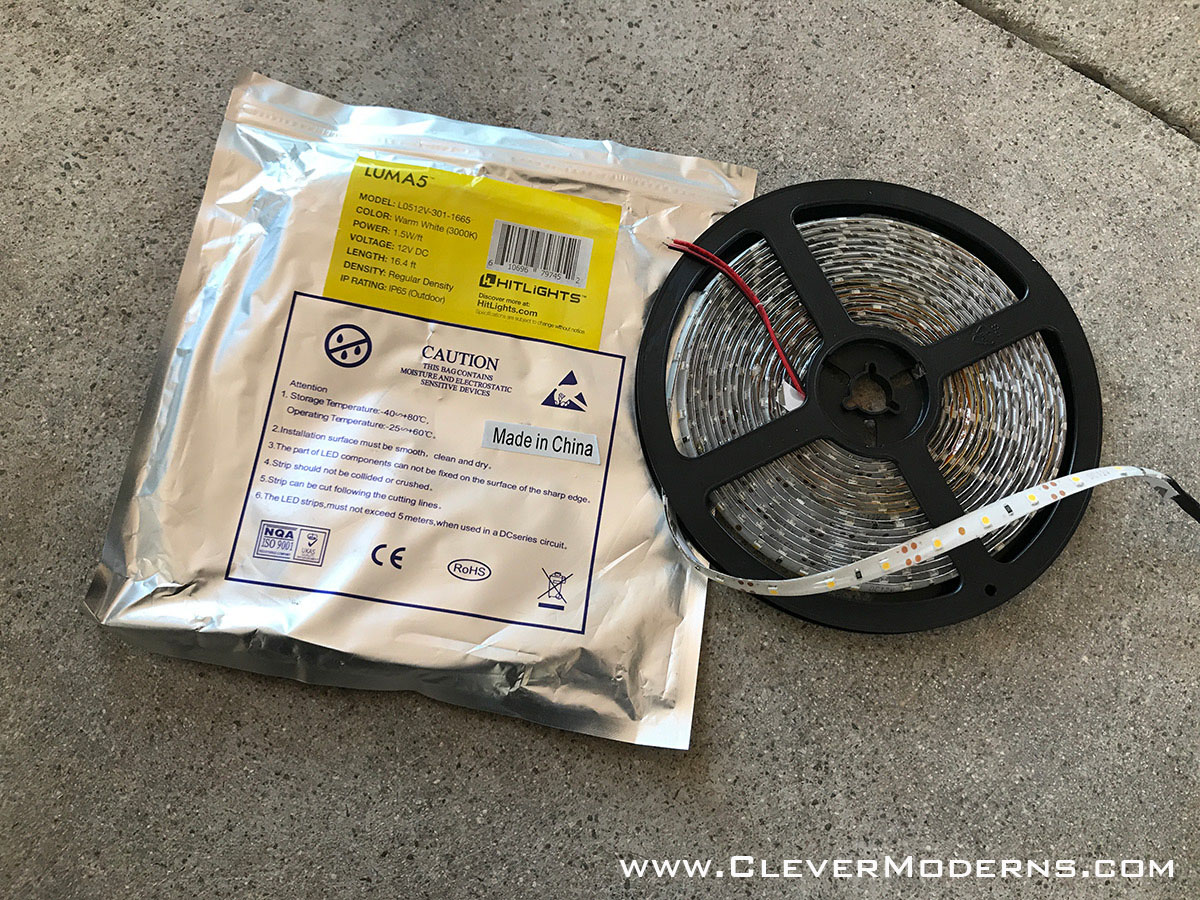
First off, you need the LED strip light itself. We used these LED strips for the outside front of the Quonset hut. Depending on how much length you have, you may need more than one.
You can use these connectors to join multiple strips together.
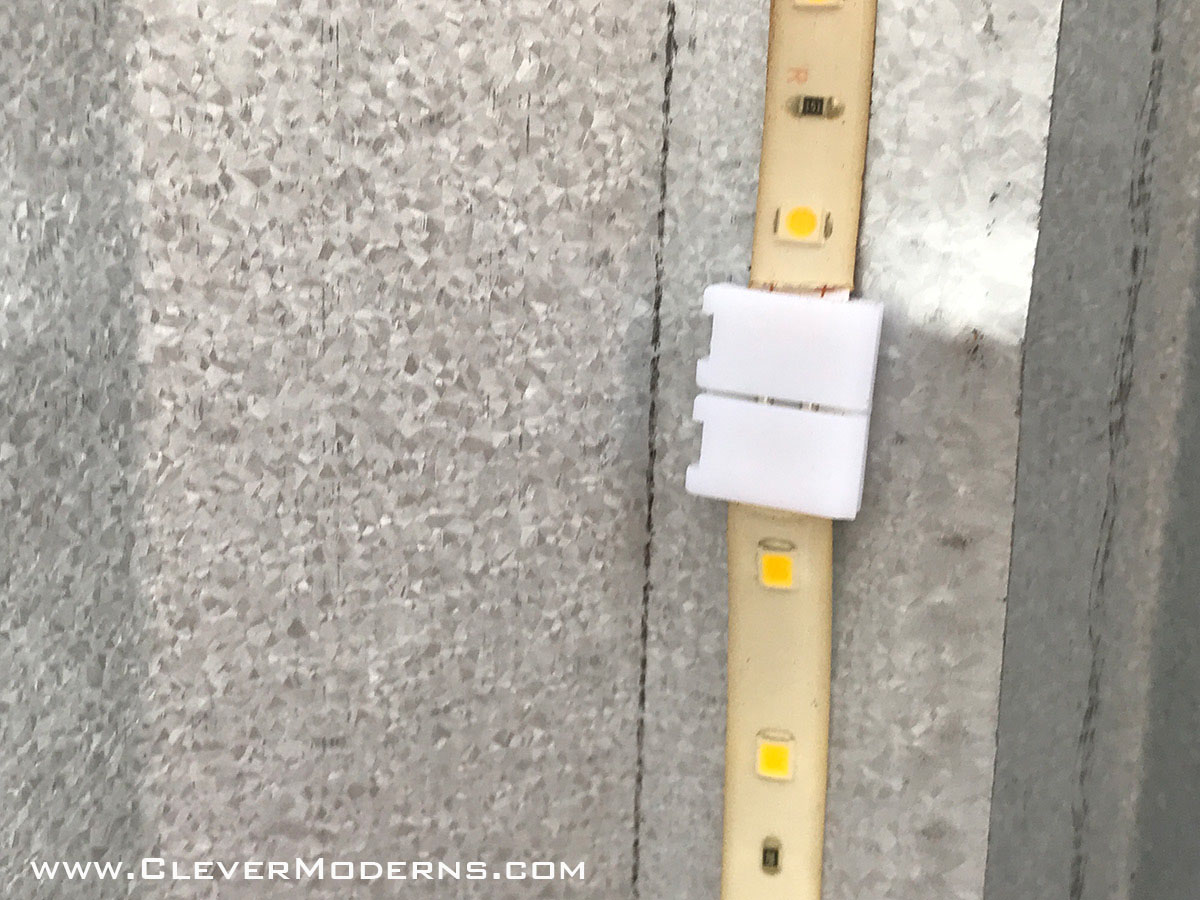
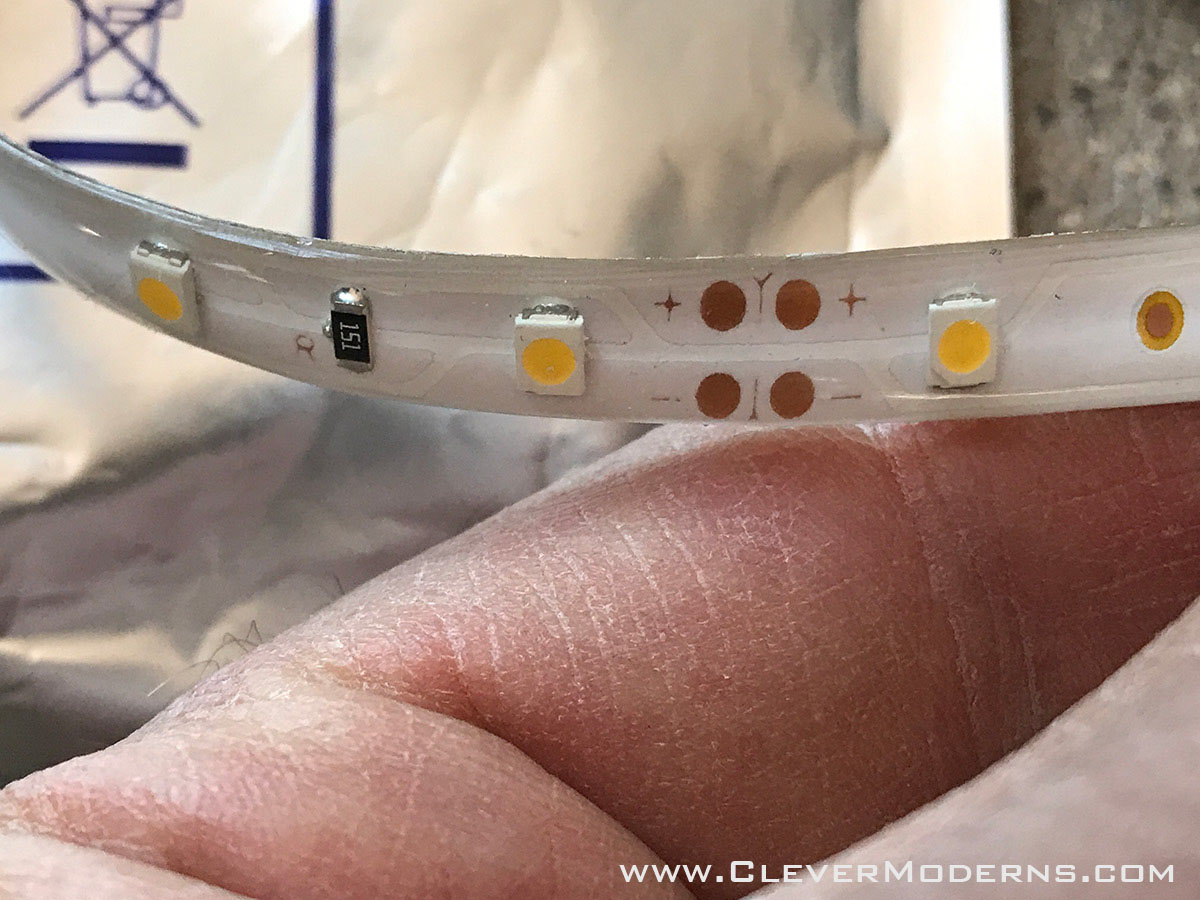
Below is a closeup of the strip. The bright yellow dot on the rectangle is the LED itself. The four circles with + and – next to them are where you can attach wire leads or the connector pieces. You can cut between the dots to shorten a strip, but you should not cut the strip anywhere else. There is a set of four dots every few inches. Also, it’s very important to always keep the + and – lined up correctly from strip to strip. If you get them reversed, it will create a short circuit.
The LED strips are adhesive-backed, so to attach the strip to the building, you just peel and stick.
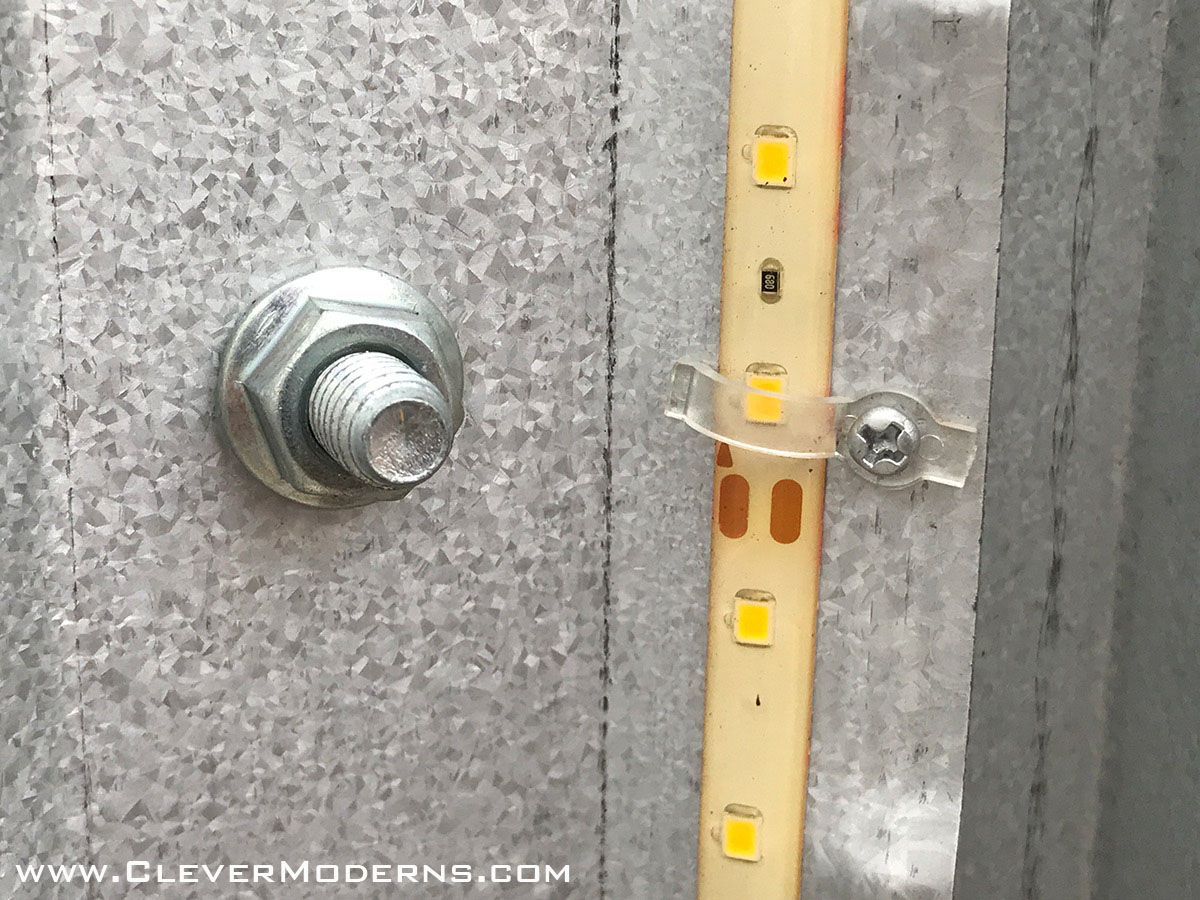
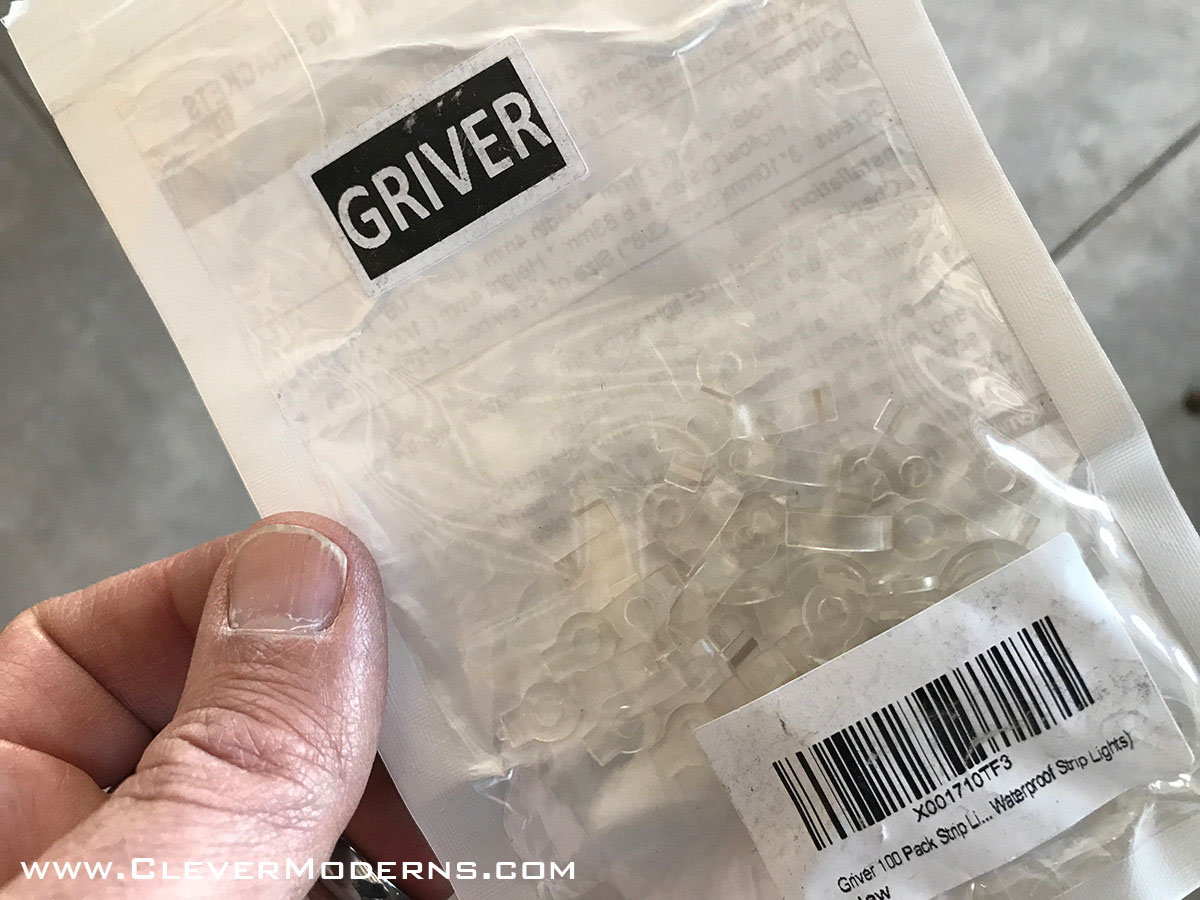
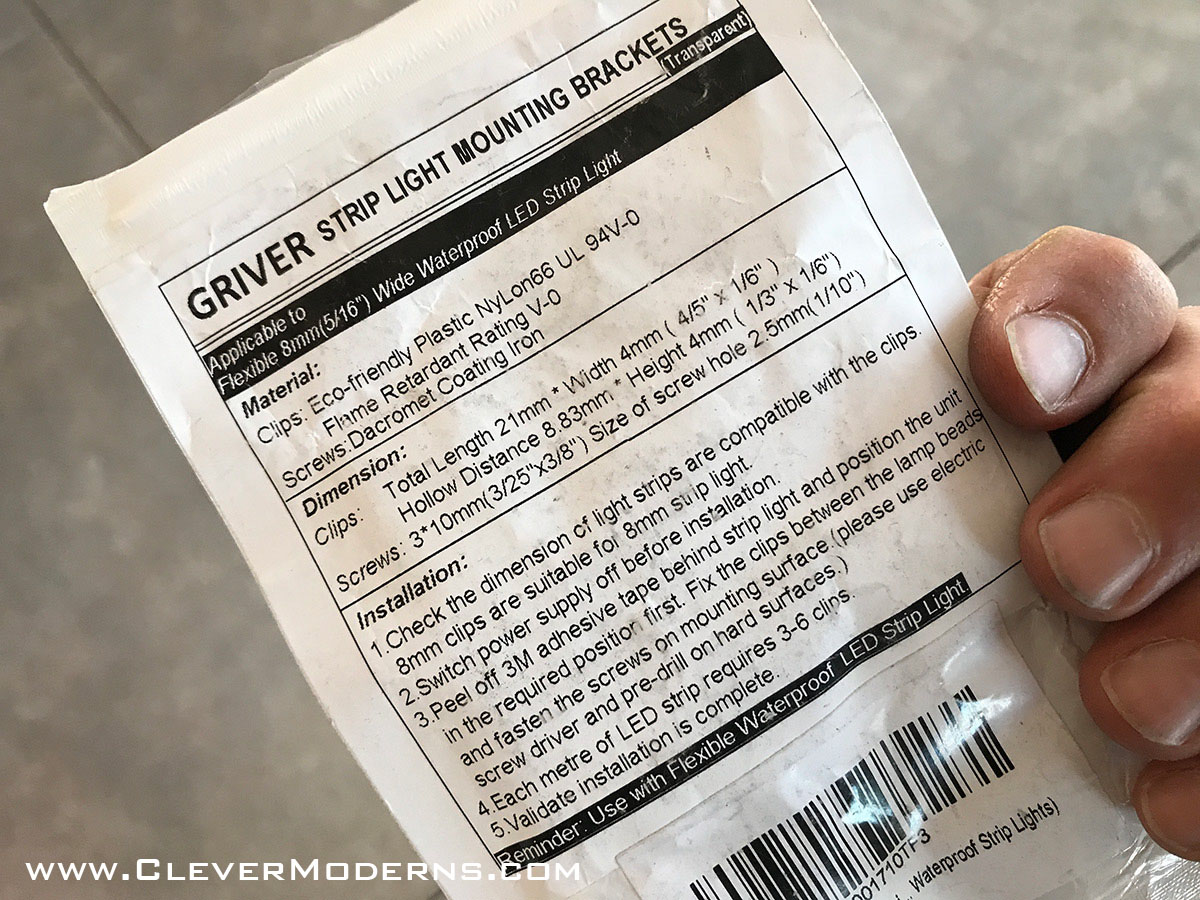
Just to be safe though, we also used these little clear plastic brackets, which come with their own little packet of screws. We put a bracket every six inches or so. It’s unclear how long they will stick and if/when the stickiness will give out.
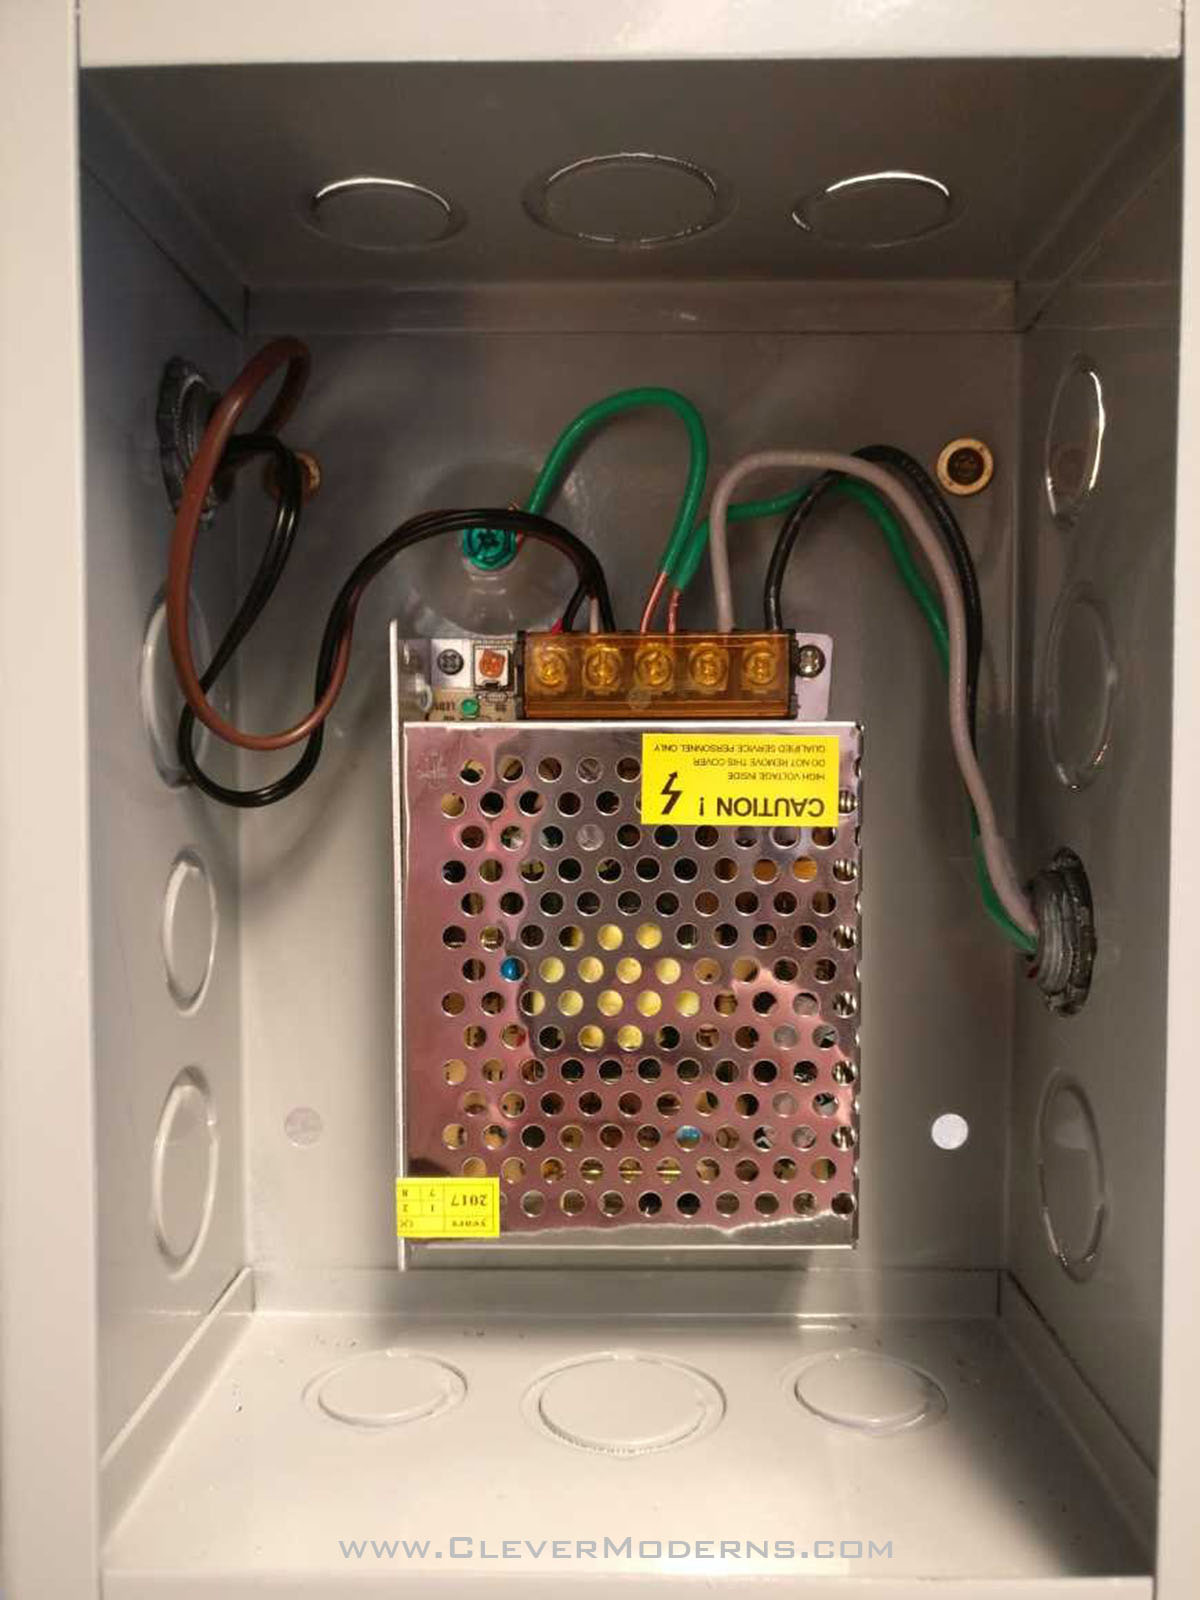
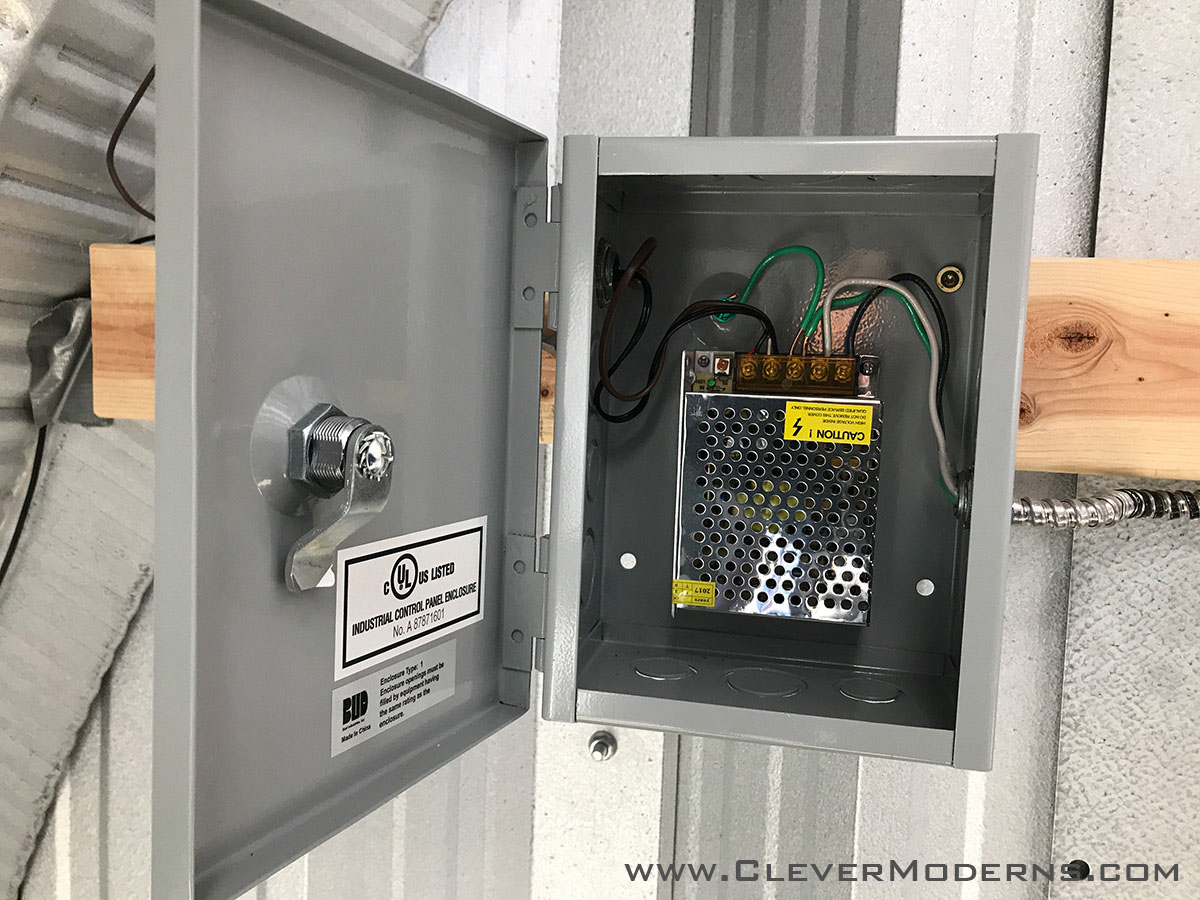
You will need a transformer (sometimes also referred to as a “driver”) which converts the electricity from standard household 110V to low voltage; ours is pictured below. (To clarify what you’re seeing: the shiny chrome-looking perforated metal case in the center, including the screws lined up horizontally across the top where the wires are connected, is the transformer. For this discussion, the wires themselves are not part of the transformer, and the grey box housing the transformer is also a separate thing.) The line voltage (110V) comes in from the right, and the low voltage (12V) goes out to the left. It’s important to ensure that the transformer can provide sufficient power for the total length of LED strip you’re driving with it. According to the package, our LED strip required 1.5 watts per foot. We had about 40′ of length of LED, so we used this transformer which is rated at 60W. (Update: it seems this exact one is no longer available on Amazon; you could try this one.) Wattage per foot can vary based on manufacturer and number of LED’s per foot, so check your product info and make sure to select a transformer designed to provide sufficient power for your length of lights.
We placed the transformer/driver inside this 6″ x 8″ x 4″ grey electrical housing box.
There were a few other parts we used and/or that you might find useful:
- This thermostat wire worked well to run the low voltage power from the transformer to the far end of the LED strip. It also seems to not be available on Prime, but here’s one that is. (This is the brown wire in the close up photo of the transformer above.)
- Here is a plug-n-play type transformer that can be used to plug the LED strip into a regular outlet, if you don’t want to hard-wire it to a transformer like we did. If your building is already built and yours is a retrofit installation, this might be easier. The plug-n-play transformer can also be used inside the grey box, if you install an outlet inside the grey box to go with it.
- A splitter like this one could be used to split the low voltage power line. If you are using a plug-n-play transformer this could be helpful.
- Instead of the thermostat wire, you can get a long, low-voltage extension cord like this one, that has the round jacks on the ends to match the plug-n-play transformer and splitter mentioned above. (We used one of these – the black wire going out to the left in the close up photo of the transformer above. We clipped the socket off of one end to wire it directly into the transformer.)
Putting it All Together
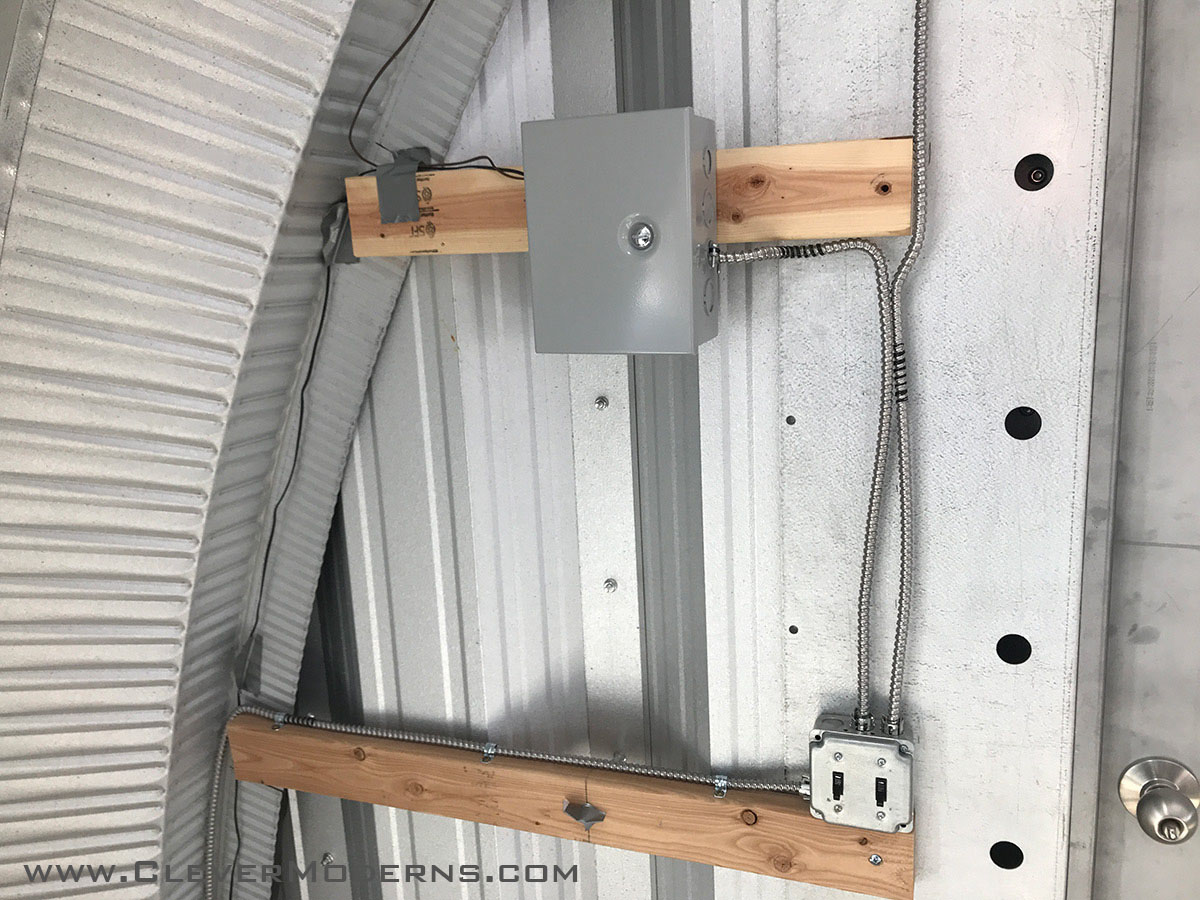
Here’s the picture of our basic setup with some numbers so I can more easily identify the key components and narrate a description for you.
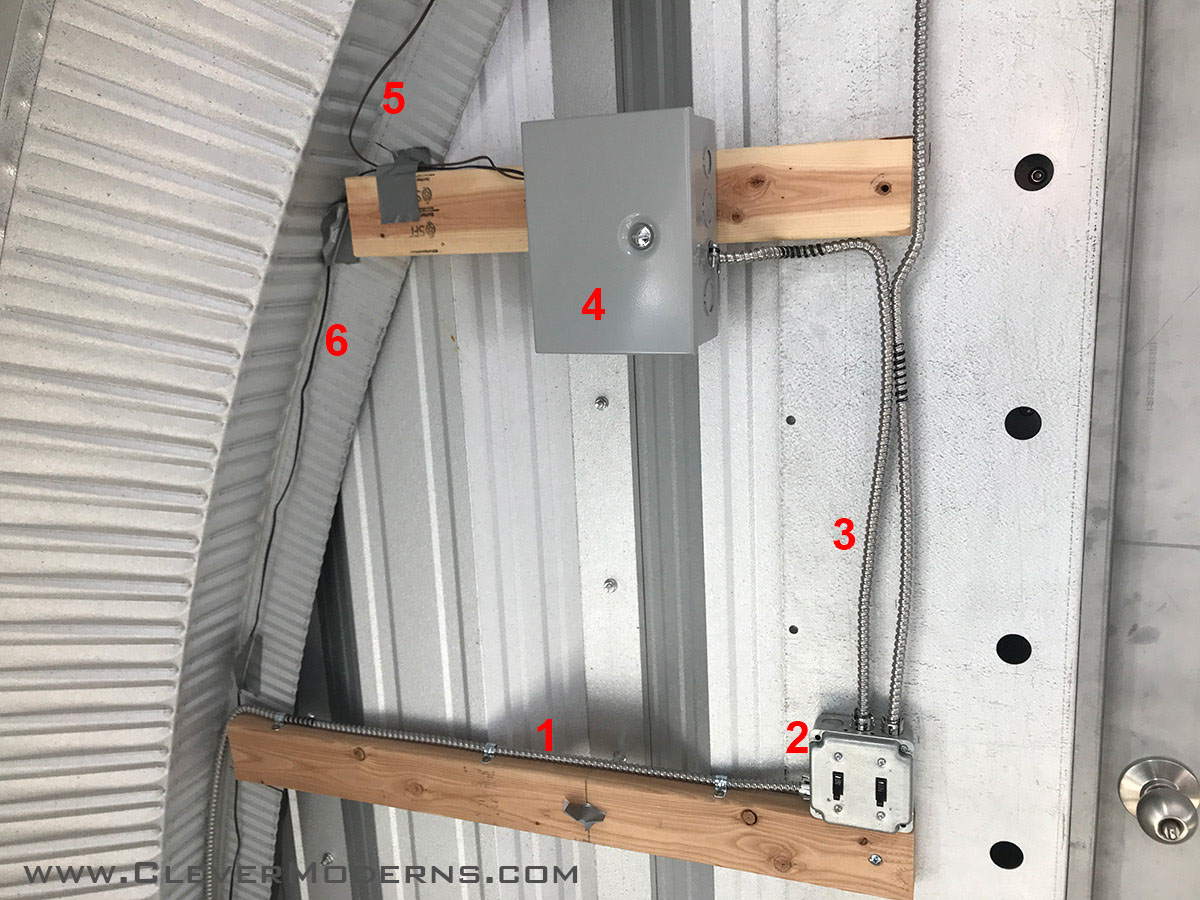
- Line voltage – the basic power feeding in at 110V. Not shown is the fact that this line branches off of a GFCI outlet, which gives the whole thing a little more protection in case of a short somewhere in the system.
- Regular light switch to turn the lights on and off. The outside lights are running through the switch nearer the door, and the room lights are the switch further from the door.
- Line voltage from the switch to the transformer.
- Box housing the transformer.
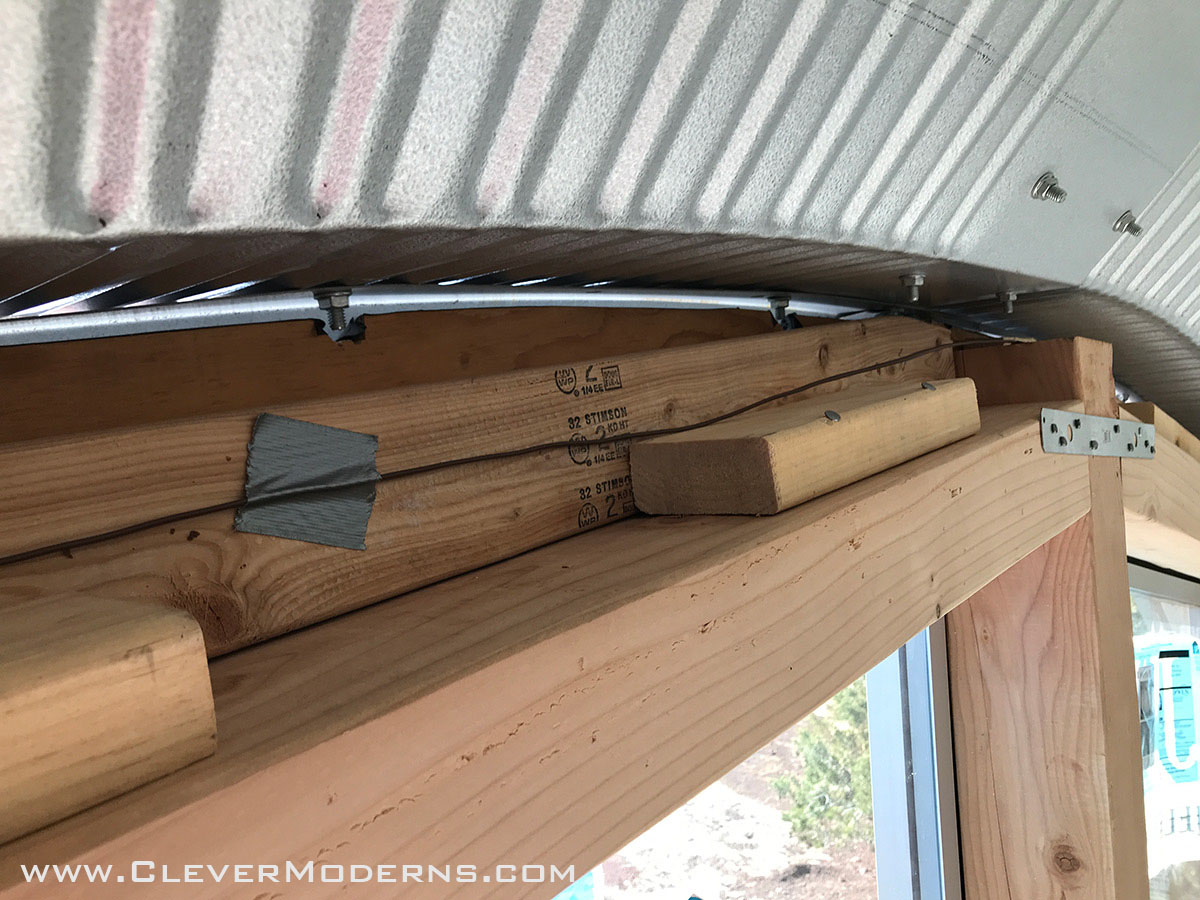
- Low voltage line out – going across the top of the wall to feed the LED strip from the other side of the building. (This is the brown thermostat wire mentioned above.)
- Low voltage line out – going down to feed the LED strip from the corner of the building just below the picture. (This is the black, low-voltage extension cord mentioned above.)
Let me make a quick clarification about items 5 & 6 on the list above. One thing about these low voltage strips is that over a long distance, the LEDs get noticeably dimmer the farther away they are from the power source. The image below only has the side by the door connected to the power supply. Notice how on the left side the light is much dimmer than the right side. Our solution was to join the LED strips into one continuous piece, and then feed the power from both ends simultaneously. This seems completely weird because it’s 100% NOT the way you would run power to light fixtures using conventional AC household current. But this is DC, and low voltage, and the rules are different (and it’s much safer to work with!) Once we powered the strip from both sides, the brightness evened out nicely.
Below you can see the little brown wire (the thermostat wire) carrying the low voltage current over the top of the wall to the other side, where it will power the opposite end of the LED strip. (This will all get foamed in when we insulate.)
Here’s another view inside the grey box with the transformer. You definitely want to locate this where little kiddies can’t reach it! Once the low voltage lines exit the grey box they are extremely safe, but inside the box where it transitions from high to low voltage it should be treated with all the caution you would use with regular household current.
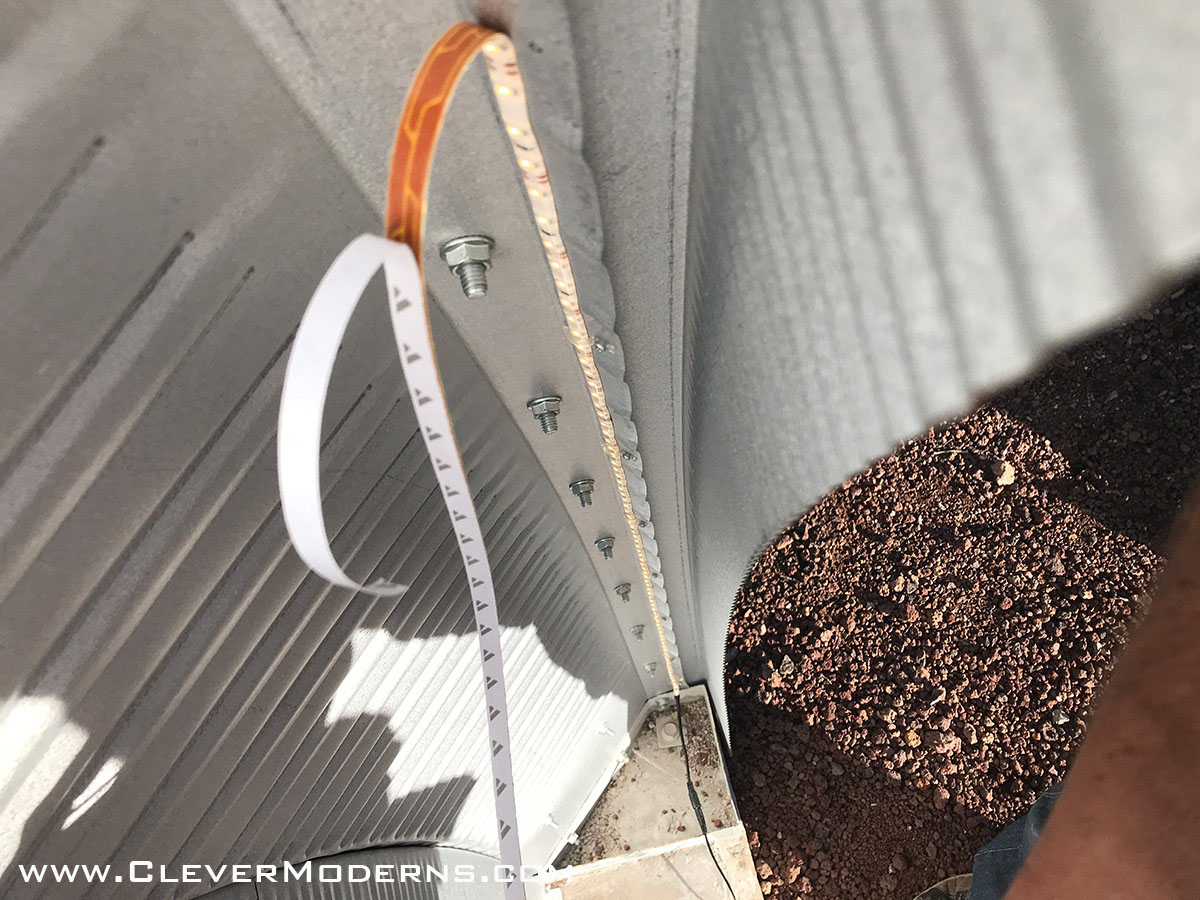
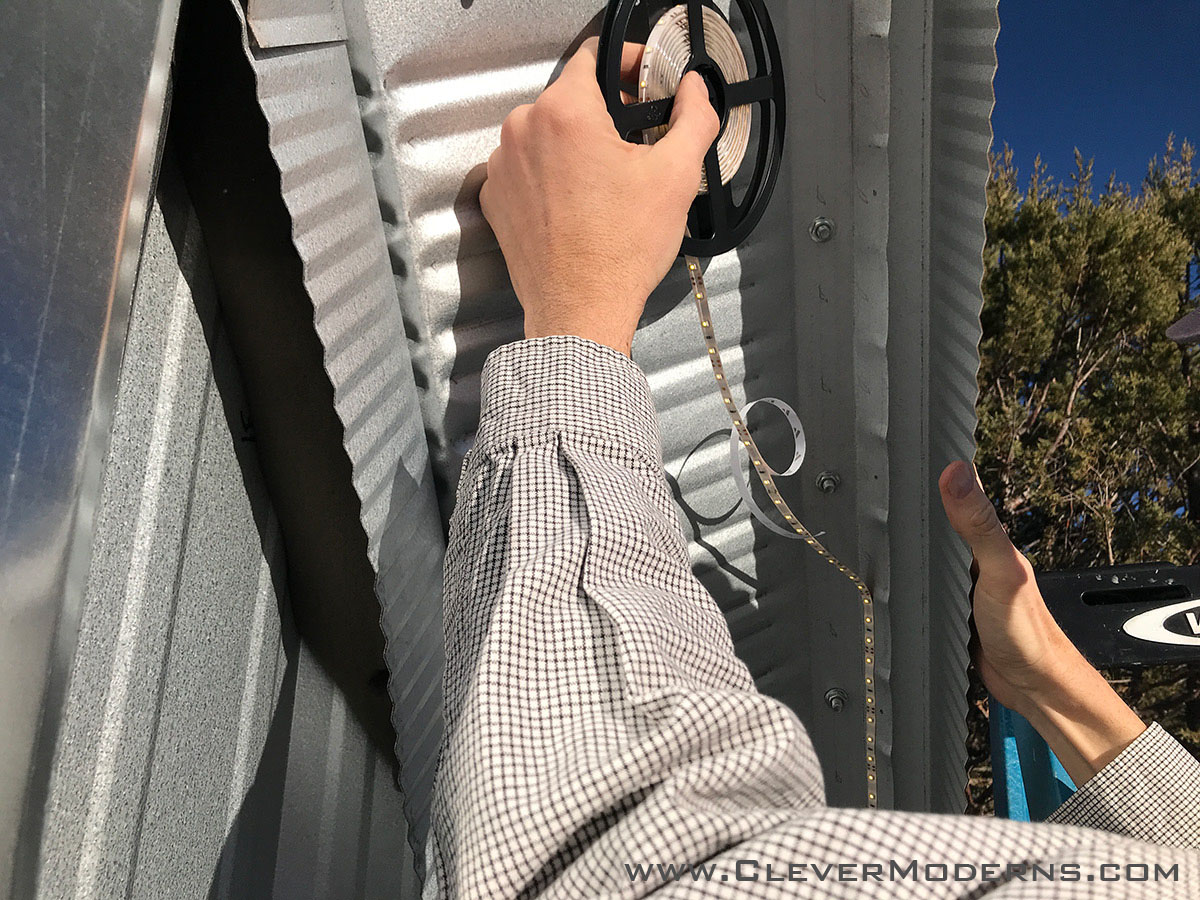
Here I am attaching the LED strips to the front of the building.
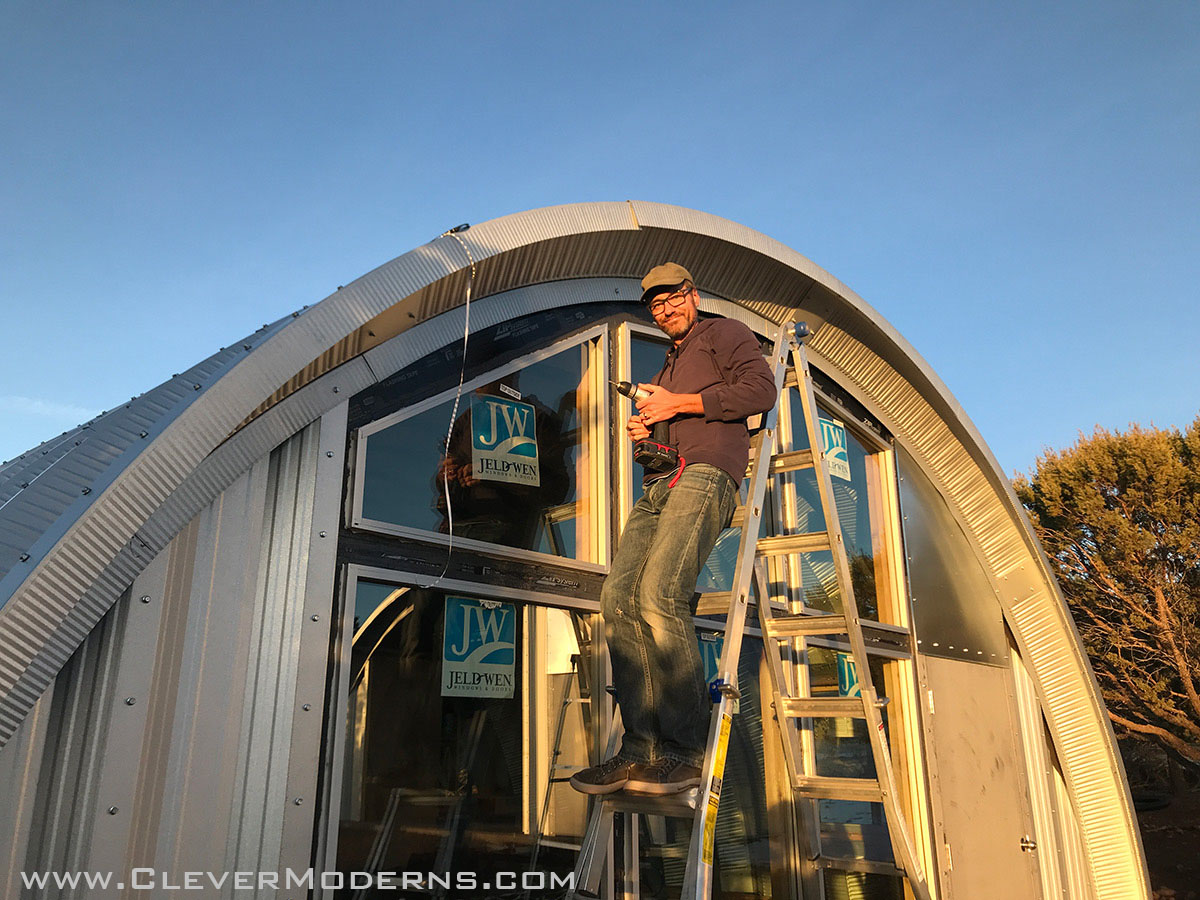

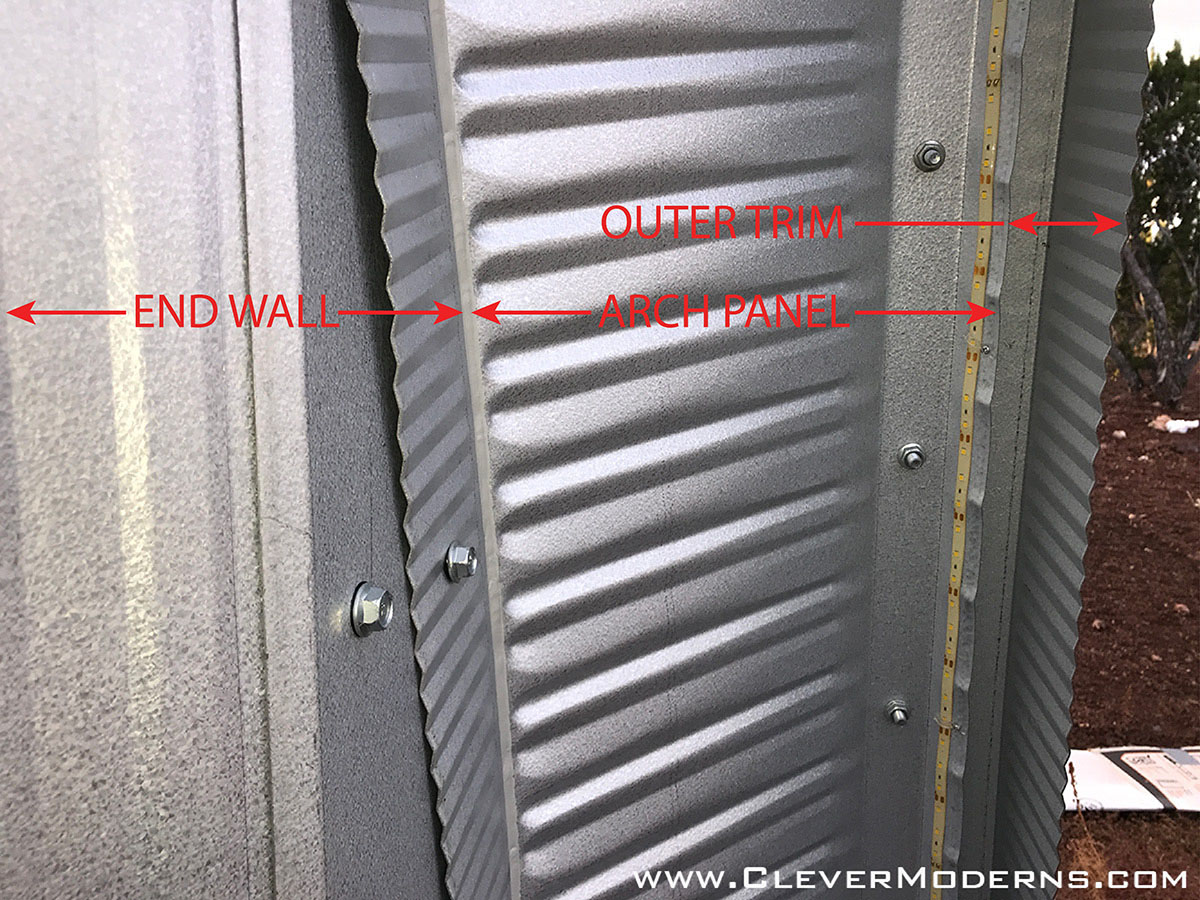
As it turns out, at the front of the building, the outer edge of the arch panel forms a perfectly angled surface to stick the LED strip onto. The 45-degree crimp in the edge of the panel perfectly directs the light back at the end wall of the building, while simultaneously helping hide the LED strip from view when you’re standing in front of the building.
Connecting the Ends
Once the transformer is all set up and the LED strip is attached to the building, all that remains is to connect the ends of the strip to the power supply! To do this, we used these leads (with the black wires) and connected them to the ends of the LED strip. A better solution though, might be to use these, which can connect the LED strip to the cut-off end of the jack directly.

On the end by the door, we ran the wire through the gap between the arch panel and the curved trim angle, and then connected it to the transformer on the inside. (We cut off the round jack, and stripped the wire to make the connection to the transformer. If we were using a plug-n-play transformer we would just plug it in.)
On the opposite end, where we ran the brown thermostat wire up and over the top of the wall, we used the round jack that we had clipped off the end of the other wire. We fished the cut end of wire through the gap in the wall, and connected it to the thermostat wire. This is where it’s extremely important to ensure your + and – line up all the way through the whole assembly and back to the transformer!!!
Concluding Thoughts
That’s my basic write-up on how we did our LED lights. Please keep in mind that electricity is extremely dangerous and should always be approached with great caution. You could be killed or burn your house down. Always consult a qualified electrician before attempting this kind of installation. I want to provide helpful information here but there is no way I can be held responsible for the use of this information by anyone else on their project.
If you have questions or feel that any of this needs clarification, please leave a comment below.
Have you installed LED strip lighting successfully in your Quonset hut house? I would love to see your pictures and possibly even share them in a future post. Did any of my Amazon links not work? Please let me know that also, as obscure parts like these sometimes rotate in and out over at Amazon. The concepts presented here can be applied to under-cabinet lighting or just about any use you can think of. Turn on your creativity and let me know what you come up with!
Curious about Quonsets? Ready to learn more about these bizarre, amazing, shiny, round, prefab structures? Drop your info below and I’ll start you off on my email tutorial series. Looking to build an inexpensive but beautiful home debt-free? Considering going off-grid? Or are you just tired of the same old same old and want something unique and beautiful? A Quonset House might be the answer for you.
Follow us on Instagram and Facebook. We also have a private Facebook group called DIY Quonset Dwellers, where we share discussion, design, and construction tips with others who are interested in building their own Quonset hut house. With over 6,000 members and counting, the Facebook group has grown into an amazing resource all of its own! Learn more and request to join the Facebook group here.
I would love to read about the install of your radian in the floor heat. And the type of water heater you bought.
We haven’t bought the water heater yet. There will probably be more than one post on the radiant floor heat, so stay tuned. We are looking at Rinnai for the water heater. It will be on propane.
Once again, Earl, you have made a clear set of instructions that challenges us all to Get Creative!
We really proofed and revised this one a lot for clarity; thanks for the feedback!
Does the transformer get too warm? I’ve been told to oversize for some headroom.
Ours don’t get warm that we’ve noticed, and I think we did oversize them by an amp or two now that you mention it.
I’m curious, how are the LEDs holding up?
Your application looks beautiful! I love that glowing look. I might do a quonset hut some day, and really like your LED look. In using something similar under cabinets I’ve found with time the product wears out in that the light varies on different strands. I had a segment cease working too.
Thank you for sharing all this great detail. I’m enjoying reading through your blog.
Thanks for the kind words!
The LED’s are holding up pretty well at this point and it’s been nearly 18 months since the original install. So far so good! The only thing I would add at this stage is that several months later we got more stuff and added LED’s to the front of the workshop. Even though we ordered exactly the same LED strips, the color temperature of the newer ones is cooler than the original set – cheap stuff made overseas with poor quality control, apparently. It’s not super noticeable, but worth mentioning that you might want to plan out all your LED’s and order everything at once.
Thanks especially for this tidbit: you can fix the distance:brightness relationship by feeding from both ends. DC vs AC. Wish I had known that long ago!
I’m getting ready to build my Steelmaster quonset hut and I will definitely be using your method for the exterior lighting. Thank you SO much for the incredible detail and great information! I truly appreciate you taking the time do write this out and post!